
Importing your Information
Once your fields are defined, the next step is getting your customer data into Prisma. There are two ways to do this: uploading a spreadsheet manually, or setting up an automated sync that keeps Prisma updated as your data changes.
Option 1: Manual spreadsheet upload
This is the quickest way to get started. You prepare a CSV file with your customer data and upload it directly from the interface.
-
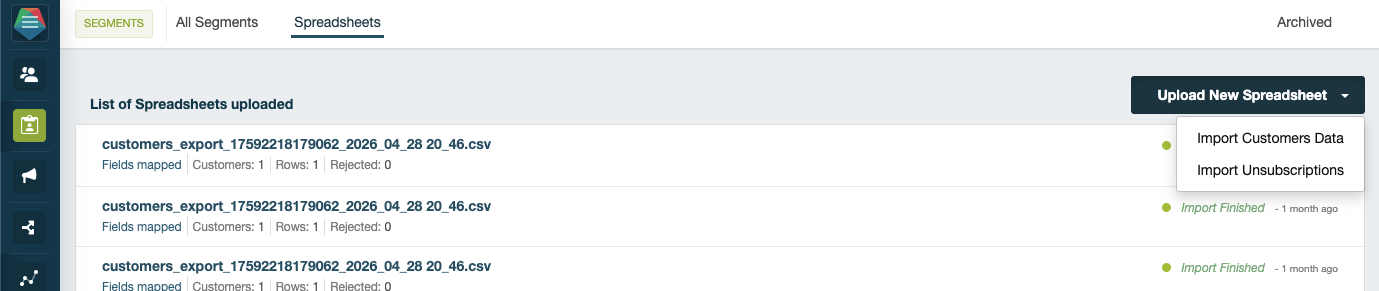
Go to Segments > Spreadsheets and click Upload Spreadsheet:
-
Drop your
.csvor.txtfile into the upload area.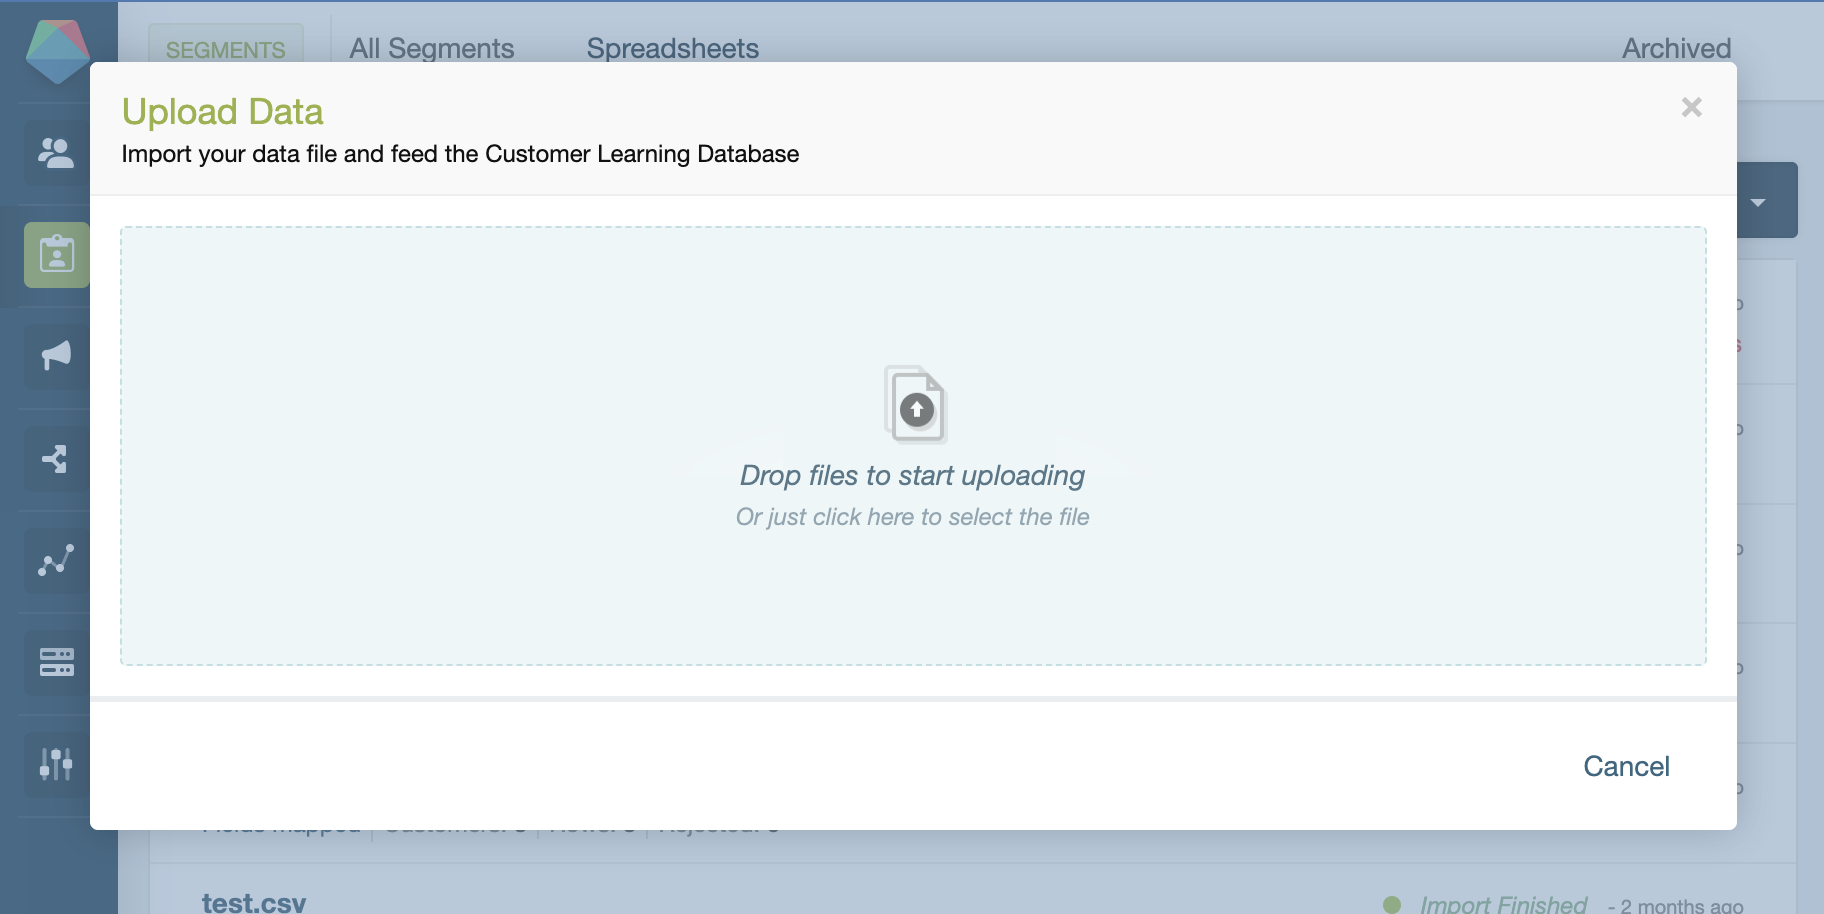
-
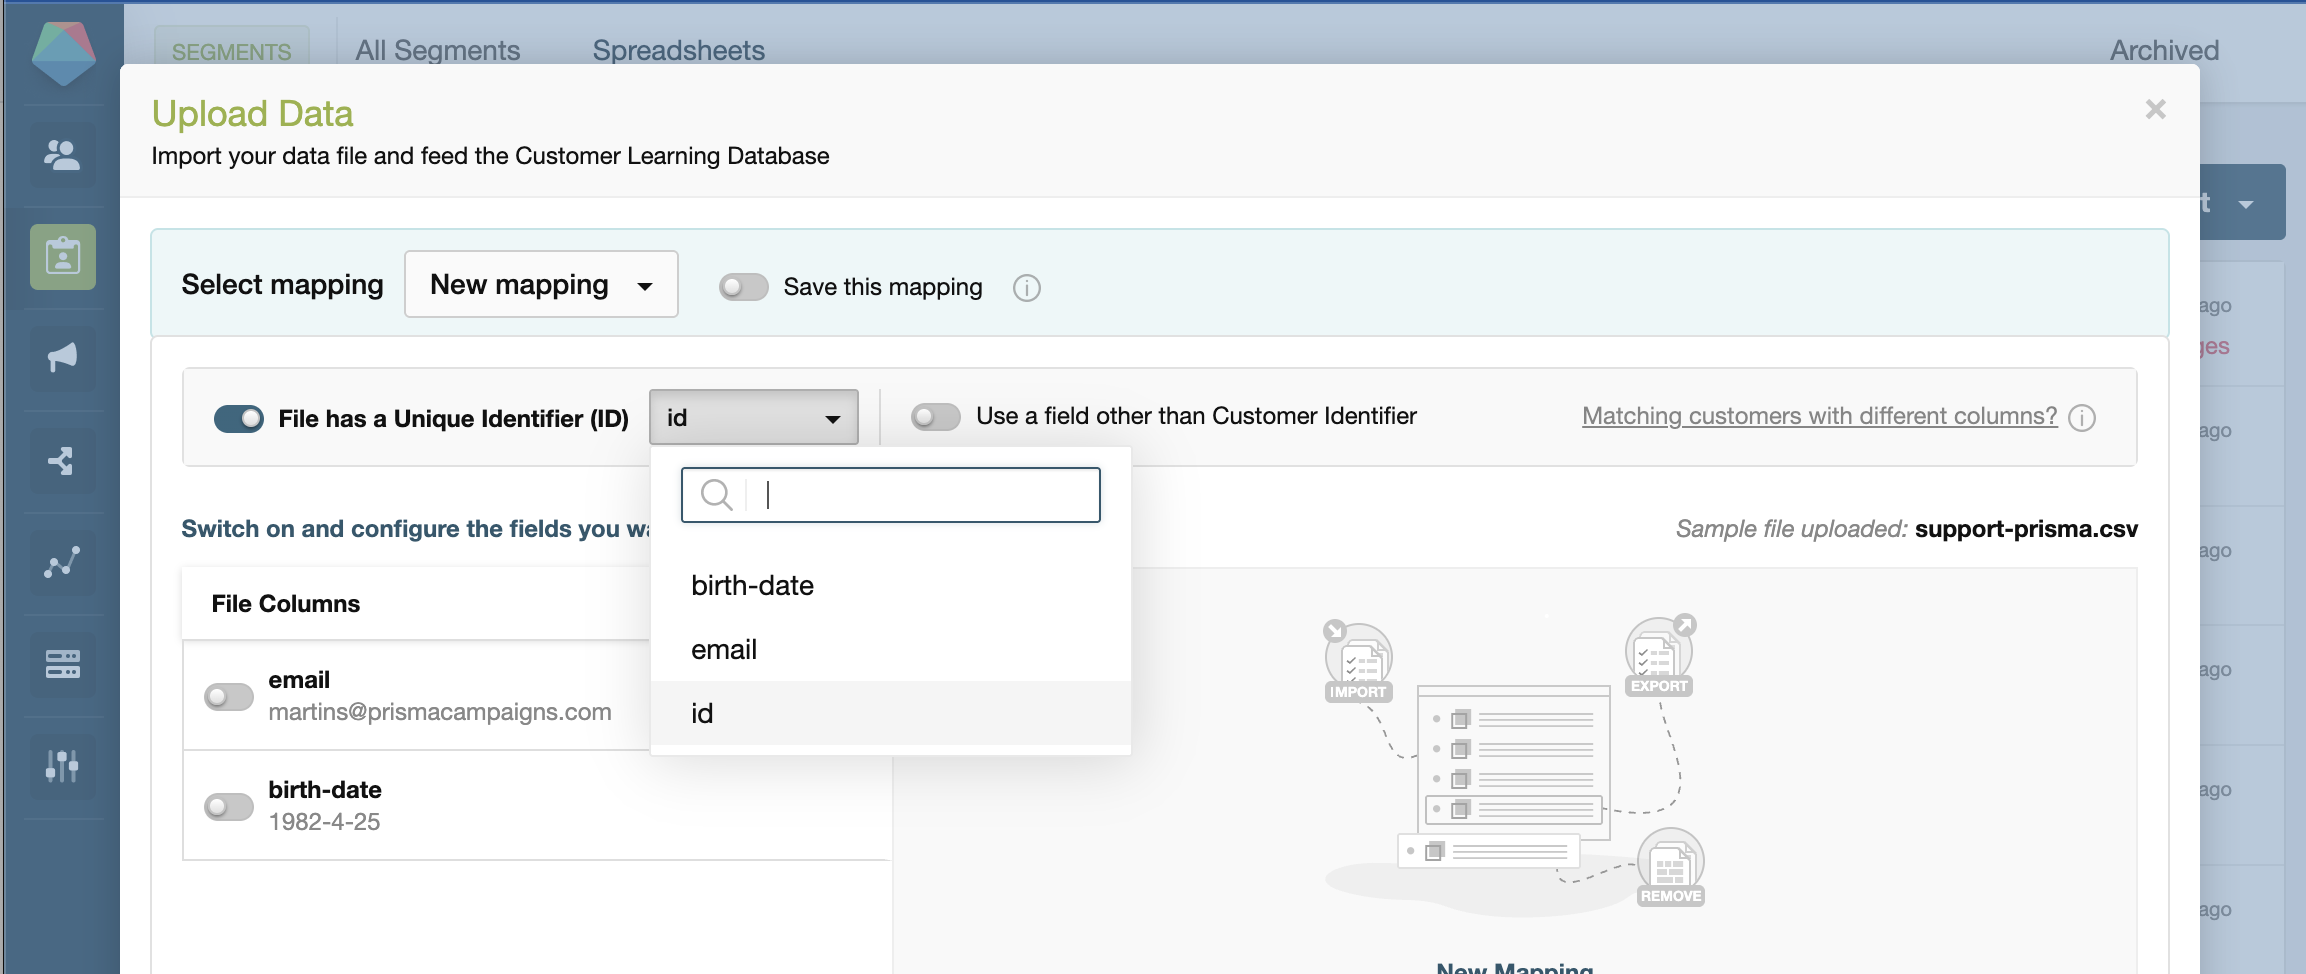
Select the column that contains the unique customer ID:
-
Map each column from your file to the corresponding field in Prisma. If a column doesn’t match any existing field, you can create a new one on the spot:
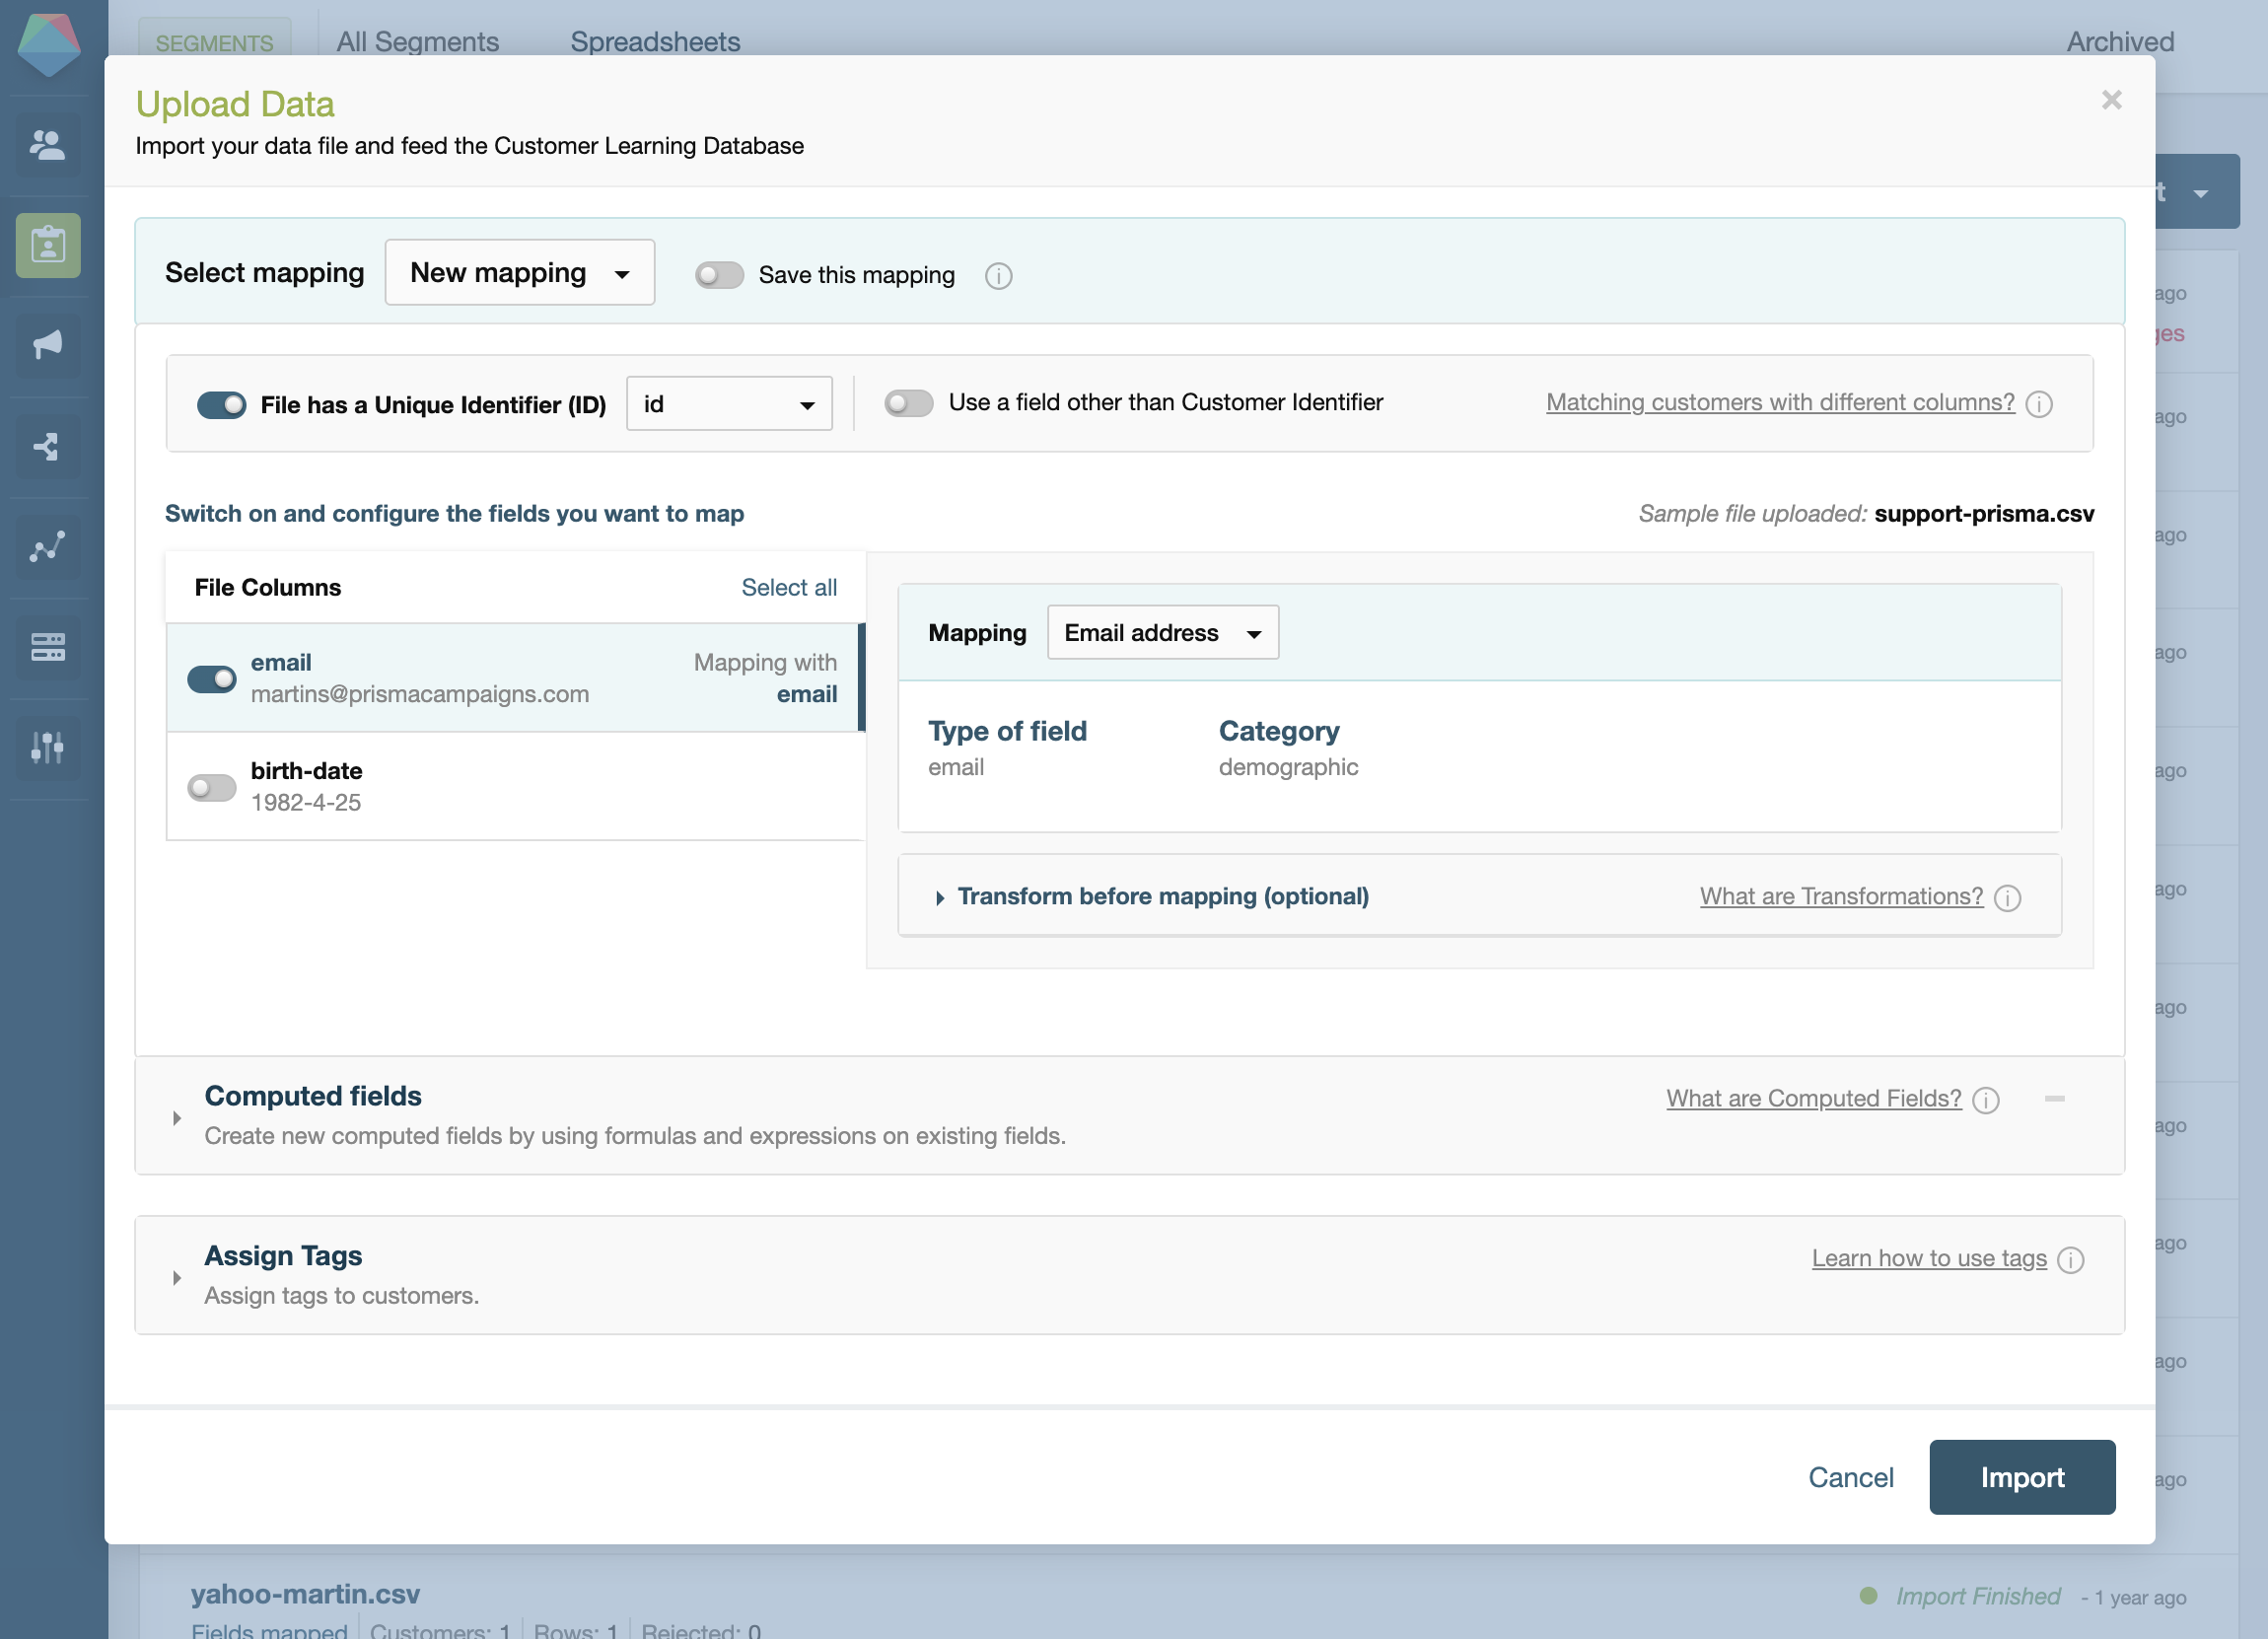
If a column header in your CSV matches the field ID of an existing Prisma field exactly, the column maps automatically — no manual selection needed. Using your Prisma field IDs as column headers is a good practice: it saves time on every upload and avoids accidentally creating duplicate fields.
-
Click Import to start uploading.
After uploading, the customers in the file are added to your database and their fields are populated with the values from the spreadsheet.
If you upload the same customer ID more than once (for example, to update a field), Prisma will update the existing record rather than creating a duplicate.
For a step-by-step walkthrough with screenshots, see Uploading Customer Information From a .csv File.
Option 2: Data Sync (automated)
Data Sync is Prisma’s automated import mechanism. Instead of uploading files by hand, you configure a connection so that Prisma periodically pulls data from a source — typically a file placed on an SFTP server by your systems — and keeps your customer records up to date automatically.
The key concept in Data Sync is the column mapping: a configuration that tells Prisma which column in your incoming file corresponds to which field in the data model. Once the mapping is set, every new file that arrives is processed using those rules without any manual intervention.
Setting up a Data Sync involves:
- Defining the file format and location (SFTP path, file name pattern, delimiter, etc.)
- Creating a column mapping that links your file’s columns to Prisma fields
- Scheduling how often Prisma should check for new files
Data Sync is the recommended approach for production environments where customer data changes frequently.
For detailed configuration steps, see Column Mappings and Connecting to an SFTP Server.
Which option should I use?
| Manual spreadsheet | Data Sync | |
|---|---|---|
| Setup time | Minutes | Hours (initial config) |
| Best for | One-time loads, testing, small datasets | Ongoing updates, production data |
| Requires technical setup | No | Yes (SFTP, file naming conventions) |
Most teams start with a manual upload to validate their data model and segments, then move to Data Sync once they’re ready for regular operations.
 Related Articles
Was this article helpful?
On this page