
Funnel
The funnel is the sequence of steps a customer goes through after entering a campaign. It starts when the customer receives a message or clicks a link, and ends when they complete an action (a conversion) or exit without converting.
Most campaigns in Prisma include a funnel. A blast email with a call-to-action button is a common example: the email is the entry point, the landing page is a step, and clicking the button is the conversion. Simpler campaigns may have a minimal funnel, or skip it entirely.
Funnel steps
Steps are the building blocks of a funnel. You add them to a canvas and connect them in sequence. The most common step types are:
| Step type | What it does |
|---|---|
| Page | Displays content to the customer — a banner, popup, landing page, or form. Use it to show personalized messages, collect survey responses, or capture customer input |
| Webservice | Calls an external API (e.g. to validate data or trigger a back-end action) |
| OTP Verification | Sends and verifies a one-time password |
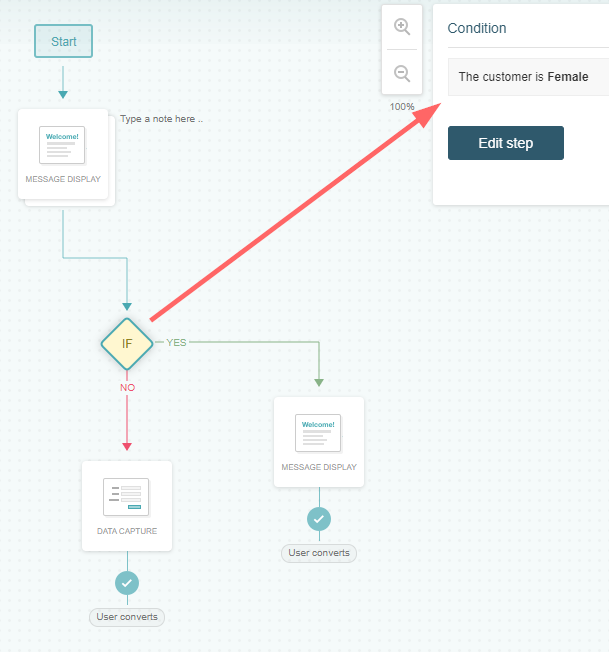
| IF Condition | Branches the funnel based on a customer data rule — customers go down different paths depending on whether they match the condition |
| Conversion | Marks the customer as having completed the campaign goal |
Prisma supports additional step types for specific use cases — document signing, page redirects, and more. See Adding Funnel Steps for the full list.
Building your first funnel
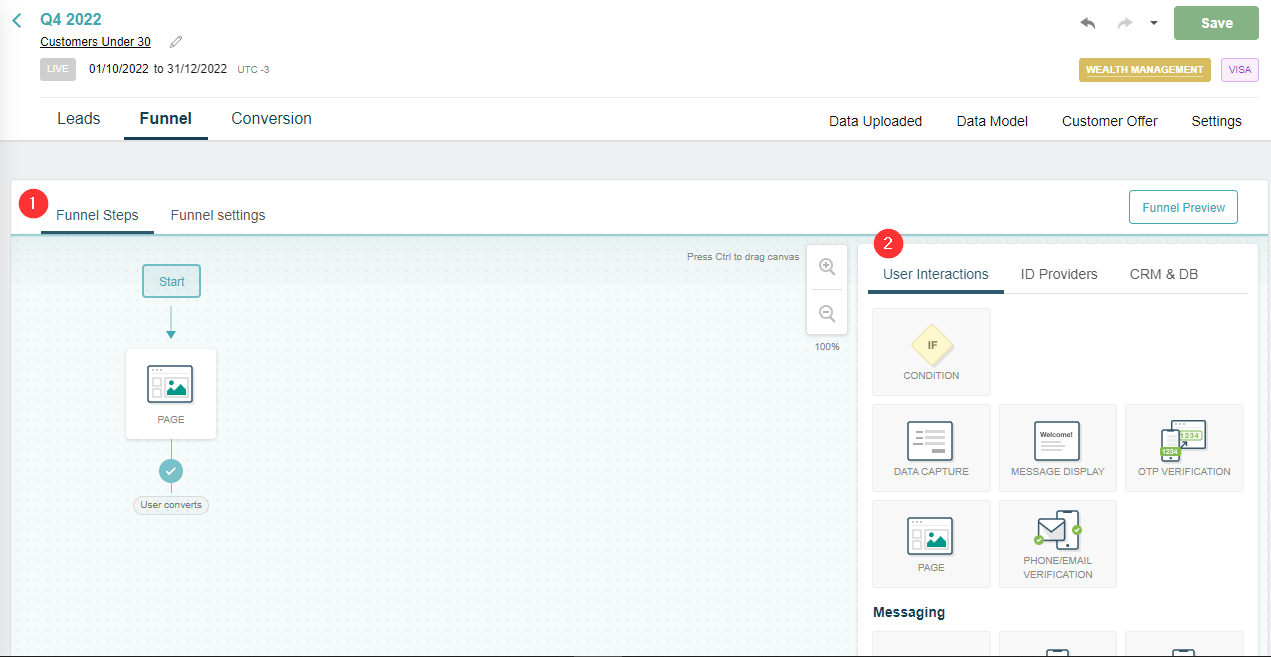
In your campaign, go to the Funnel tab. You’ll see a canvas with a starting point.
- From the panel on the right, drag a Page step onto the canvas and connect it to the start.
- Add a Conversion step and connect it after the Page.
- Save your changes.
This is the simplest possible funnel: the customer sees content on the page, and viewing it counts as a conversion. From here you can add more steps, branch paths, or conditions as your needs grow. When you’re ready to send to your audience, use Orchestration to schedule a blast.
Connecting steps
To connect two steps, hover over the bottom edge of the first step until a connector appears, then drag it to the top edge of the next step. Steps can have multiple outgoing connections to create branching paths (for example, different paths for “accepted” and “declined” responses).
Publishing
A funnel only goes live when the campaign is published. After saving your funnel, click Publish in the top right corner of the campaign. Unpublished campaigns are invisible to customers.
Always publish your changes before scheduling a blast. A yellow dot in the campaign header indicates unpublished changes — if you see it, click Publish before sending. Unpublished changes are not included in the blast.
 Related Articles
Was this article helpful?
On this page