Refining Your Segments Through Event Tracking
Understanding the interactions of your audience with your financial institution is critical for creating effective marketing campaigns. By tracking the activity of your customers on your public website (events like navigating to specific sections of the page, using a loan simulator, clicking buttons, and more), you can gather valuable insights into their preferences and behaviors. This feature will allow you to create more fine-grained segments, capture your customers’ interest in specific products, and tailor more personalized campaigns accordingly.
To accomplish this goal, this article will guide you step by step to start tracking events with Prisma Campaigns and help you enhance your marketing strategies.
Adding Client-Side Code
-
To begin, create the buttons for each event that you want to track when your customers click on a product. In this example, we will give the following buttons the IDs of mortgages and loans and the trackable class:
<div style="text-align: center; margin-bottom: 10px;">
    <button id="mortgages" class="trackable">Mortgages</button>
    <button id="loans" class="trackable">Loans</button>
</div>
As you can imagine, each
ididentifies the product the customer selects. On the other hand, theclassgroups the buttons for easier selection through JavaScript. The same approach of adding event listeners to track user interactions is also valid for the navigation tabs or any other clickable element on the page. -
By assigning a common class to all the buttons you want to track, you can select them and attach a listener on the click event easily:
function trackNavigation() {
    const trackables = document.querySelectorAll('.trackable');
    trackables.forEach(t => {
        t.addEventListener('click', function handleClick(event) {
            prisma.client.tracker.trackEvent(event.target.id, [])
        });
    });
}
After initializing Prisma Campaigns by invoking
prisma.load()as explained in JavaScript parameters, integrations, and examples (SDK), calltrackNavigationto start tracking the events.
Segmenting Based on Tracked Events
-
In the Segments menu, we will create a new segment from scratch called Mortgages and choose Actions Tracking as a new condition under Interaction History. When the prompt to enter the event appears, type mortgages and hit Enter.
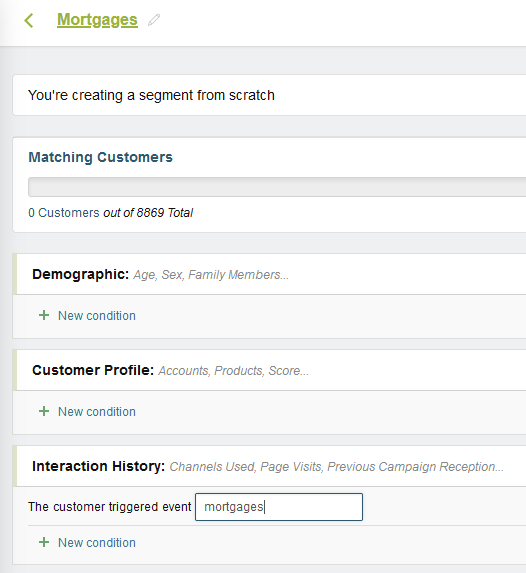
If you intend to track other actions in addition to mortgages (loans, for example), create other segments in the same manner as needed. In any event, make sure to save each new segment before proceeding.
-
Now that you have created an event tracking-based segment, you can use it in your campaigns. For example, you can create a new campaign called New Mortgages Offers and select the Mortgages segment as the target audience:
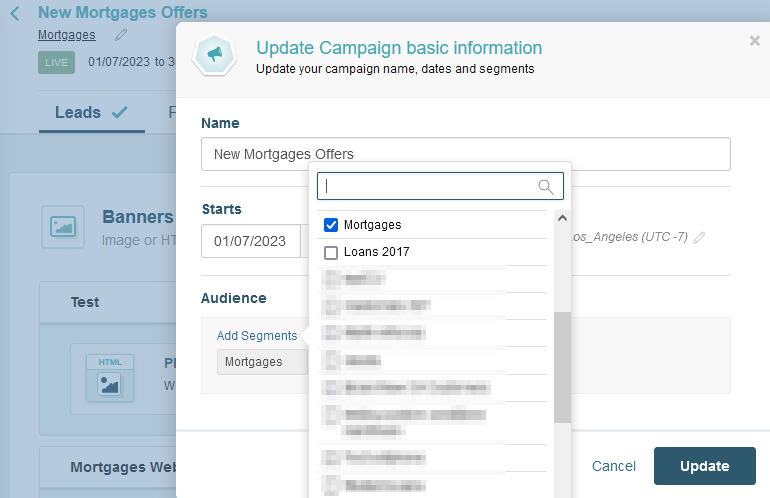
Here is where event tracking comes in handy. Since this campaign targets customers who have clicked on the Mortgages button, it enables you to engage with them and present personalized mortgages offers.
Related Articles
On this page