Okta (Identity Management)
Okta is a cloud-based identity management service that provides authentication and authorization services. Prisma Campaigns offers integration with this tool so that customers can take advantage of single sign-on (SSO). This way, they can access the platform using the same Okta account they use to access other services in a multi-application enterprise environment.
This guide explains how to configure Okta as an Identity Provider (IdP) for Prisma Campaigns using SAML 2.0.
When completing the sections of this guide, you will need to gather the necessary information to configure the integration and provide it to the Prisma Campaigns technical support team.
Create a New SAML 2.0 Application in Okta
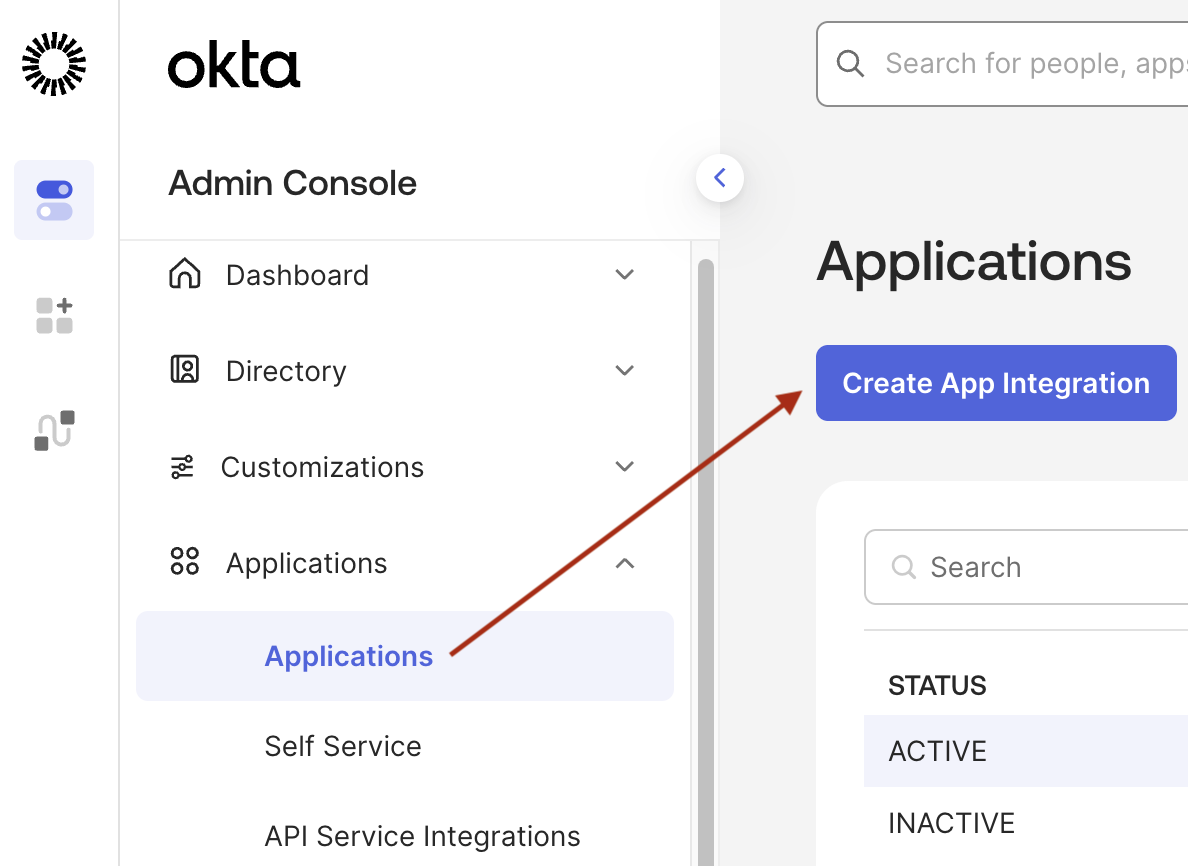
To begin, you will need to create a new SAML 2.0 application in your Okta dashboard.
-
Go to Applications → Create App Integration.
-
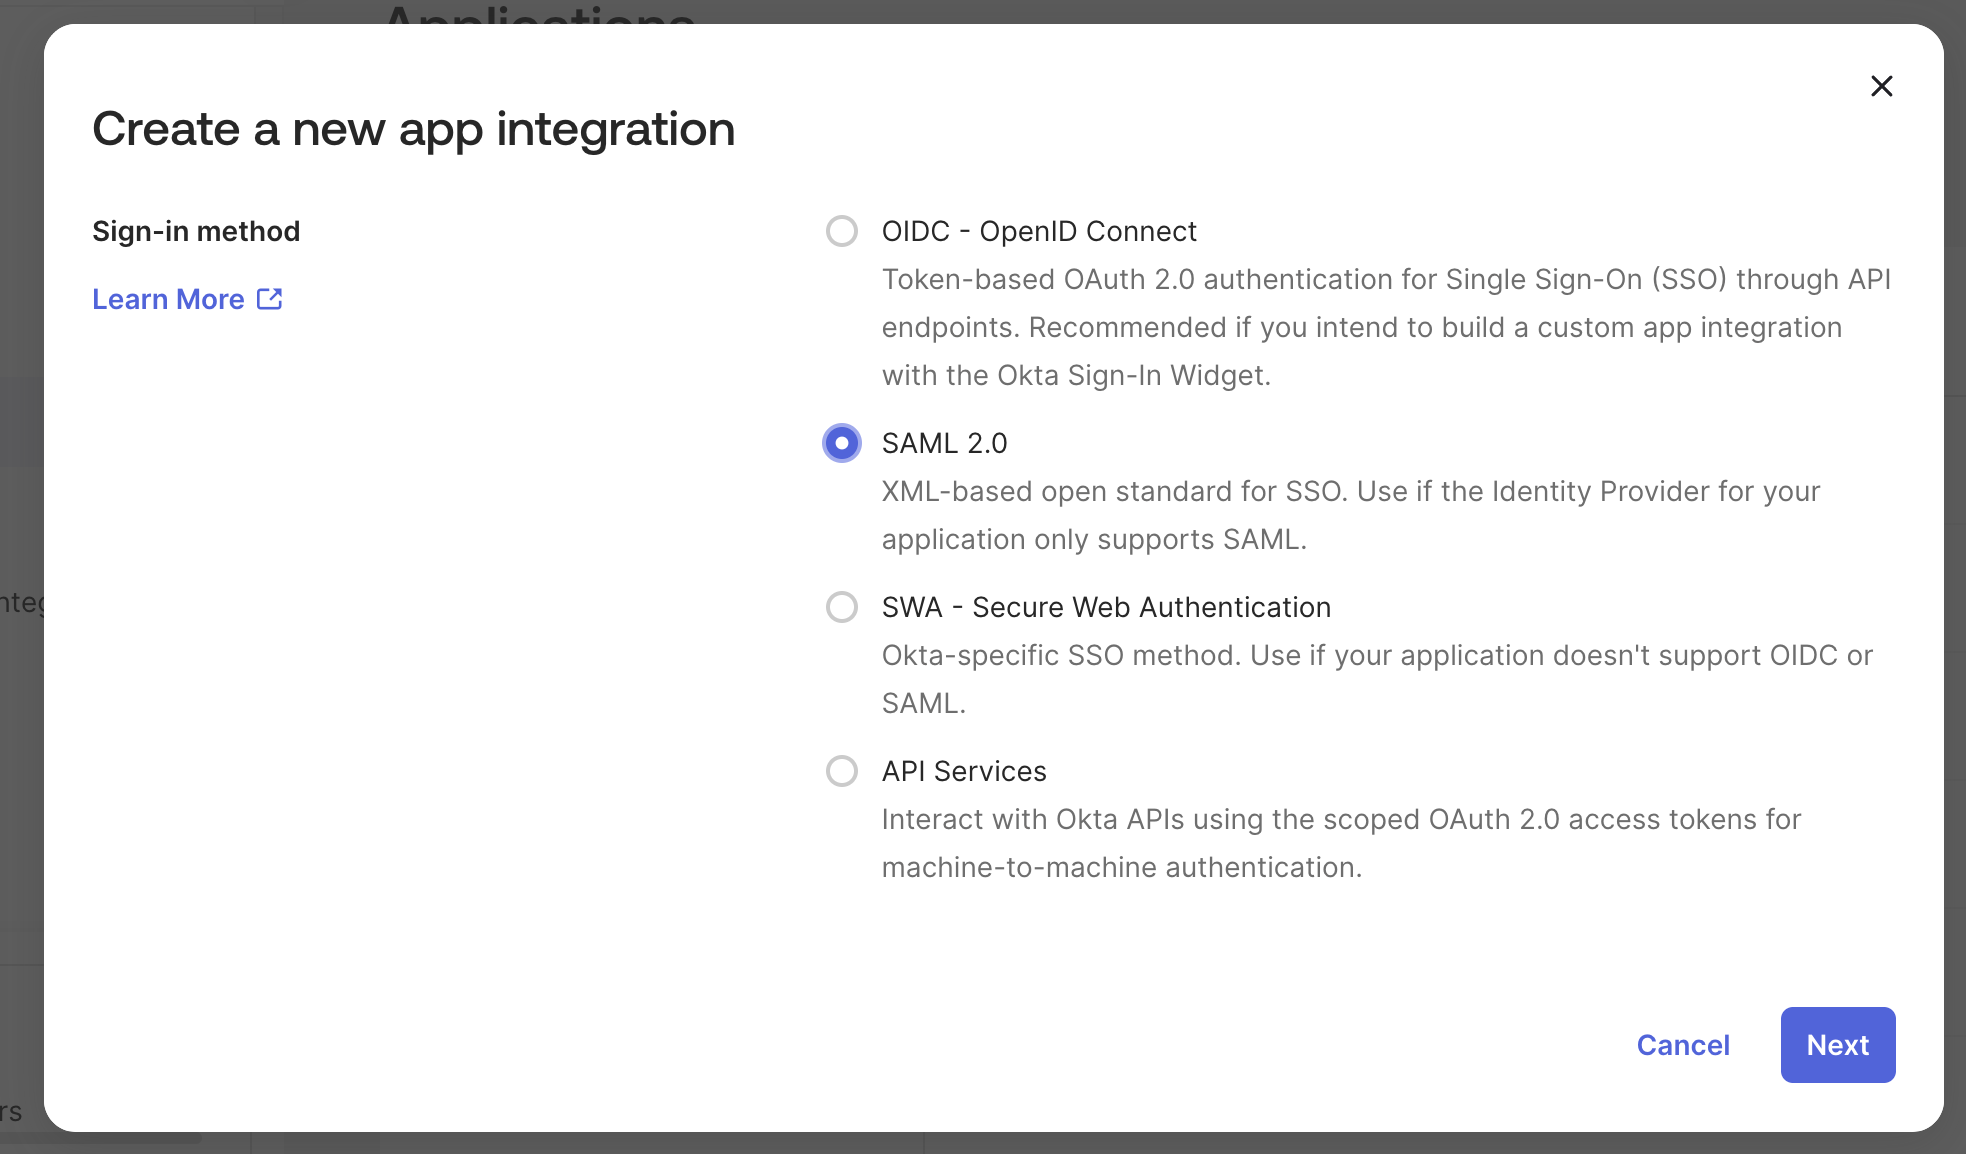
Choose SAML 2.0 as the sign-in method.
-
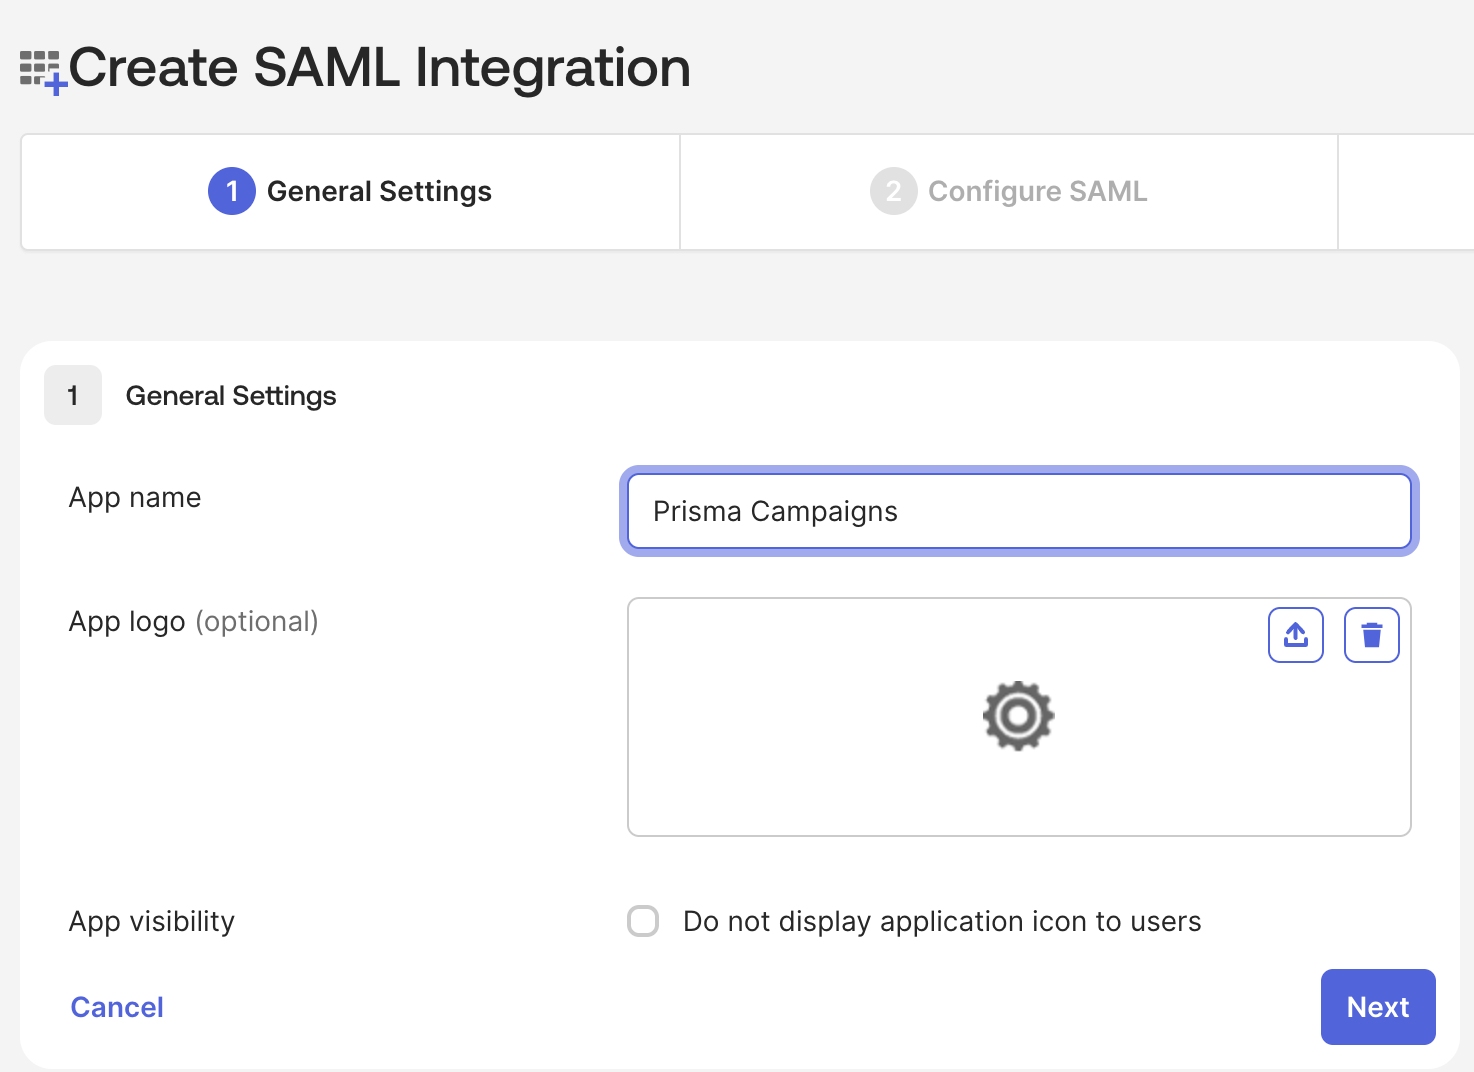
Enter Prisma Campaigns as the app name.
-
(Optional) Upload the Prisma Campaigns logo.
-
In the Visibility section, leave the checkboxes unchecked unless you want to hide the application from the Okta dashboard.
-
Click Next.
Configure SAML Settings
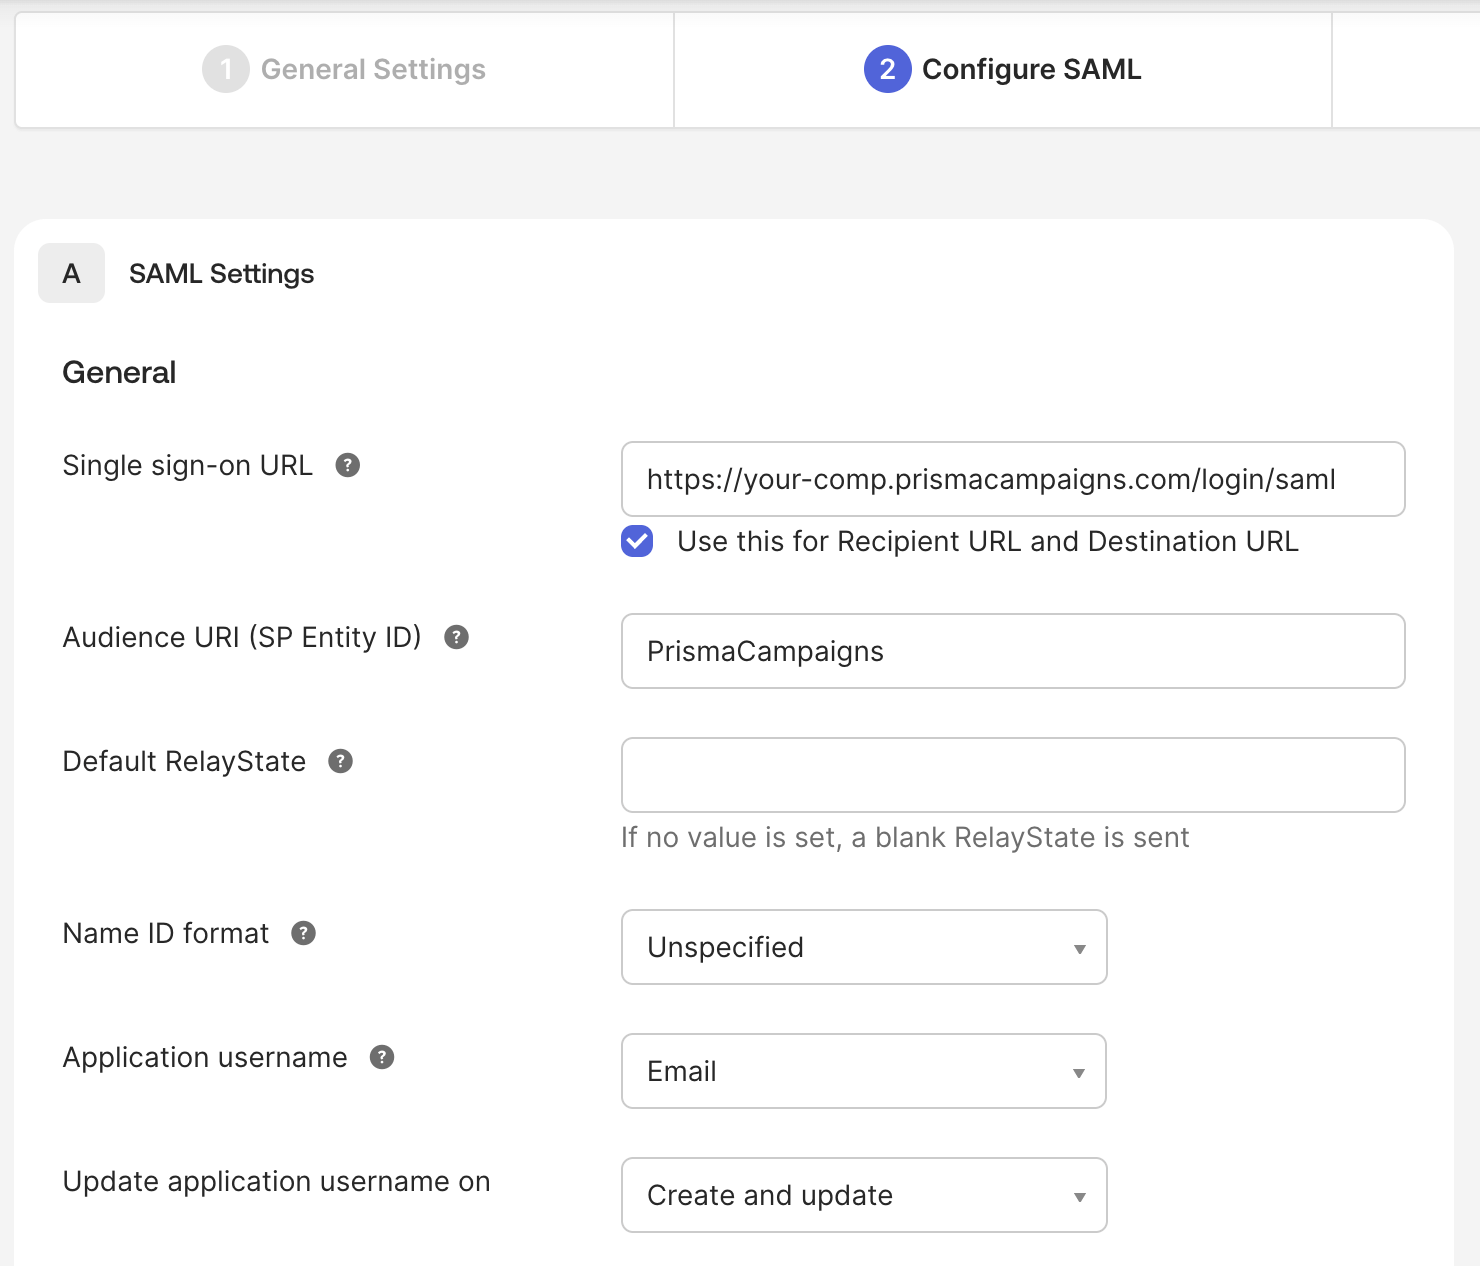
In the SAML Settings section, you need to configure the connection details between Okta and Prisma Campaigns.
1) Fill in the following fields:
- Single sign-on URL:
https://your-comp.prismacampaigns.com/login/saml(replaceyour-comp.prismacampaigns.comwith your Prisma Campaigns instance URL). Check the box for “Use this for Recipient URL and Destination URL”. - Audience URI (SP Entity ID):
PrismaCampaigns - Default RelayState: Leave blank.
- Name ID format:
Unspecified - Application username:
Email
2) For Update application username on, select Create and update.
3) Click Next.
Attribute Statements
Define the following attributes to ensure user information is passed correctly to Prisma Campaigns.
-
ID:
user.id -
email:
user.email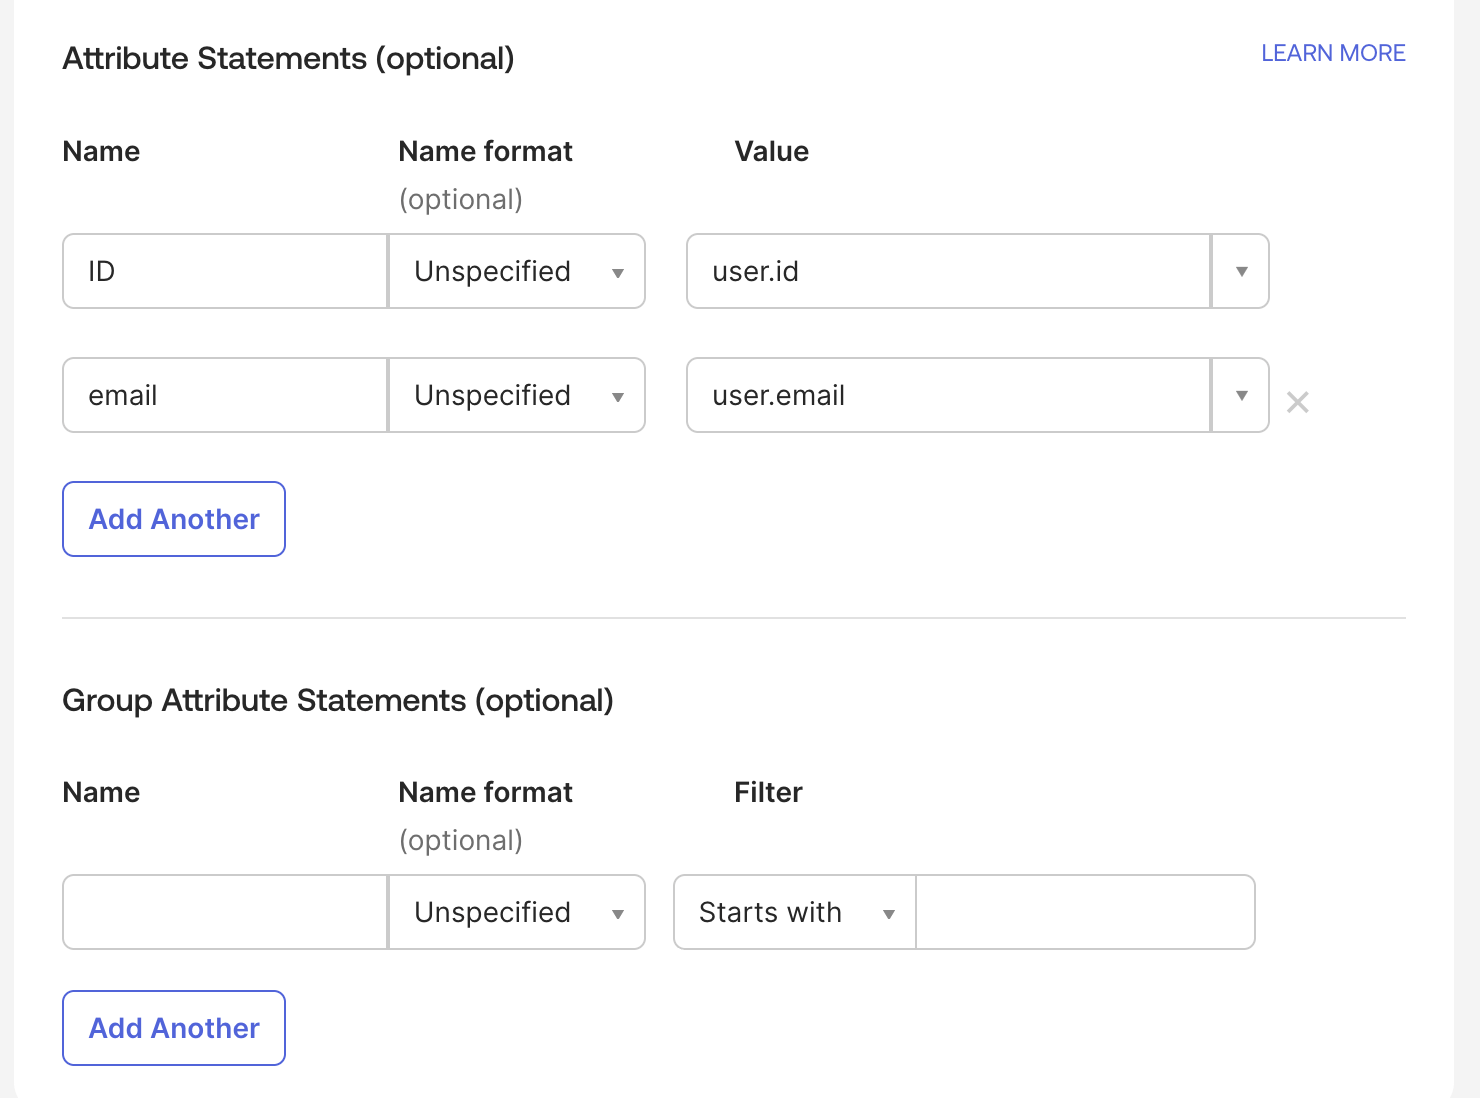
(Optional: You can add group attributes if you need to control access by groups.)
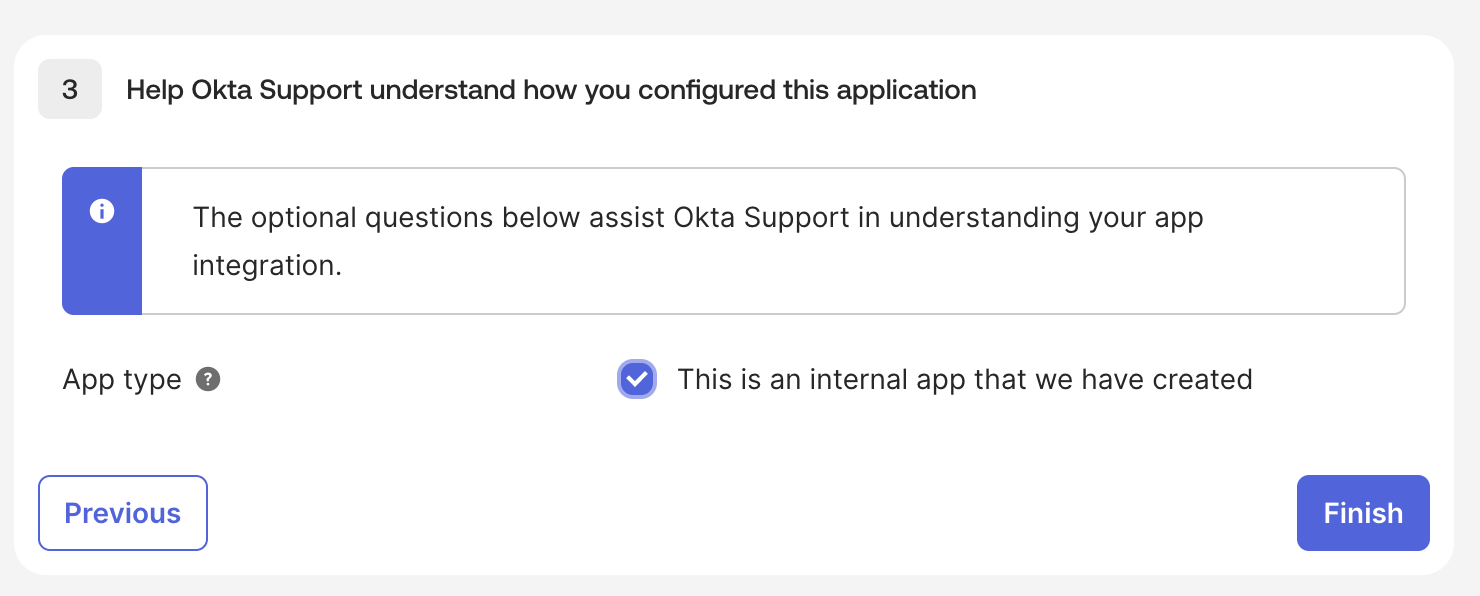
App Type (Okta Support Helper)
-
Under the “Help Okta Support understand how you configured this application” section, check “This is an internal app that we have created”.
-
Click Finish.
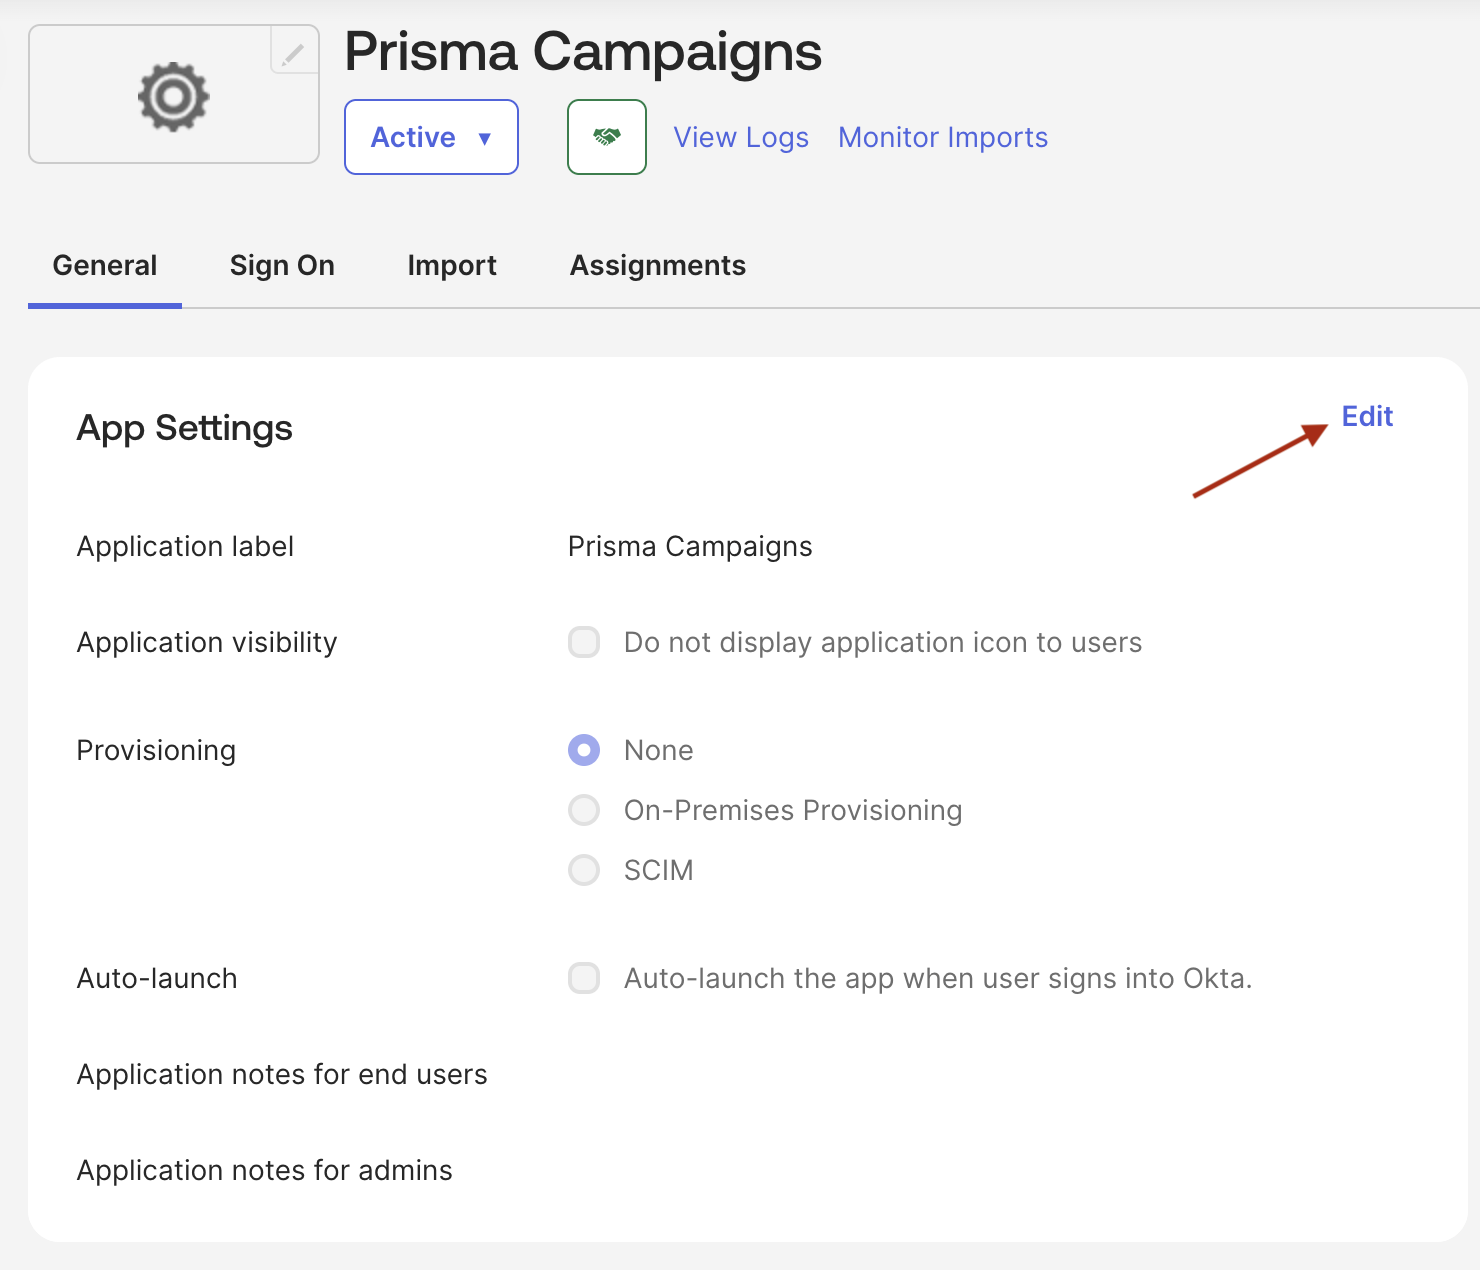
Provisioning and App Settings
In the General settings, ensure that Provisioning is set to None. Do not enable auto-launch unless you want the app to open automatically upon login to Okta. Add notes for admins or end users if needed.
Obtain IdP Metadata
After saving the application, you need to provide the IdP metadata to the Prisma Campaigns support team.
- From the application’s Sign On tab, find the SAML Signing Certificates section.
- Click on View IdP metadata. A new browser tab will open with the XML metadata.
- Save this XML content as a file and send it to your Prisma Campaigns support contact. Alternatively, you can provide the following individual values:
- IdP Issuer (also called Entity ID)
- IdP SSO URL (also called Login URL)
- X.509 Certificate (the public certificate)
The support team will use this information to configure the integration in the Prisma Campaigns backend.
Testing the Integration
Once the support team confirms the setup is complete, you can test the integration.
- Assign Users: In Okta, assign the relevant users or groups to the Prisma Campaigns application.
- IdP-Initiated Login: From the Okta dashboard, click the Prisma Campaigns app icon. You should be automatically logged into Prisma Campaigns.
- SP-Initiated Login: Navigate directly to your Prisma Campaigns login URL (
https://your-comp.prismacampaigns.com/login/saml). You should be redirected to Okta for authentication and then returned to Prisma Campaigns.
Related Articles
On this page