Using UTM Parameters
Prisma Campaigns allows you to gain deeper insights into customer interactions across various channels by incorporating UTM parameters in the external links of your outbound communications. These tags enable you to analyze the results of your marketing efforts by identifying the specific sources, mediums, and campaigns driving traffic to your institution’s website.
UTM parameters are case-sensitive and must be used consistently across all your campaigns to ensure accurate tracking. To maintain consistency and ensure accurate tracking, use lowercase letters for all UTM parameters.
| UTM Parameter | Description | |
|---|---|---|
utm_source |
Identifies the origin of the traffic | |
utm_campaign |
Specifies the campaign name | |
utm_medium |
Indicates the marketing medium used | |
utm_content |
Differentiates between the age segments and variants in A/B testing |
Setting Default UTM Parameter Preferences for New Campaigns
To set whether UTM parameters are enabled or disabled by default in new campaigns:
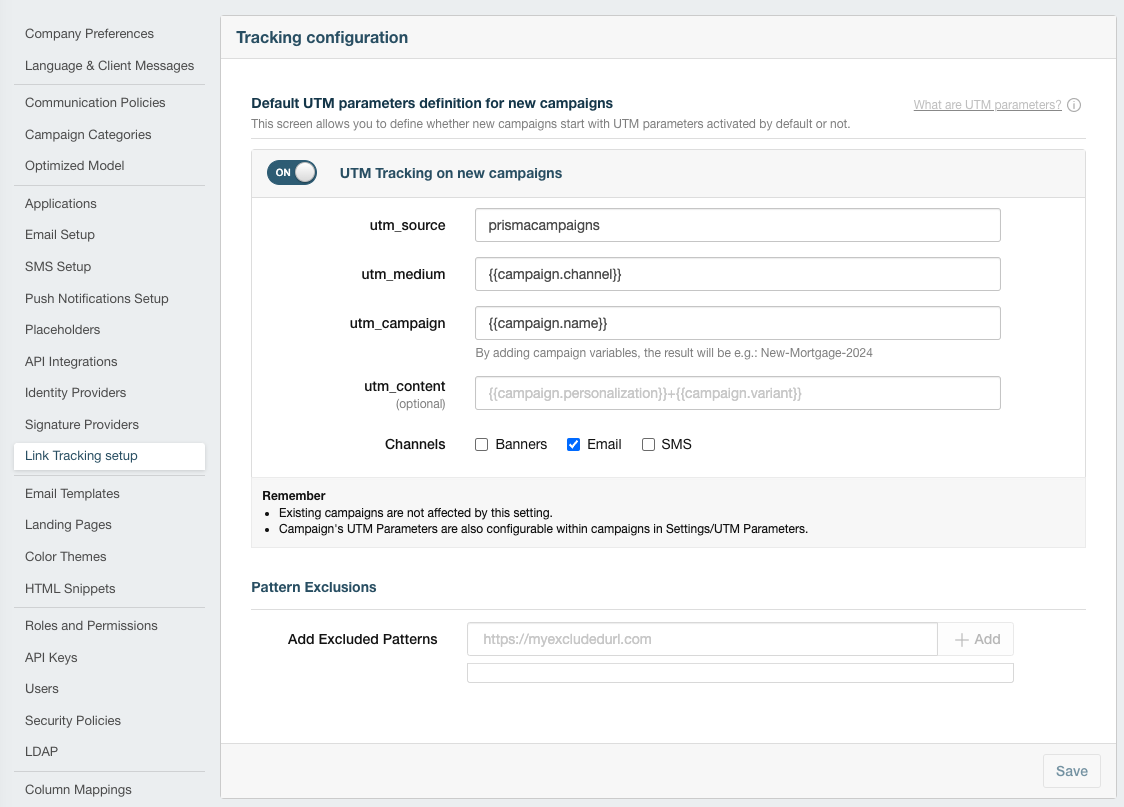
- Go to Settings/Link Tracking Setup.
- Choose your preferred default state for UTM parameters (enabled or disabled) through the switch UTM Tracking on new campaigns.
- If you decided to enable the feature, you can set system-wide default UTM parameters for new campaigns by entering values in the form fields. These values will be pre-filled in the UTM parameters fields when creating a new campaign:
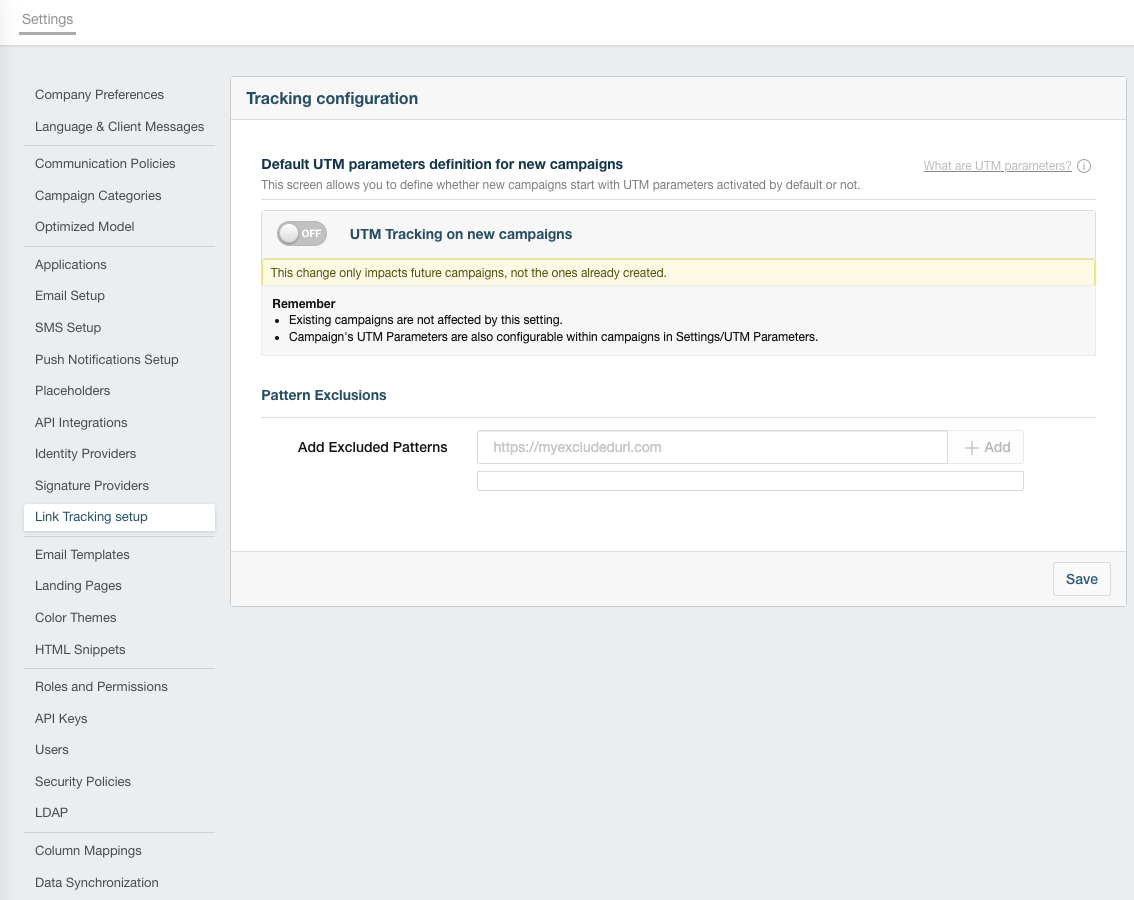
- Otherwise, the UTM parameters will be hidden:
- Save your changes.
This setting applies only to campaigns created after this configuration and does not affect existing campaigns, for which you can enable or disable UTM parameters individually.
Configuring UTM Parameters in Existing Campaigns
For campaigns that have already been created, you can manage the UTM parameter settings individually. To do so:
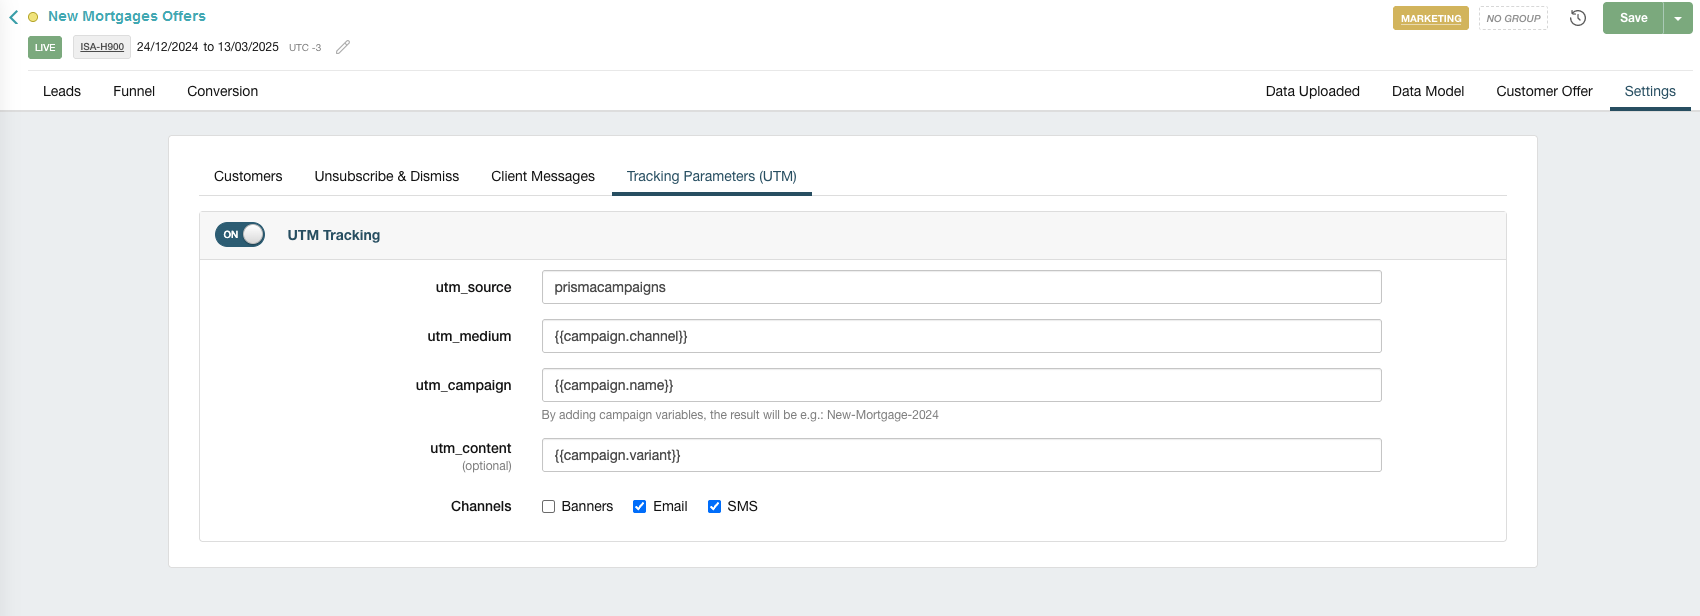
- Open the campaign you want to configure.
- Go to the Settings tab.

- Toggle the switch UTM Tracking to enable or disable UTM parameters for the campaign. If it is on, the UTM parameters fields will be displayed below the switch.
- Save and publish your changes.
Using Variables and Custom Values
The previous examples use predefined Prisma Campaigns variables ({{campaign.channel}}, {{campaign.name}}, etc.), but you can combine them with other static or custom values based on your needs. For example:
utm_source=email_newsletterutm_campaign=q1-{{campaign.name}}-promoutm_medium=socialutm_content=custom-{{campaign.variant}}
In particular, for utm_content, note that {{campaign.personalization}} renders a personalization number (“1”, “2”, “3”, …), while {{campaign.variant}} does the same with the corresponding variant letter ("", “A”, “B”, …). You can structure this parameter according to your needs by combining variables and custom values.
Related Articles
On this page