Customizing Image Texts in HTML Banners
The instructions below will allow you to combine text (including variables) and an image within HTML banners. This scenario is similar to sending personalized communications, only that the personalization on the image takes place in the code itself.
-
Create the banner and upload the base HTML code from a file. Alternatively, you can type or paste it into the edit field.
-
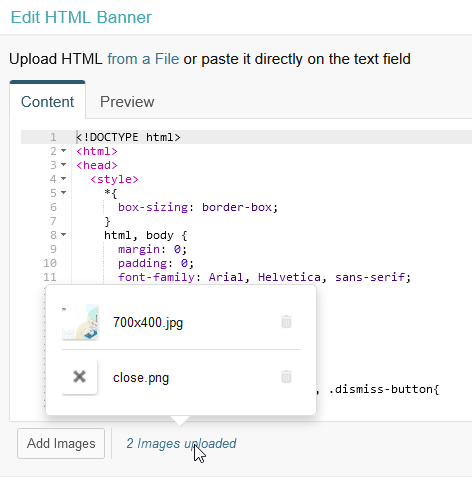
Upload the image by clicking on Add Images and selecting it from your hard drive.
-
Set the
srcattribute with the image name (not using relative paths to other directories). -
Use internal styles to position floating elements on top of the image. Properties such as
top,right,bottom, andleftwill determine the actual location of those elements with respect to the placeholder.
For example, the following HTML code produces the result shown in the image below. Note that it includes a call to action, an optional close button, and a link to dismiss the campaign:
<!DOCTYPE html>
<html>
  <head>
    <style>
      * {
        box-sizing: border-box;
      }
      html,
      body {
        margin: 0;
        padding: 0;
        font-family: Arial, Helvetica, sans-serif;
      }
      a {
        display: block;
      }

      /* Banner styles */

      .banner-content,
      .close-button,
      .dismiss-button {
        position: absolute;
      }
      .banner-content {
        z-index: 0;
        top: 150px;
        left: 50px;
        width: 400px;
        text-align: left;
      }
      .personalized-text {
        color: #3e566f;
        font-size: 24px;
        font-weight: bold;
      }
      .call-to-action {
        background-color: #3e566f;
        width: 180px;
        padding: 15px;
        color: white;
        text-align: center;
        text-decoration: none;
        font-weight: bold;
        border-radius: 4px;
        box-shadow: 3px 3px 10px #ccc;
      }

      .close-button,
      .dismiss-button,
      .personalized-text {
        z-index: 1;
      }
      .close-button {
        width: 24px;
        height: 24px;
        top: 5px;
        right: 5px;
      }
      .dismiss-button {
        bottom: 0;
        color: #888;
        text-align: center;
        font-size: 12px;
        text-decoration: none;
        background-color: #f1f1f1;
        border: 1px solid #e5e5e5;
        display: block;
        padding: 7px 5px;
        width: 100%;
      }
    </style>
  </head>

  <body>
    <img src="700x400.jpg" />
    <div class="banner-content">
      <p class="personalized-text">
        {{customer.name}}, <br />
        we have a special offer for you
      </p>
      <a
        href="#"
        onclick="prisma.startFunnel.call(this)"
        class="call-to-action"
      >
        LEARN MORE
      </a>
    </div>
    <a
      href="#"
      onclick="prisma.dismissCampaign.call(this)"
      class="dismiss-button"
    >
      I'm not interested in this offer
    </a>
    <a href="#" onclick="prisma.closePopup.call(this)" class="close-button">
      <img src="close.png" width="24px" />
    </a>
  </body>
</html>
For your convenience, you can download the sample HTML code and images here.

where personalized-text contains a series of styling properties. These modify the div element where the {{customer.name}} variable appears and make it possible to display the text on top of the image. Additionally, note that the image (700x400.jpg) resides in the same folder of the HTML code as the source of the img element.