Sending Personalized Communications
In case you need to reach your customers through personalized communications, Prisma Campaigns makes it possible to insert data of each individual in the message body. Although you can include customer-specific information in image or HTML banners and emails, this article illustrates the steps to follow using the first alternative.
When preparing the image to be used in the banner, remember to leave space available to print the desired text and then follow the instructions below:
-
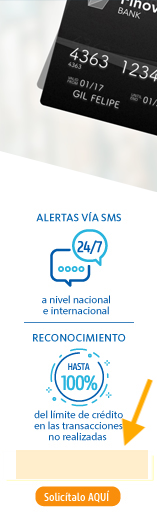
Create a banner and upload the image. The arrow indicates the blank spot where the personalization will appear later.
-
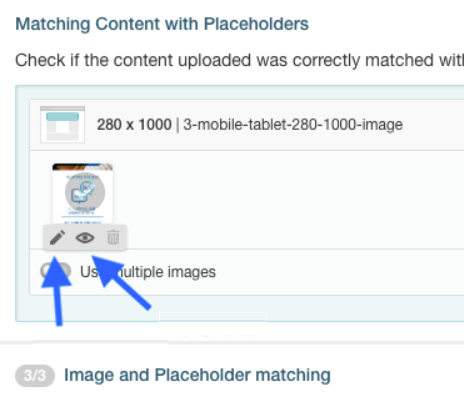
Click on the pencil icon that appears when you position the mouse over the image:
-
Add a field on the image by clicking on the button Add new text and then on Add var to choose the client model variable that contains the data to be displayed.

As a result, a text box will appear on the image with the content
{{customer.variable-name}}wherevariable-nameis the chosen variable. This text box can be resized and positioned at any desired location in the picture. You can also edit the text style so that it resembles that of the image.It is important to note that the segment used in the campaign must include users that contain the data in question if you want to visualize it in the image.
-
After applying the change, you can preview the result by clicking on the eye icon found to the right of the pencil. To see how, please refer to the image in step 2. Using the drop-down list, you can select different clients and see how the value shown in the original image varies from one to another.