Using Physical Communications
If you want to increase engagement with segments that prefer or respond better to traditional mail, Prisma Campaigns allows you to send personalized postcards, letters, and other forms of offline communications to your customers. Incorporating physical mailings into your marketing strategy offers additional advantages, such as creating a lasting impression, improving brand awareness, and delivering a more powerful visual impact on your audience.
Prerequisites
To set up direct mail, navigate to Settings and select Direct Mail Setup. Choose PostGrid as your provider, then enter api.postgrid.com as the host along with your PostGrid API key. Next, add one or more return addresses that will be available when configuring campaigns.
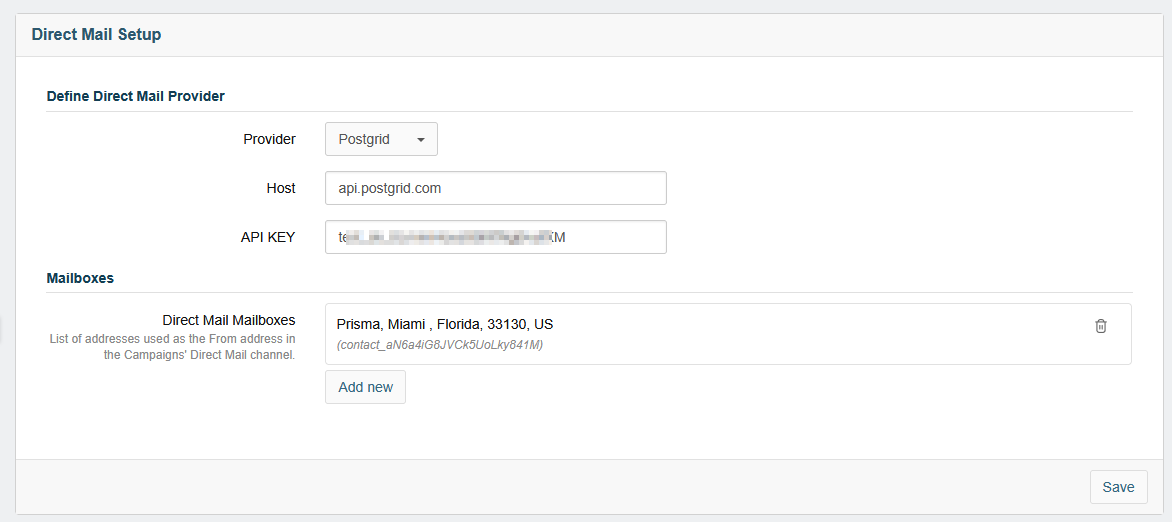
Prisma Campaigns does not validate the return addresses you enter, so ensure they are correct before proceeding.
After entering the necessary information, click Save to complete the initial configuration.
Creating Direct Mail Templates
To create templates from scratch, follow these steps:
- Navigate to Settings and select Direct Mail Templates.
- Use the built-in editor to write your HTML content or upload your HTML file.
- Enter a descriptive name, choose the format, indicate whether it is a back or front design, and specify the size.
- Add internal styles and images as needed.
- Implement placeholders for dynamic content, such as
{{customer.name}}, to personalize your messages.
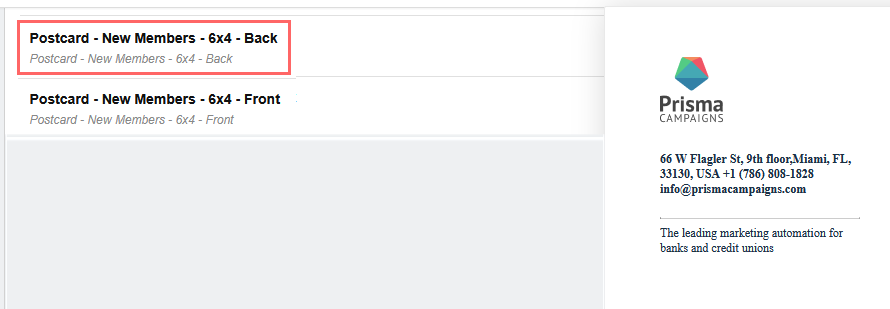
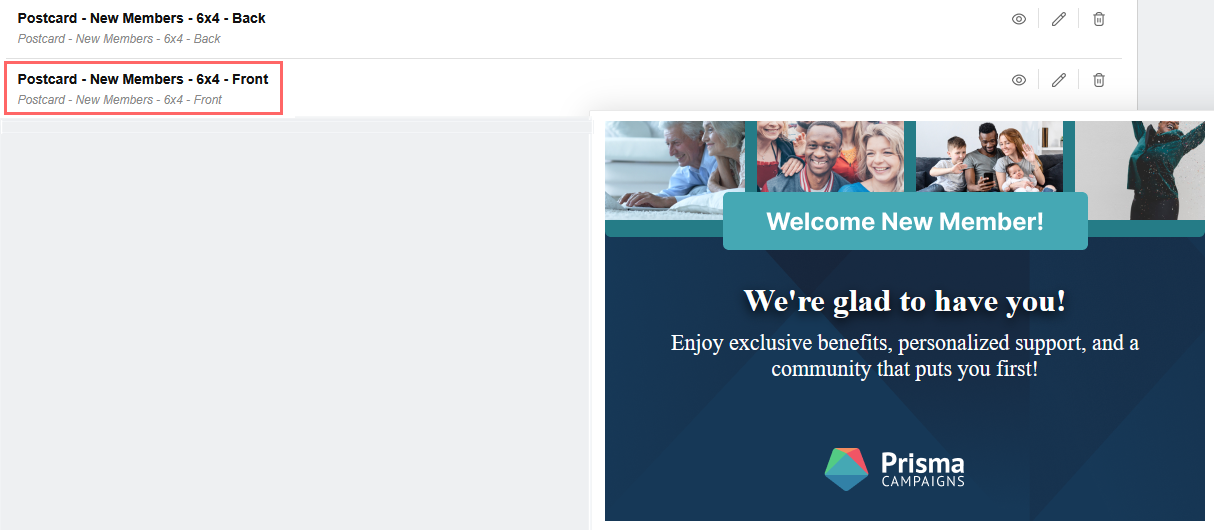
For your reference, the following code snippets show a basic HTML template with a personalized message. You can find additional design specifications and guidelines in the PostGrid Design Guidelines.
Back design:
<!DOCTYPE html>
<html>
<head>
    <link href="https://fonts.googleapis.com/css?family=Avenir+Next&display=swap" rel="stylesheet" />
    <style>
        * {
            box-sizing: border-box;
        }
        body {
            font-size: 14px;
        }
        p {
            margin: 0;
        }
        .page {
            width: 600px;
            height: 408px;
            opacity: 1;
            position: absolute;
            top: 0px;
            left: 0px;
            overflow: hidden;
        }
        .info {
            position: absolute;
            left: 40px;
            top: 40px;
            width: 200px;
        }
        .logo {
            margin-bottom: 20px;
        }
        .address-text {

            margin-bottom: 20px;
            color: #1A2F44;
            font-family: Avenir Next;
            font-weight: 600;
            font-size: 12px;
            opacity: 1;
            text-align: left;
        }
        hr {
            border-bottom-color: #ccc;
            border-top-color: transparent;
        }
        .tag-text {
            width: 188px;
            color: rgba(26, 47, 68, 1);
            font-family: Avenir Next;
            font-weight: Demi Bold;
            font-size: 12px;
            opacity: 1;
            text-align: left;
        }
    </style>
</head>
<body>
    <div class="page">
        <div class="info">
            <div class="logo">
                <img src="logo.png" width="">
            </div>
            <div class="address-text">66 W Flagler St, 9th floor,Miami, FL, 33130, USA +1 (786) 808-1828
                info@prismacampaigns.com
            </div>
            <hr>
            <div class="tag-text">The leading marketing automation for banks and credit unions</div>
        </div>

    </div>
</body>
</html>
Front:
<!DOCTYPE html>
<html>
<head>
    <link href="https://fonts.googleapis.com/css?family=Avenir+Next&display=swap" rel="stylesheet" />
    <style>
        * {
            box-sizing: border-box;
        }
        body {
            font-size: 14px;
        }
        p {
            margin: 0;
        }
        .page {
            width: 600px;
            height: 408px;
            position: absolute;
            top: 0px;
            left: 0px;
            overflow: hidden;
        }
        .bg {
            width: 600px;
            height: 408px;
            position: absolute;
            top: 0px;
            left: 0px;
            overflow: hidden;
        }
        .box {
            position: absolute;
            width: 500px;
            top: 150px;
            left: 50px;
            font-family: Avenir Next;
            text-align: center;
            color: rgba(255, 255, 255, 1);
        }
        .title {
            padding: 10px 30px;
            color: rgba(255, 255, 255, 1);
            text-shadow: 0px 4px 11px rgba(0, 0, 0, 1);
            font-family: Avenir Next;
            font-weight: 600;
            font-size: 32px;
            opacity: 1;
        }
        .content {
            font-family: Avenir Next;
            font-weight: 400;
            font-size: 22px;
        }
    </style>
</head>
<body>
    <div class="page">
        <div class="bg">
            <img src="bg.png">
        </div>
        <div class="box">
            <div class="title">
                We're glad to have you!
            </div>
            <div class="content">
                Enjoy exclusive benefits, personalized support, and a community that puts you first!
            </div>
        </div>
    </div>
</body>
</html>
You can preview the templates by clicking on the eye icon:
Back design:
Front design:
After saving the template, you can use it in your campaigns.
Adding Direct Mail in a Campaign
To incorporate direct mail into your campaigns, follow these steps:
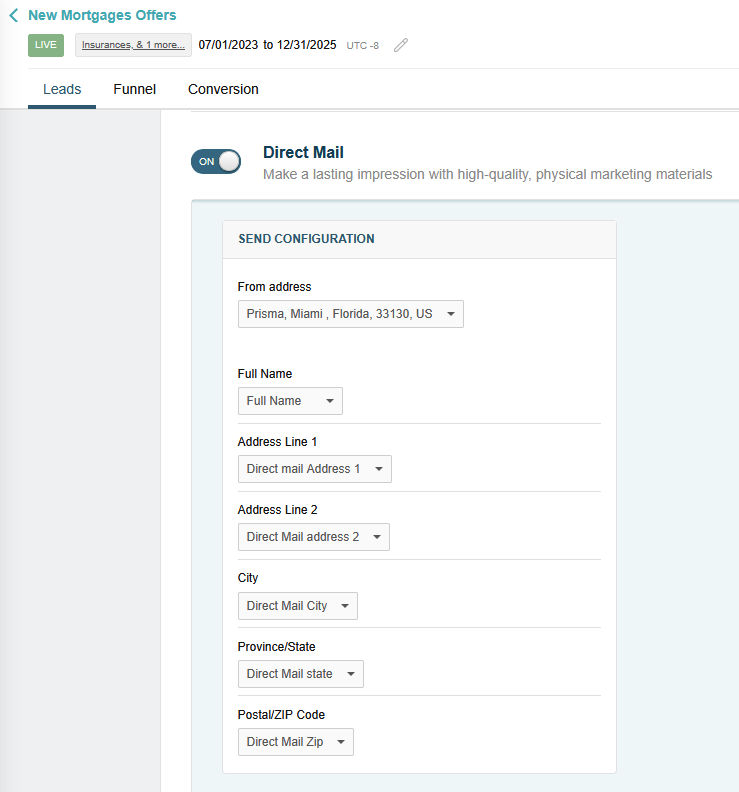
- Open the Campaigns menu and click on a campaign (e.g., New Mortgages Offers).
- Enable the Direct Mail switch.
- Select the sender from the list of available return addresses.
- Choose the specific fields from the customer model from where the recipient’s information will be taken. You can view the available fields in Customers/Data Model.
Next, design your message using an existing template:
-
Click on New Direct Mail within the channel configuration.
-
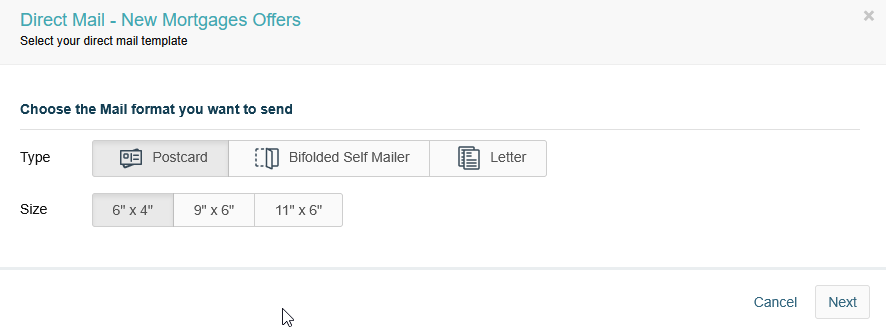
Select the desired mail format: Postcard (available in 6" x 4", 9" x 6", and 11" x 6" sizes), Bifolded Self Mailer (8.5" x 11"), or Letter (standard letter size). For the first two, you can design both the front and back, while Letter allows for a front design only.
-
Click Next.
-
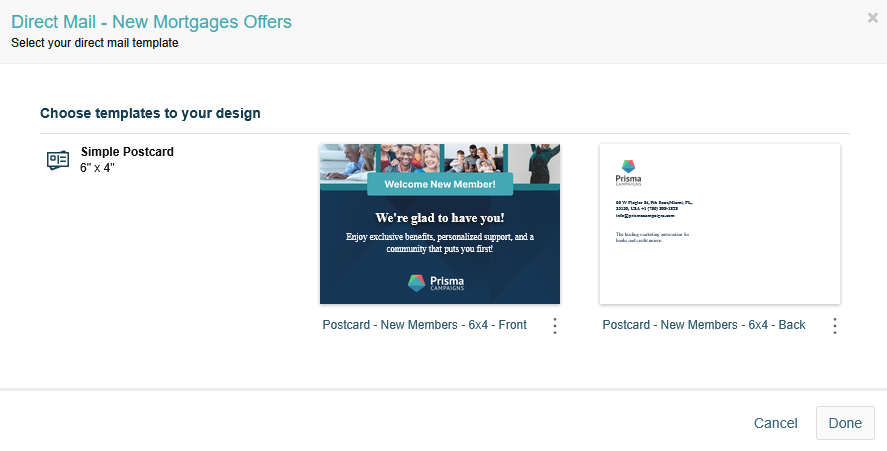
Choose from existing templates (or upload another of your own) via Settings/Direct Mail Templates. You can customize your message by adding text, images, dynamic elements, and other resources. You will be prompted the choose the front and back designs for postcards and bifolded self mailers, and the front design for letters.
-
Once your design is complete, click Done to finalize it.
-
Finally, save the changes in the campaign and publish it.
Related Articles
On this page