
Configuring Google Analytics 4 for Funnel Events
Google Analytics 4 (GA4) is Google’s web analytics platform, used to measure conversion and drop-off across a funnel. This tutorial explains how to forward Prisma Campaigns’ funnel_step event into GA4 through Google Tag Manager (GTM), and how to make its parameters visible in GA4 reports.
Before continuing, ensure that the GTM integration described in Google Tag Manager Integration is already configured — specifically, the
funnel_stepcustom event trigger and the five required variables (campaign_id,campaign_name,step_name,position,customer).
Creating the GA4 Event Tag
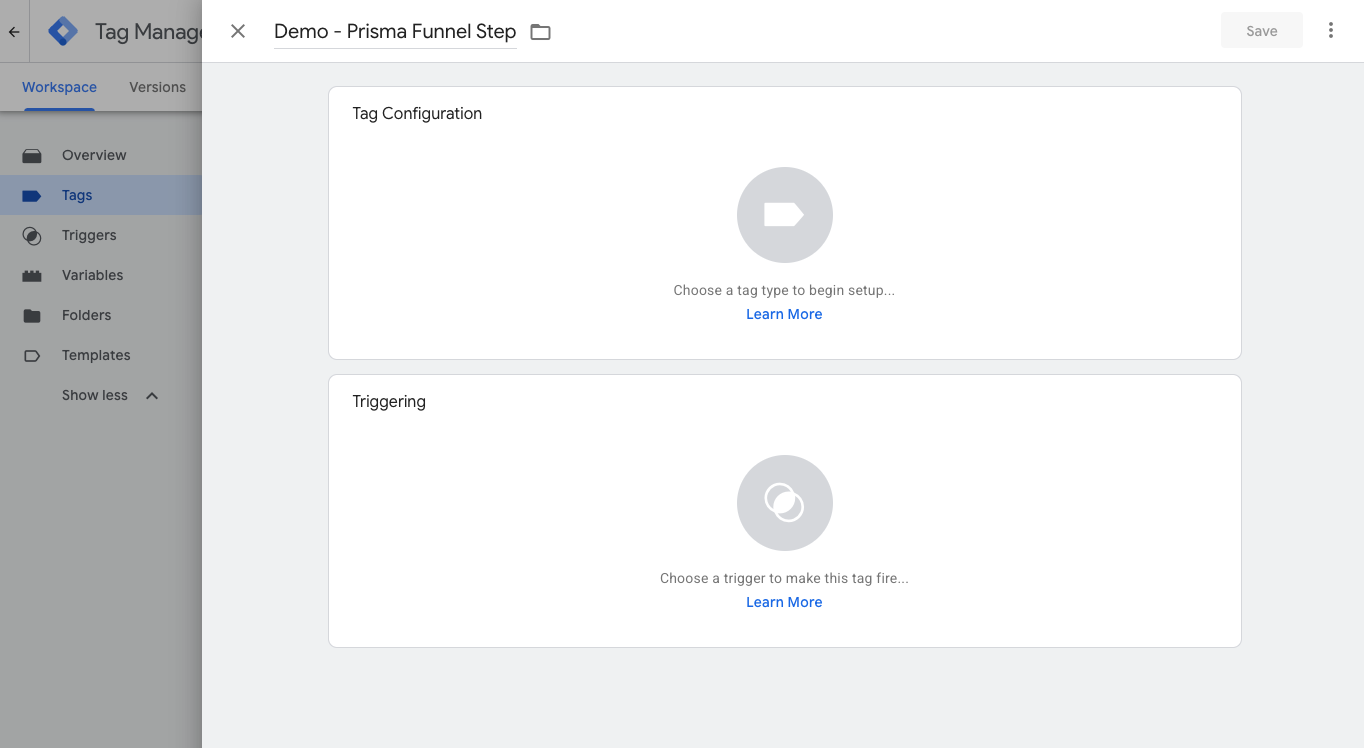
In GTM, go to Tags and create a new tag. For example, name it Demo - Prisma Funnel Step:
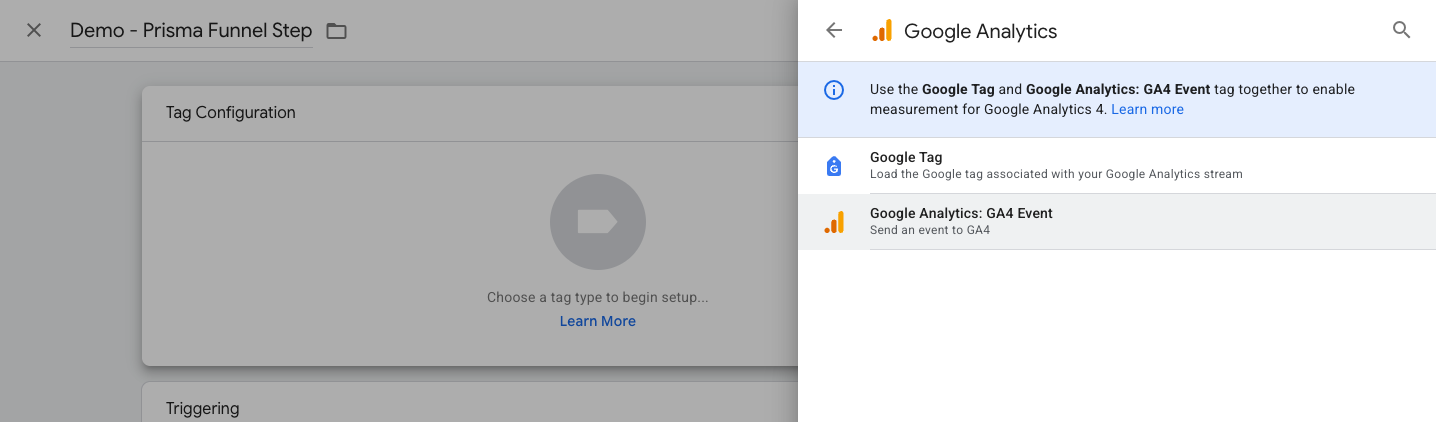
Click Tag Configuration and select the Google Analytics: GA4 Event tag type:
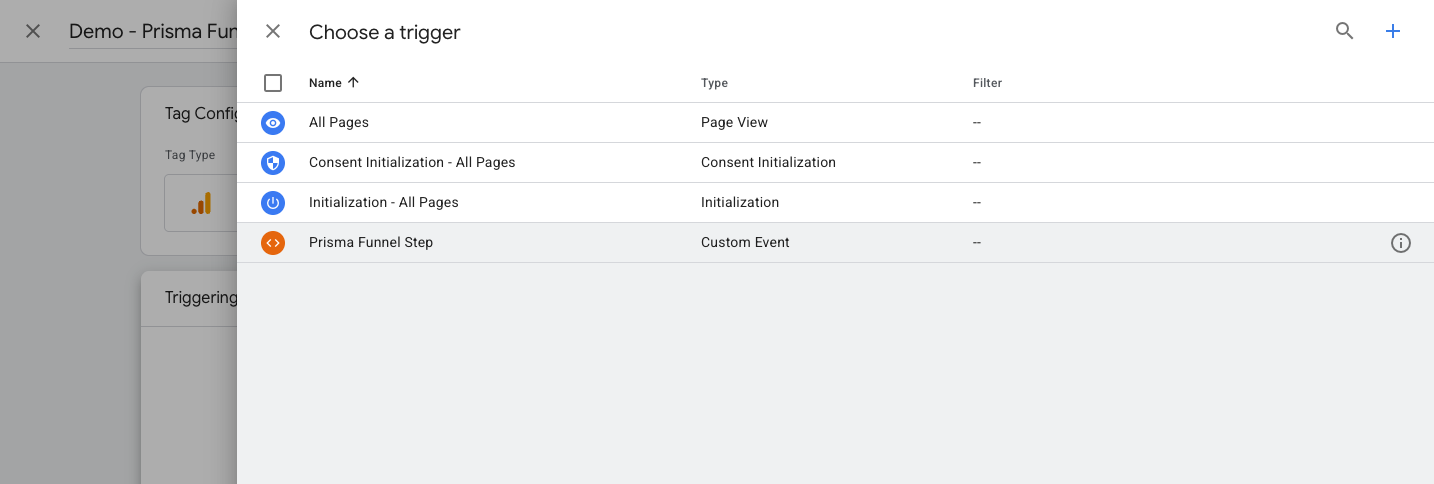
Click Triggering and select the Prisma Funnel step custom event trigger configured earlier:
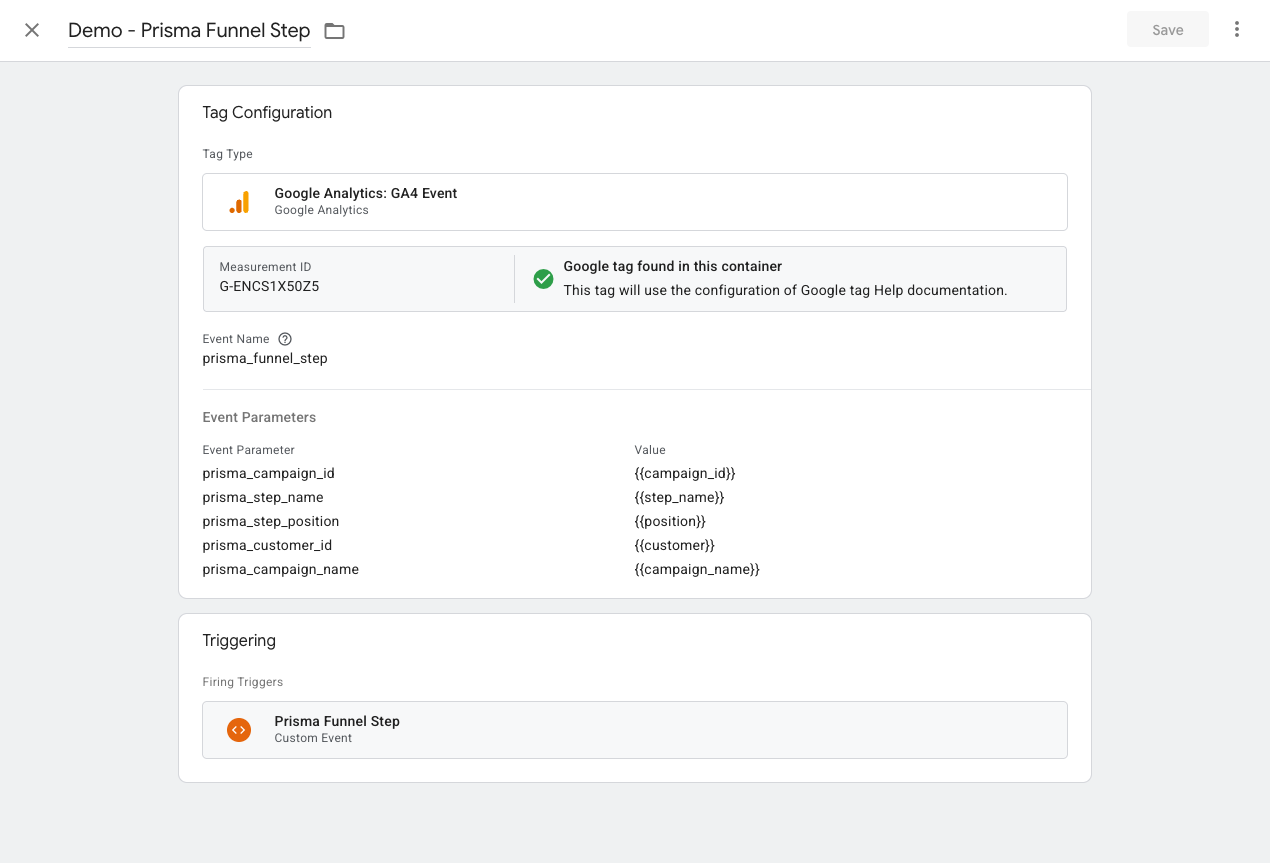
Configure the tag as follows:
- Configuration Tag: GTM automatically detects whether a GA4 Configuration tag already exists in the container and, if so, links this event to it — shown as Google tag found in this container, along with its Measurement ID. This is what tells GA4 which property to send the event to. If GTM doesn’t find one, create a GA4 Configuration tag first (or enter the property’s Measurement ID directly in this field) before continuing.
- Event Name: the name that will identify this event in GA4 reports, for example
prisma_funnel_step. - Event Parameters: one row per piece of data you want available in GA4. On the left, enter the name the parameter will have in GA4; on the right, reference the GTM variable that holds the value.
Save the tag. A newly created tag only exists in GTM’s workspace until it’s published — verify the event fires correctly in Preview mode, then click Submit and Publish to push the container live. Skipping this step means the event will never reach GA4 in production.
Referencing GTM variables correctly
The Value column of each event parameter must reference the corresponding GTM variable using double curly braces — {{campaign_id}}, {{step_name}}, {{position}}, {{customer}}, {{campaign_name}} — exactly as shown above:
| Event Parameter | Value |
|---|---|
prisma_campaign_id |
{{campaign_id}} |
prisma_step_name |
{{step_name}} |
prisma_step_position |
{{position}} |
prisma_customer_id |
{{customer}} |
prisma_campaign_name |
{{campaign_name}} |
Without the {{ }} brackets, GTM sends the literal text (for example, the string campaign_id) as the parameter value, instead of substituting the variable’s actual content.
Note that the parameter names on the left (prisma_campaign_id, prisma_step_name, prisma_step_position, prisma_customer_id, prisma_campaign_name) are independent of the GTM variable names on the right (campaign_id, step_name, position, customer, campaign_name) — they don’t need to match. The names on the left are what GA4 will actually store and display, so we recommend prefixing them (e.g. prisma_) to make them easy to identify among your other GA4 events and parameters.
Making Event Parameters Visible in GA4
By default, GA4 collects custom event parameters but does not display them anywhere in the standard reporting UI — each one has to be registered as a custom dimension before it becomes visible.
In GA4, go to Admin → Data display → Custom definitions → Custom dimensions → Create custom dimension, and configure one dimension per parameter sent by the tag:
- Dimension name: a human-readable label, for example
Prisma Step Position. - Scope:
Event. - Event parameter: the exact parameter name configured in the GTM tag, for example
prisma_step_position.
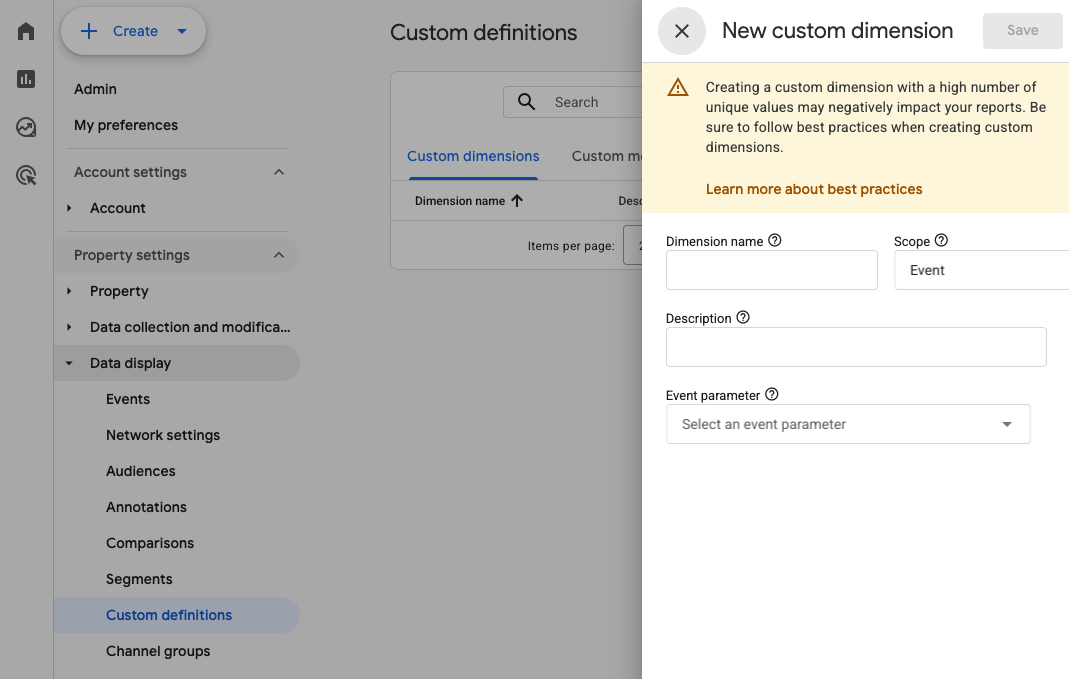
Repeat this for all five parameters. Once created, they should all appear in the custom dimensions list:
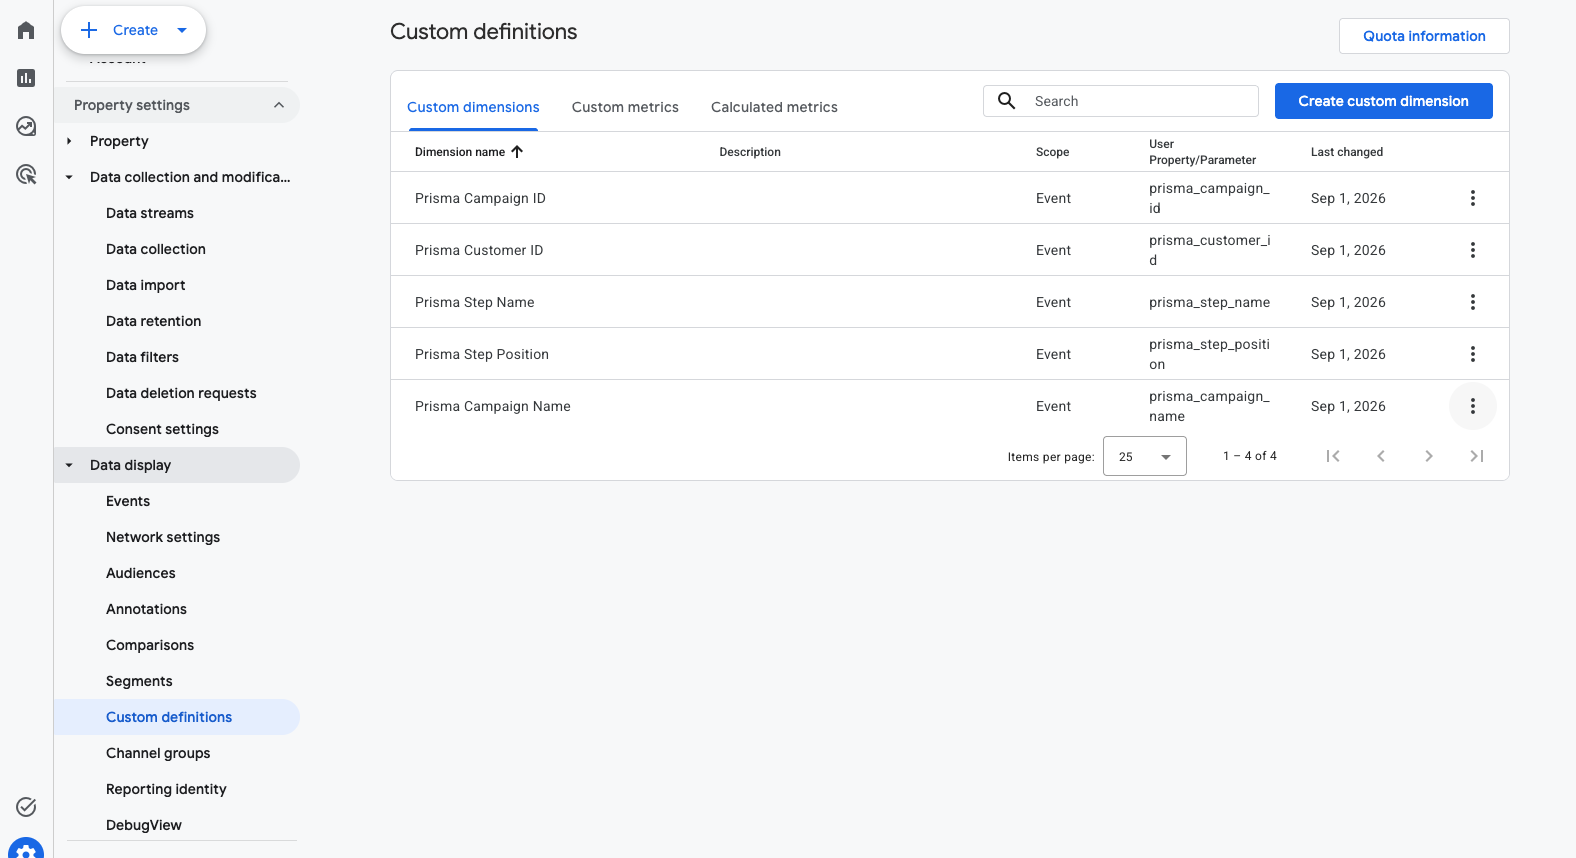
| Dimension name | Event parameter |
|---|---|
| Prisma Campaign ID | prisma_campaign_id |
| Prisma Campaign Name | prisma_campaign_name |
| Prisma Customer ID | prisma_customer_id |
| Prisma Step Name | prisma_step_name |
| Prisma Step Position | prisma_step_position |
Custom dimensions only apply going forward — GA4 does not backfill historical events collected before the dimension was registered, and it can take up to a day for values to start appearing in reports after a dimension is created.
Viewing the Data in GA4 Reports
Go to Reports → Engagement → Events, and select the event configured in the tag (for example, prisma_funnel_step):
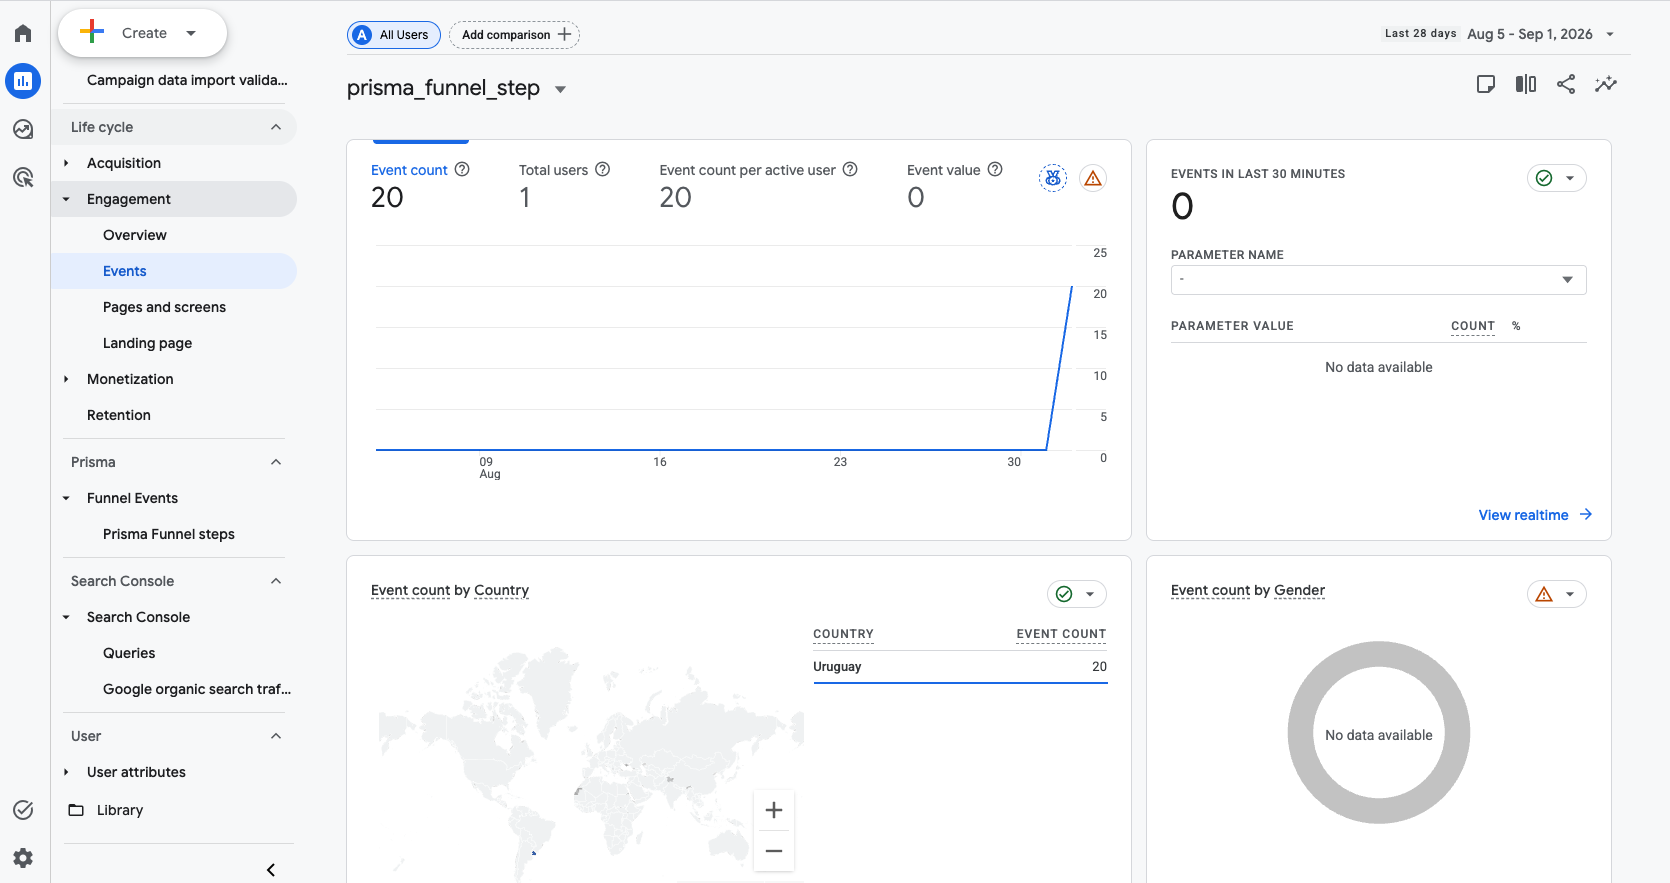
Each registered dimension renders as its own breakdown card, showing event counts and users per value — per campaign, per step, per customer:
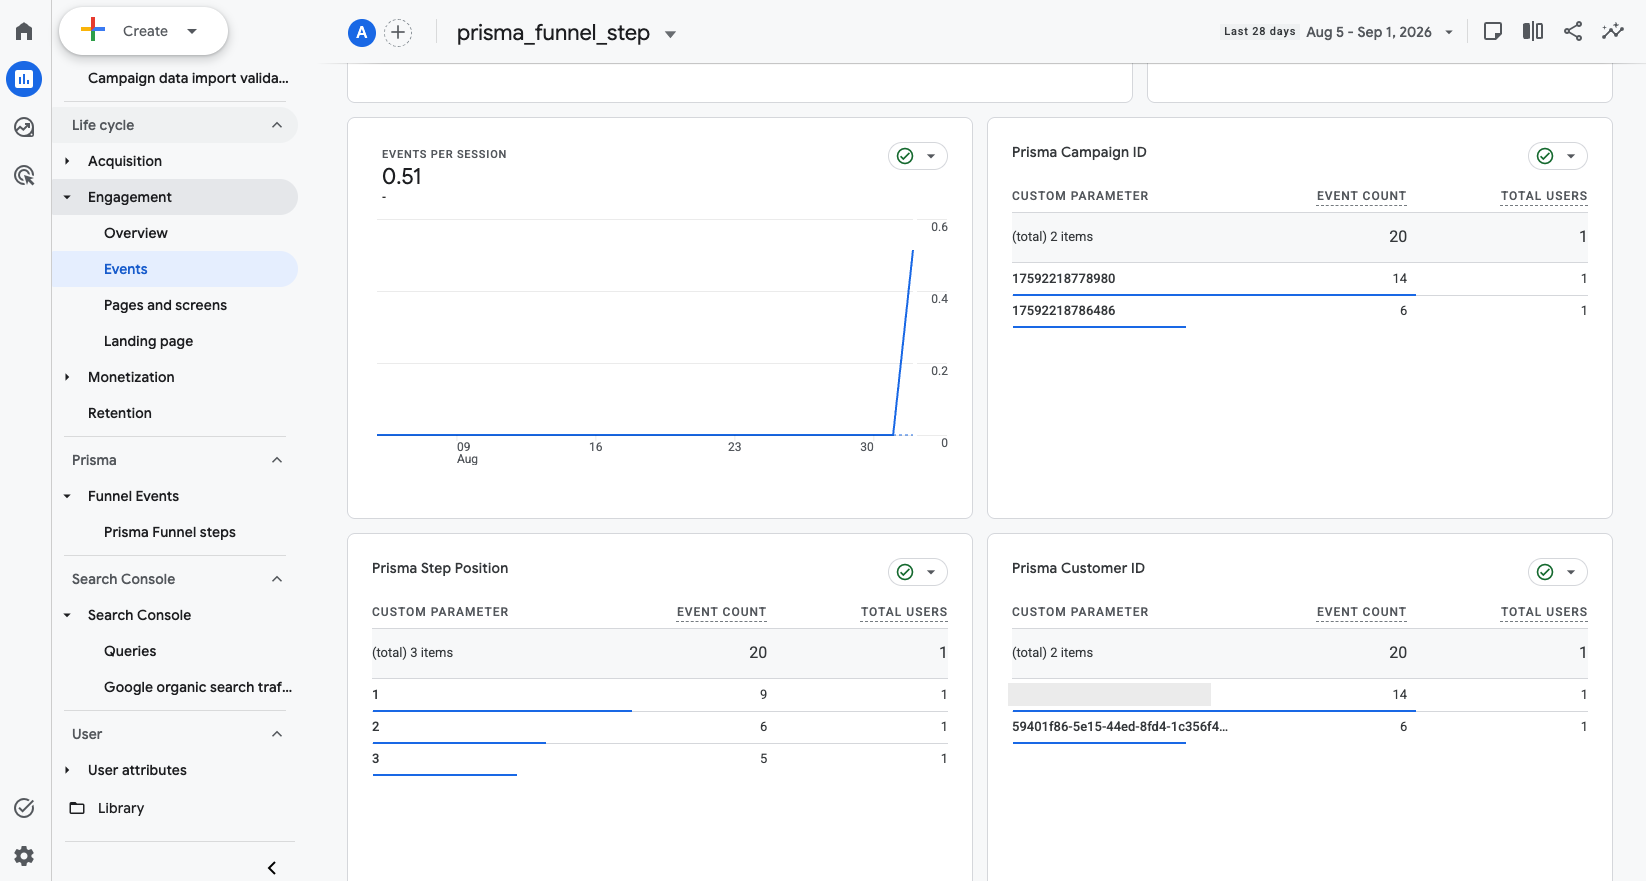
From here, the data can also be used to build custom explorations, or referenced by name in filters and segments.
Building a Funnel Exploration Report
Instead of reading conversion and drop-off numbers off the events report, you can build a dedicated funnel report using GA4’s Explore section, then publish it as a standard report in the left-hand navigation.
Start a new exploration
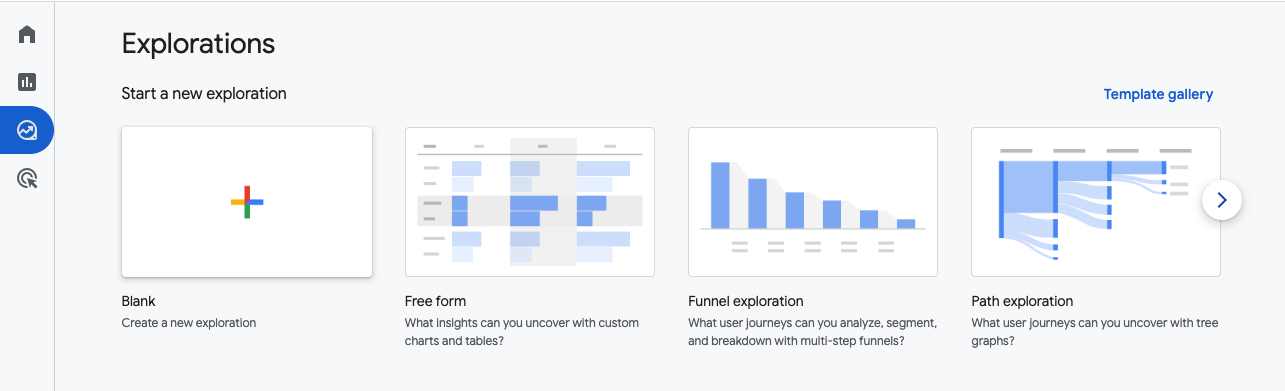
Go to Explore, and choose Blank to start a new exploration from scratch:
Add the funnel dimensions
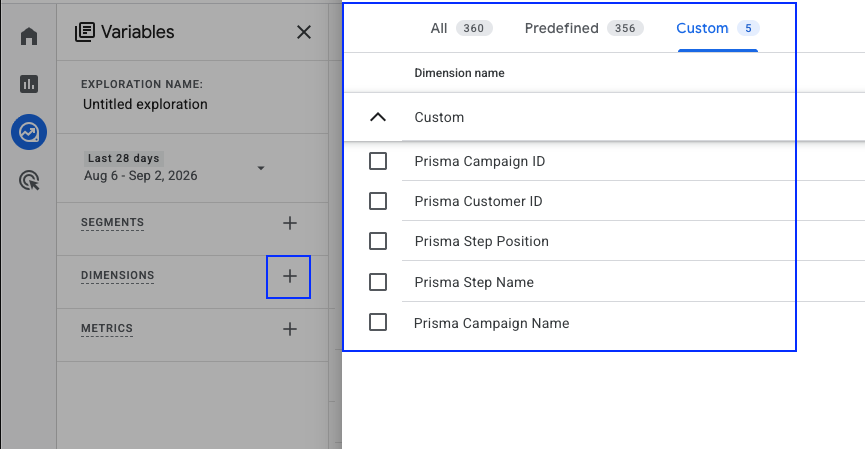
Click the + next to Dimensions, and select all five Prisma custom dimensions:
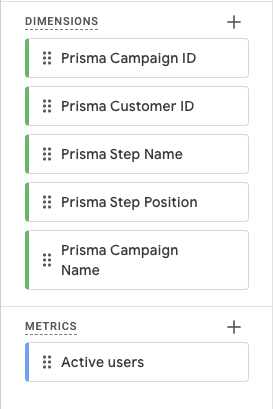
You can also include any additional dimension to break the funnel down further — geographic data, device category, or attribution parameters like source or medium are common choices. Drag the dimensions you want (and any metrics, such as Active users) into the exploration:
Change the visualization technique
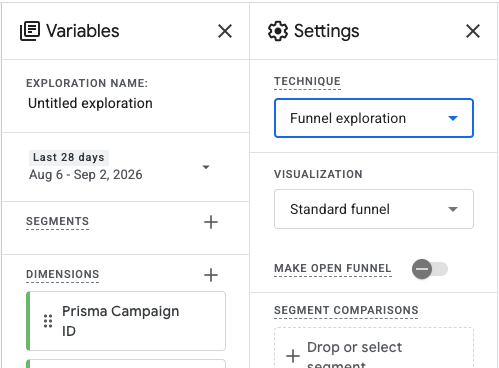
In the settings panel, set Technique to Funnel exploration and Visualization to Standard funnel:
Edit the funnel steps
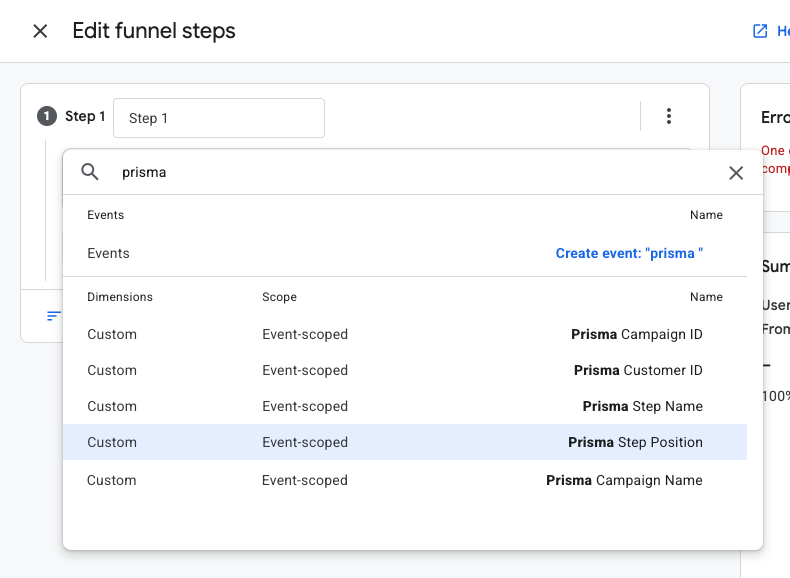
Click the pencil icon next to Steps to open the step editor. Name the first step (typically “Step 1”), add a new condition, and configure it to apply to the Prisma Step Position custom dimension:
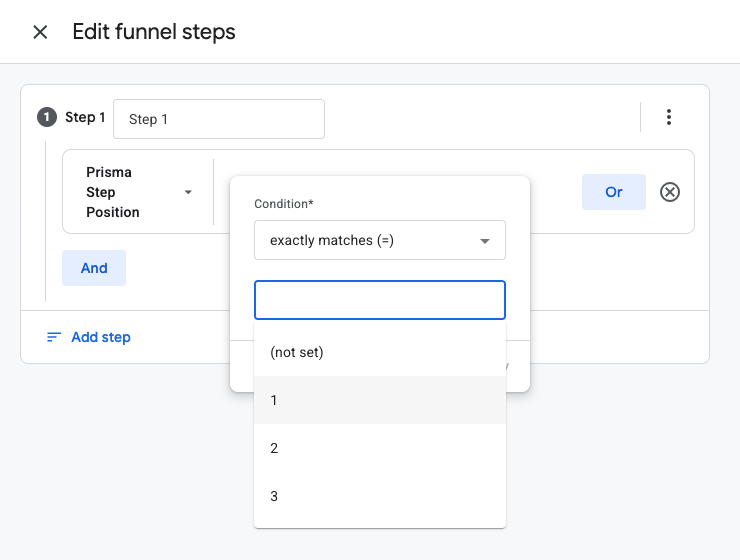
Add a filter of exactly matches 1 — you can either pick the value from the dropdown or simply type it:
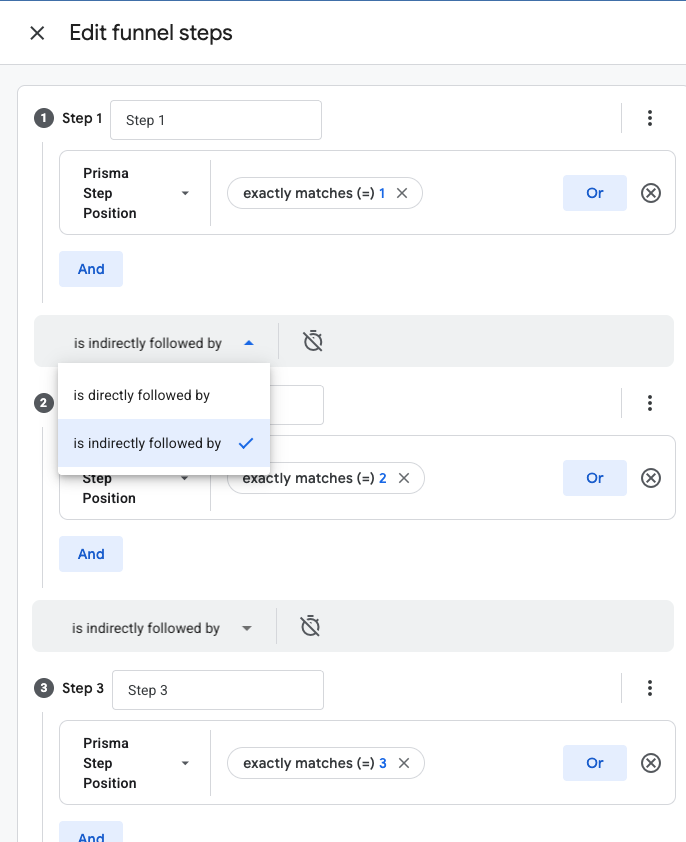
Repeat this for as many steps as your funnel has — typically 3 to 4 — matching 1, 2, 3, 4 respectively, and make sure each step transition is set to is indirectly followed by. GA4 automatically records other events (page_view, user_engagement, scroll, etc.) alongside Prisma’s funnel_step events; requiring the next step to be directly followed by would exclude genuine progress whenever one of those automatic events lands in between, understating conversion at every stage:
Save the report to the Library
Use the icon on the top right to save the report to the Library:

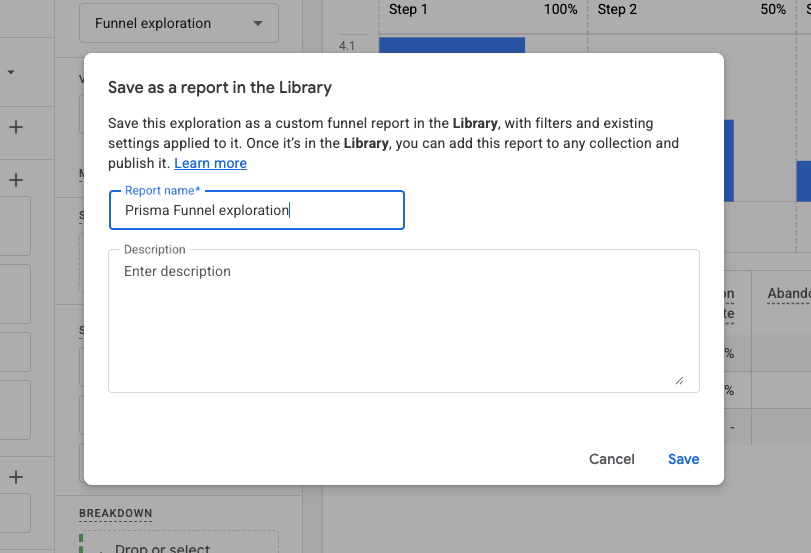
Give it a name, for example Prisma Funnel exploration, and save it — this is the name that will show in the GA4 UI once it’s published:
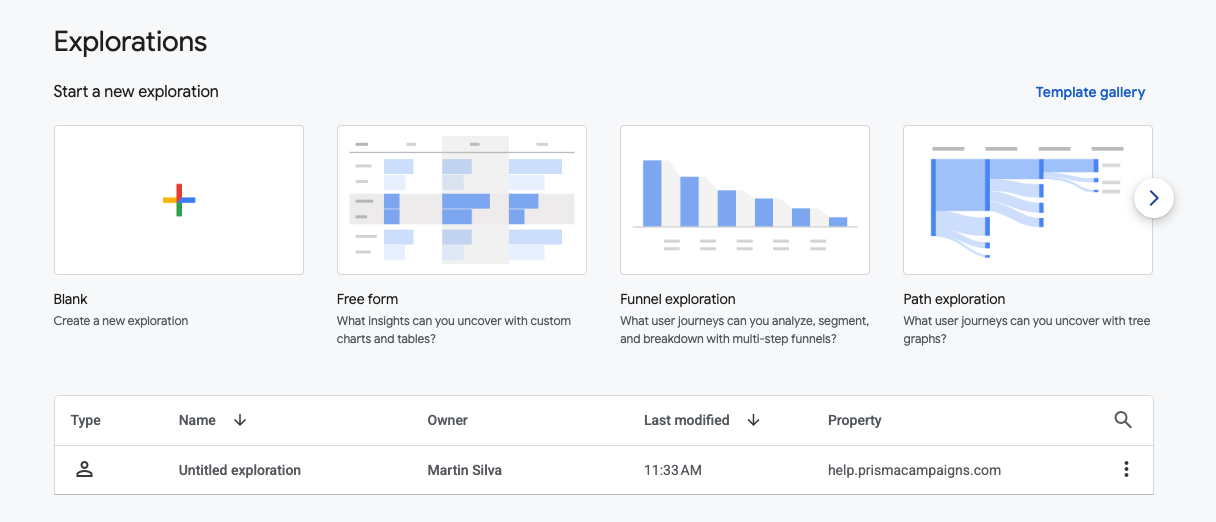
Back in the explorations list, the one you just created will still show as Untitled exploration — this is expected behavior in GA4. You can rename it from there too, using the three-dot menu on the right:
Publish it as a standard report
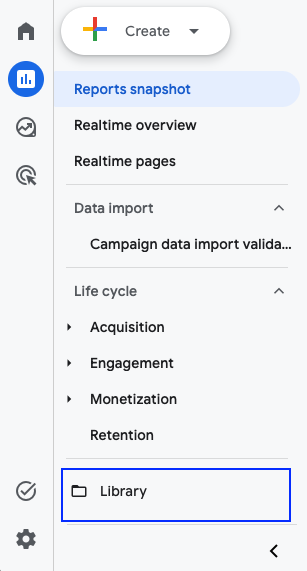
Saving to the library doesn’t make the report navigable on its own — it still needs to be added to a collection and published. In the Reports section, click the Library icon at the bottom of the left-hand menu:
Your saved report appears under Reports, below the existing collections:
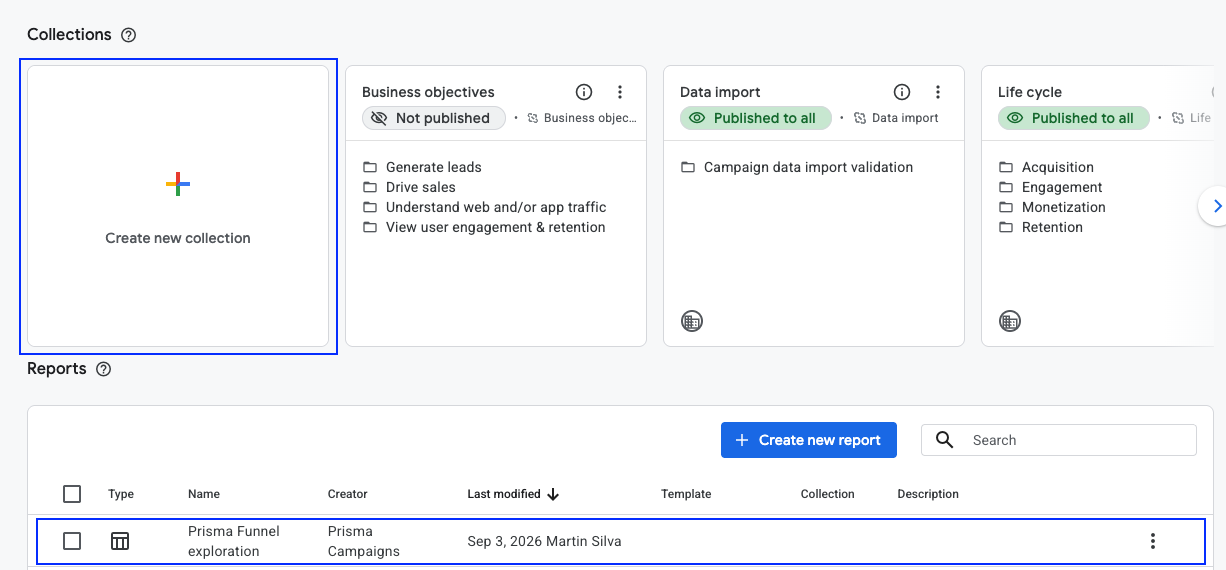
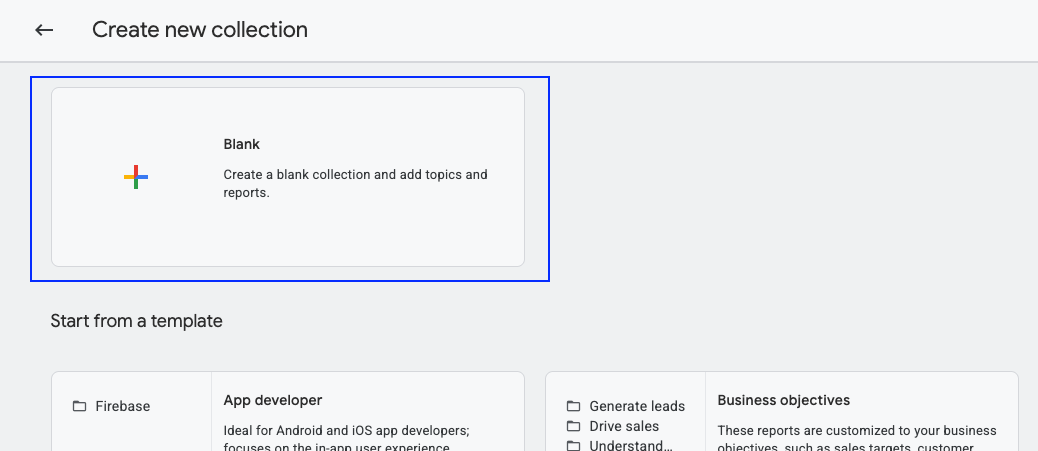
Click Create new collection, and choose Blank to start from scratch:
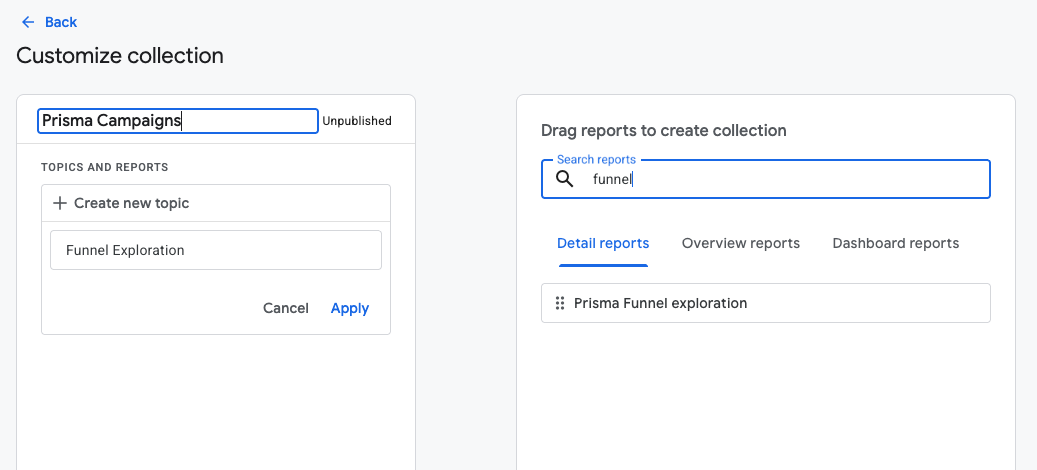
Give the collection a name, create a new topic inside it, and search for your newly created exploration in the panel on the right so you can drag and drop it onto the topic:
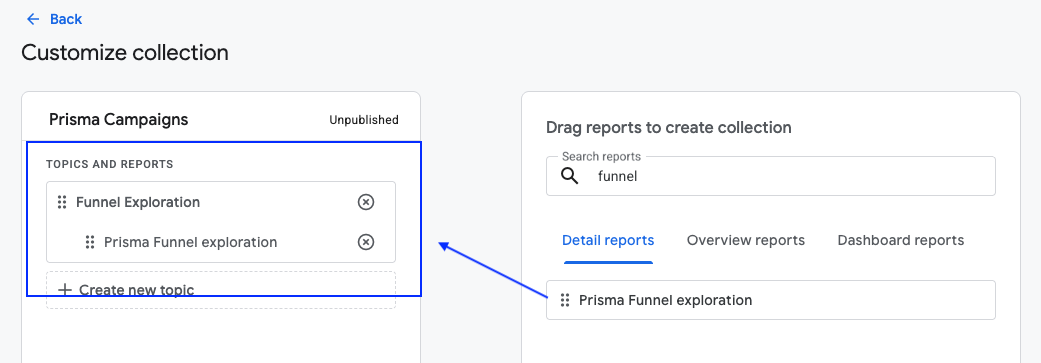
Drag the report from the panel on the right and drop it onto the topic:
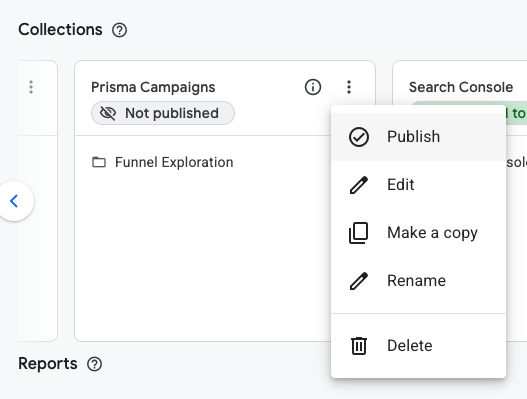
Back in Collections, open the three-dot menu on the collection you just created and select Publish:
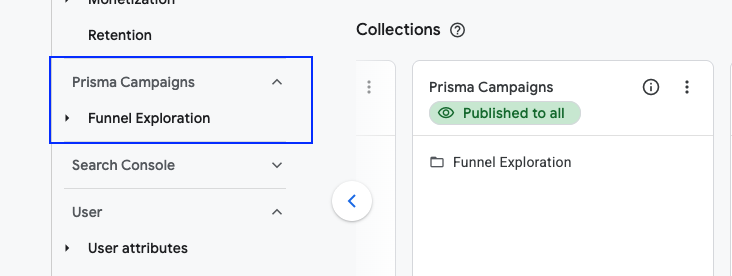
Your report is now available as part of the standard GA4 UI, under the Reports section:
 Related Articles
Was this article helpful?
On this page