Sending Your First Bulk Email
In this tutorial we will explain how to send an email message to many individuals at once. As the first step, we will create a new segment to target persons who are older than 35 years based on a spreadsheet with customer data. Finally, we will configure a campaign to use that segment, schedule an email blast and view the resulting statistics.
Before You Start
Prisma Campaigns relies on two main delivery channels to send emails to your customers: Mailgun and a regular SMTP server. To set up any of these tools, please refer to Configuring Mailgun as Email Service Provider or Configuring SMTP to Send Emails. Also, kindly download this spreadsheet to your computer and ensure that you populate the email column with valid email addresses and that dob is formatted as yyyy-mm-dd before you proceed with the rest of this tutorial.
Create a Segment
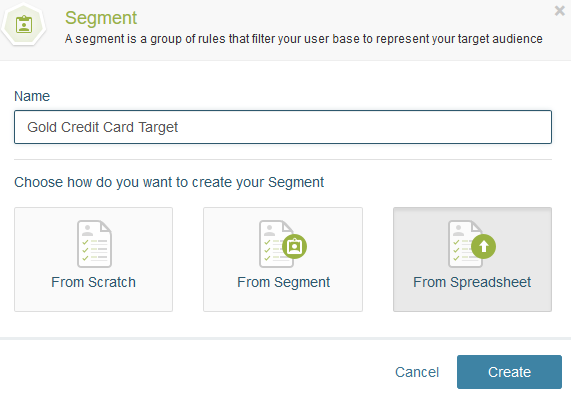
To begin, go to Segments/All Segments and click New Segment. Next, name it Gold Credit Card Target and select From Spreadsheet before you hit the Create button:
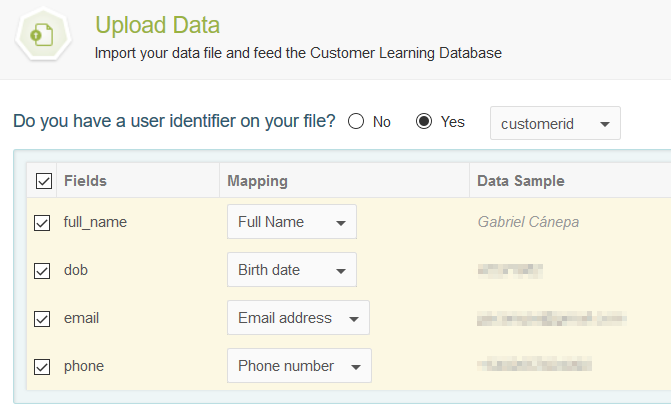
In the next screen, click Upload New File and drop the spreadsheet you downloaded earlier into the upload area. You will then be prompted to associate the spreadsheet columns with the corresponding fields of the Prisma Campaigns internal database. For this specific example, this means the following as observed in the image below:
| Spreadsheet | Database field name |
|---|---|
| full_name | Full Name |
| dob | Birth data |
| Email address | |
| phone | Phone number |
It is important to note that the spreadsheet that was just imported into the tool becomes part of your customer base. As such, it can be used in the future without the need of uploading it again. For more information on uploading spreadsheets with customer information, please refer to How to Upload Customer Information From a .csv File.
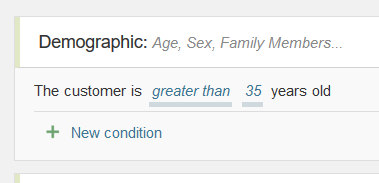
Now we will filter our target public, meaning customers who are older than 35 years:
When a segment is created using a file as in this case, you can further filter the customers by adding other conditions as described in the examples after step 5 of Targeting a Campaign to Men Under 30.
The number of matches will change based on how many customers from the spreadsheet meet the condition above. After you click the Save button on the upper right corner, you will be able to use this segment in a campaign.
Configure a Campaign
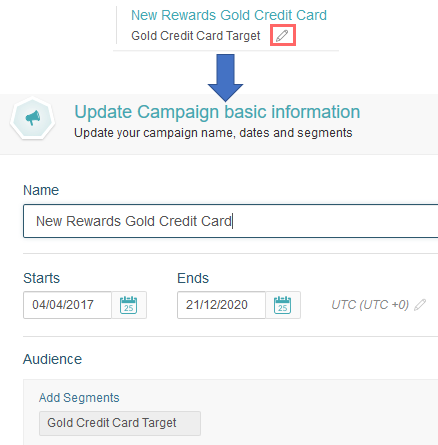
Once you have created a segment as illustrated above, the next steps consist in configuring a campaign to segment based on that criteria. This can be done by browsing to the campaign settings and adding the segment under Audience. The image below shows that New Rewards Gold Credit Card will utilize the segment we created earlier.
If you want to change the target segment later, you can do so by clicking on the pencil icon and choosing the new segment.
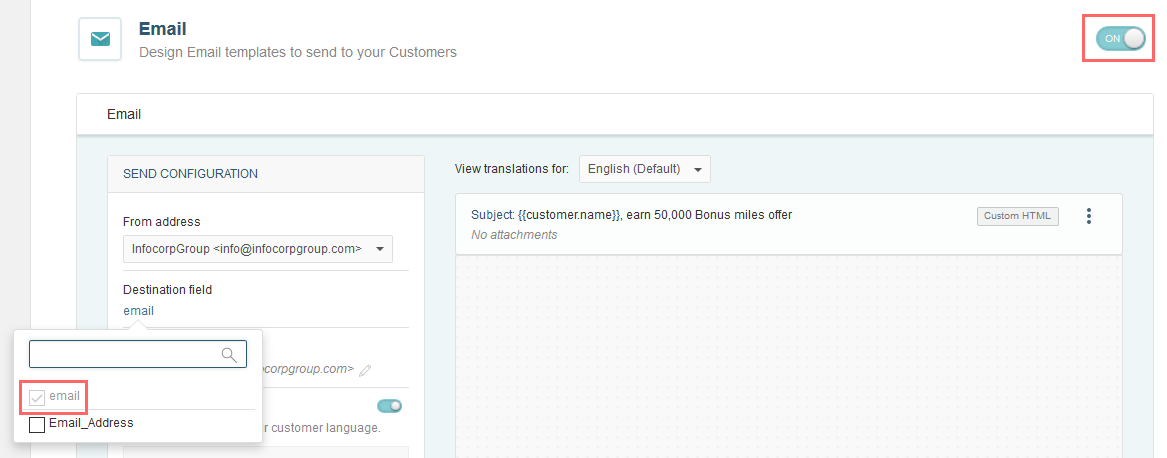
Next, go to the Leads section and ensure that the Email channel is enabled. The From addresses are those that were added in the mail setup as explained in the how-tos mentioned previously. On the other hand, Destination lists the field(s) -email in this example- from the customer data model where the tool will look for email addresses. As you can see, this matches the column name of the spreadsheet we uploaded earlier. If the same customers had other email addresses loaded in another field (Email_Address, for instance), you can check that field if you wish to send the message to those as well.
Don’t forget to save and publish the changes before moving forward.
Schedule a Blast and View Statistics
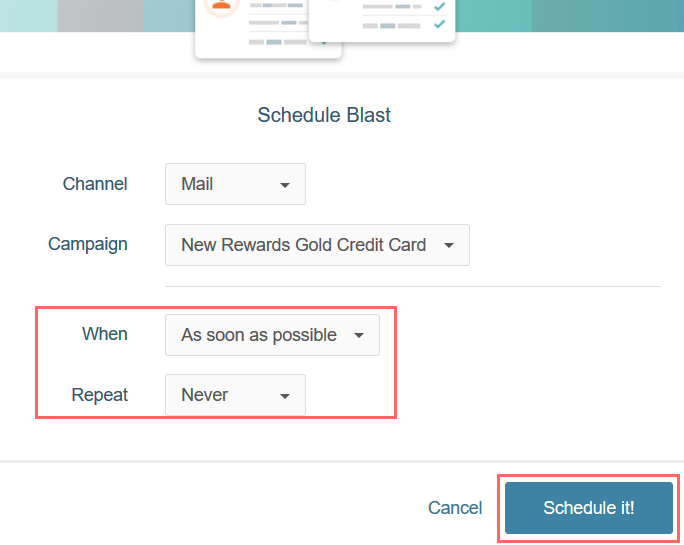
To schedule an email blast to execute immediately, follow the steps outlined in Send a Recurring Email Every Monday but select As soon as possible and Never from the When and Repeat dropdown lists and then click Schedule it!:
In other scenarios, you can choose different execution methods (starting on a given date or as soon as possible) and frequency (daily, week days only, weekly, biweekly or monthly for recurring blasts) based on your broadcasting needs.
The statistics resulting from the blast are available under Analysis in the Outbound tab after you select New Rewards Gold Credit Card. There you can filter by channel (check Email only) as shown below:
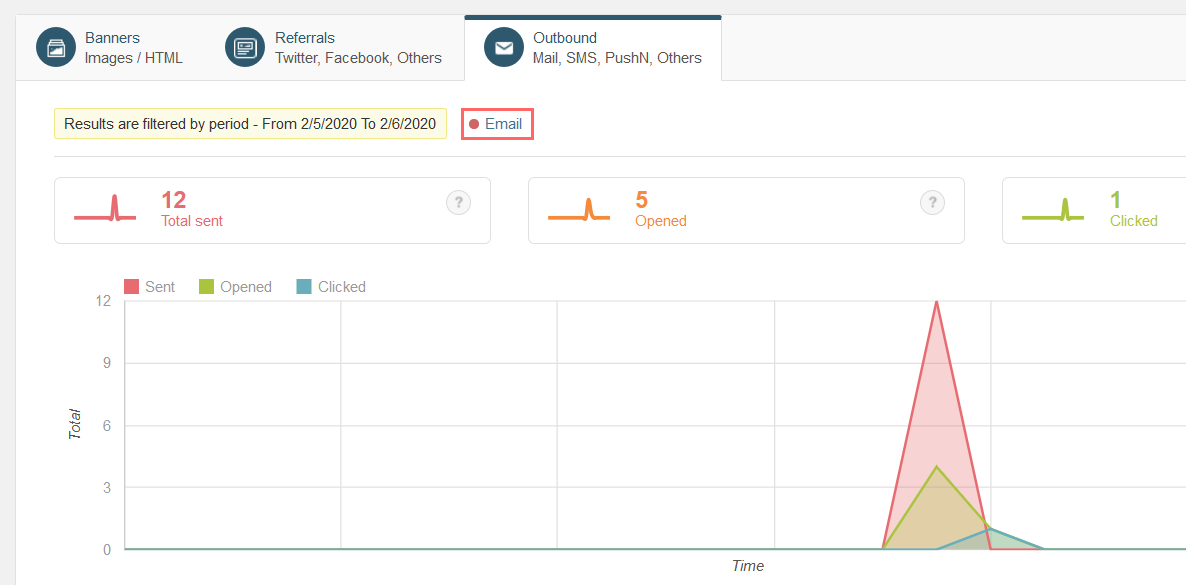
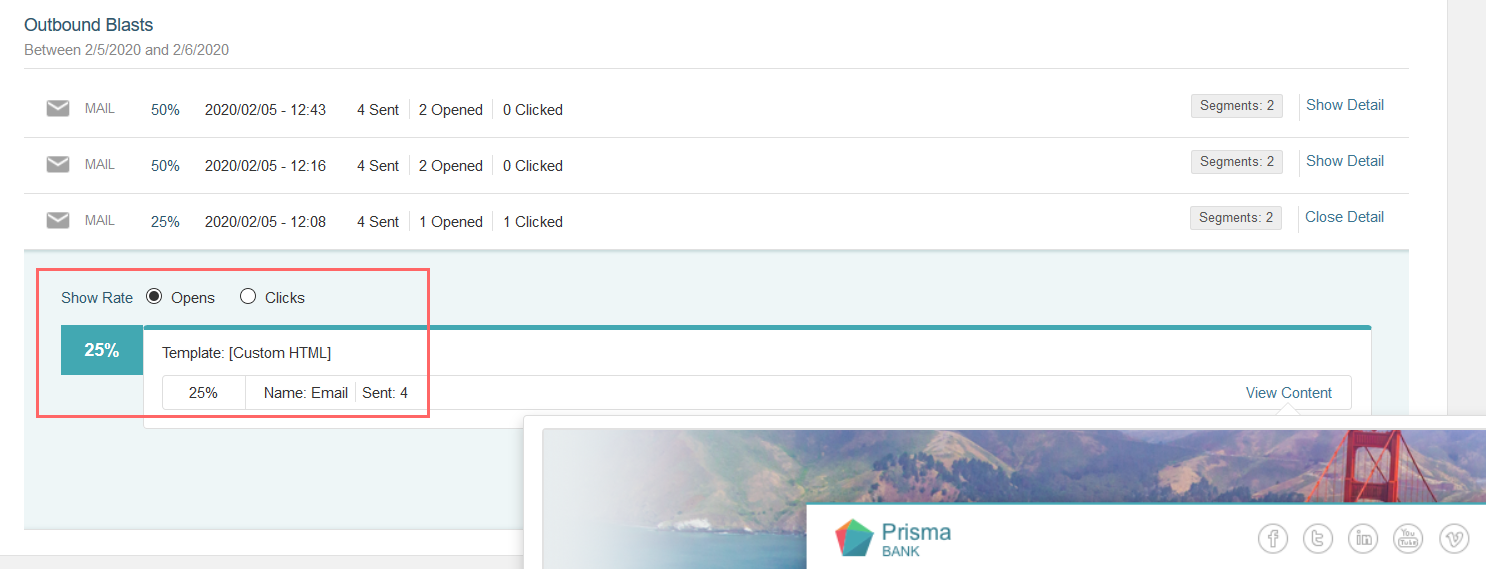
After selecting the channel, the results are split into two separate sections. First, a summary of total emails sent, opened and clicked during the time window under consideration as you can see above. These last two (opened and clicked) represent the unique opened and clicked emails. Said another way, these numbers are not increased when the same customer opens or clicks the same email more than once. Second, a report of all the outbound blasts with the chance to view the details - including the message content that was sent each time. By default, this section will display the open/sent rate (25% due to 4 sent and 1 opened in the following image) but you can switch to clicks/sent if you wish by choosing the corresponding option:
If your customers are not receiving the email messages, be sure to double check your delivery channel settings in Settings/Email Setup.
Conclusion
In this tutorial we have reviewed the entire process of sending your first bulk email starting from scratch. For more information about planning, scheduling, forecasting and prioritization please refer to Orchestration in the user manual.
Related Articles
On this page