Jumio Integration
Through the integration with Jumio, Prisma Campaigns allows implementing identity verification steps in the campaign funnel. The following steps describe the process to set up the integration on a web interface.
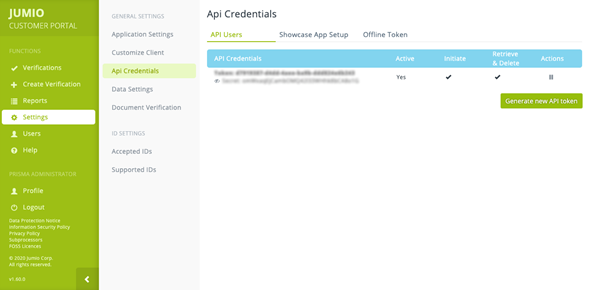
To accomplish this goal, the user needs to create an application in Jumio to get the token and the API secret that are required to use the service. Once done, both will be available in the Jumio customer portal under Settings/Api Credentials as shown below:
Next, the configuration in Prisma Campaigns is as follows:
-
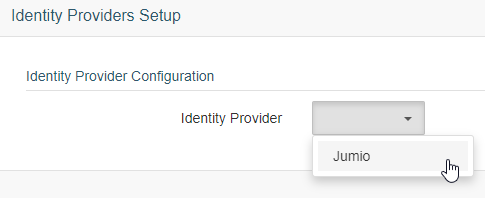
In Settings/Identity Providers, choose Jumio from the dropdown list:
-
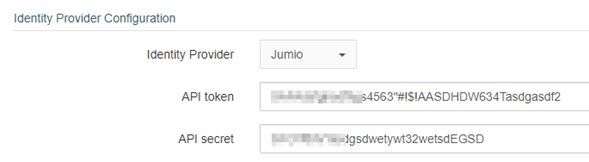
Enter the API token and the API secret you generated in Jumio previously:
-
In Id Workflow the user will find a list of options to indicate the process that the customer will follow to perform the identity verification in the funnel:
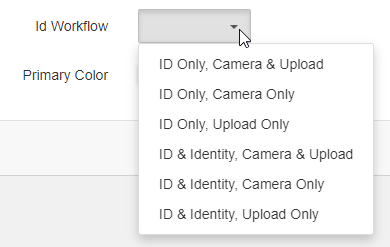
-
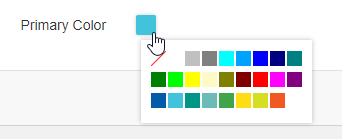
If preferred, the user can choose the background color for the Jumio interface through Primary Color:
Finally, the changes need to be recorded by clicking Save.
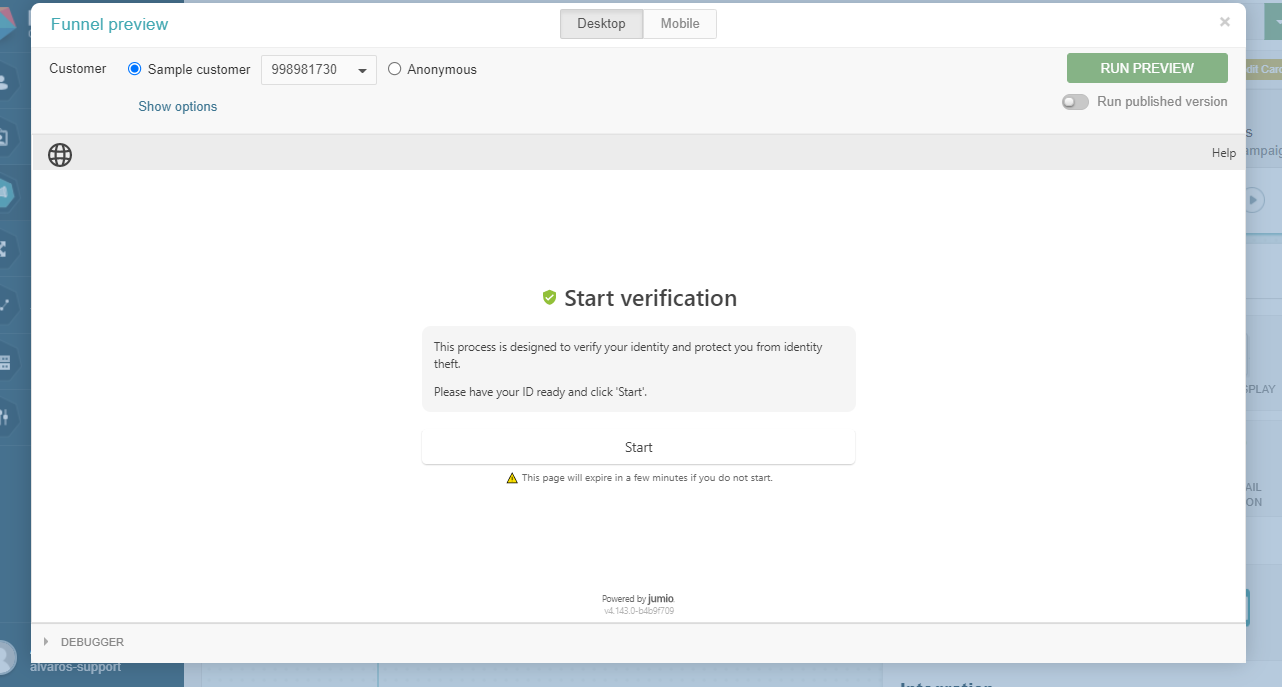
Integration in a Funnel
Once the integration is complete, a Jumio identity verification step can be added into a campaign funnel.
In order to do so, the user will need to navigate to the funnel and select the Jumio button under the ID Providers toolbar:

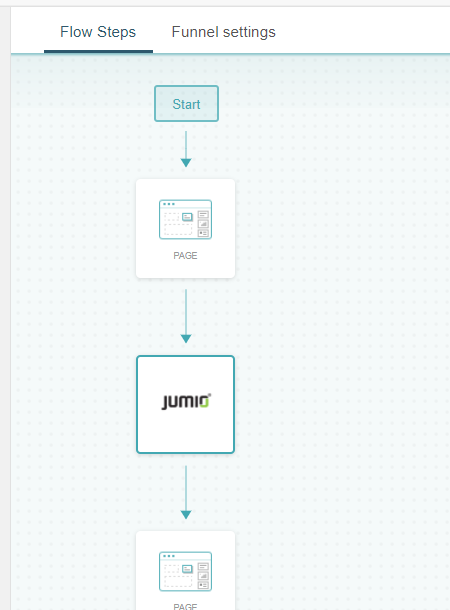
Click and drag the Jumio button, place it in the funnel and connect it to the respective previous and concurrent steps:
After placing it in the funnel, the user has the option of editing the step settings. First click on the step, and then select Edit Step in the settings menu to the right:
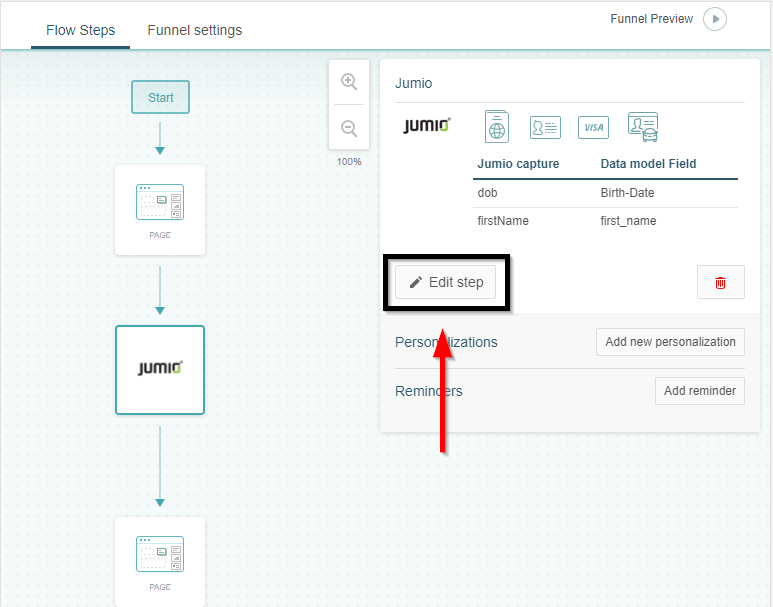
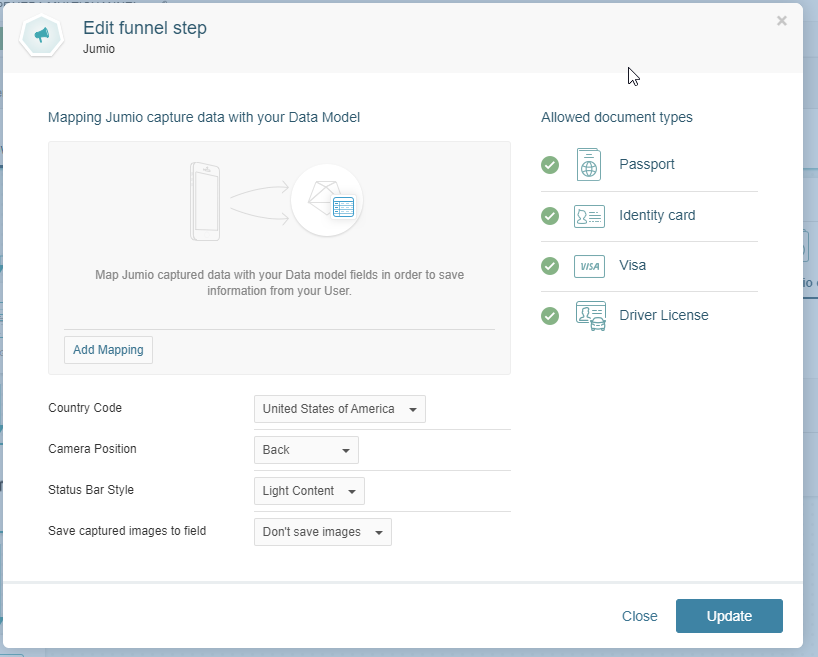
In the Edit funnel step screen the user will be able to choose from a list of documents available to be used for the verification and map the information captured in Jumio to pre-existing fields in the data model, as well as choosing the settings for the Jumio step (Country Code, Camera Position, Status Bar Style and Save the captured images)
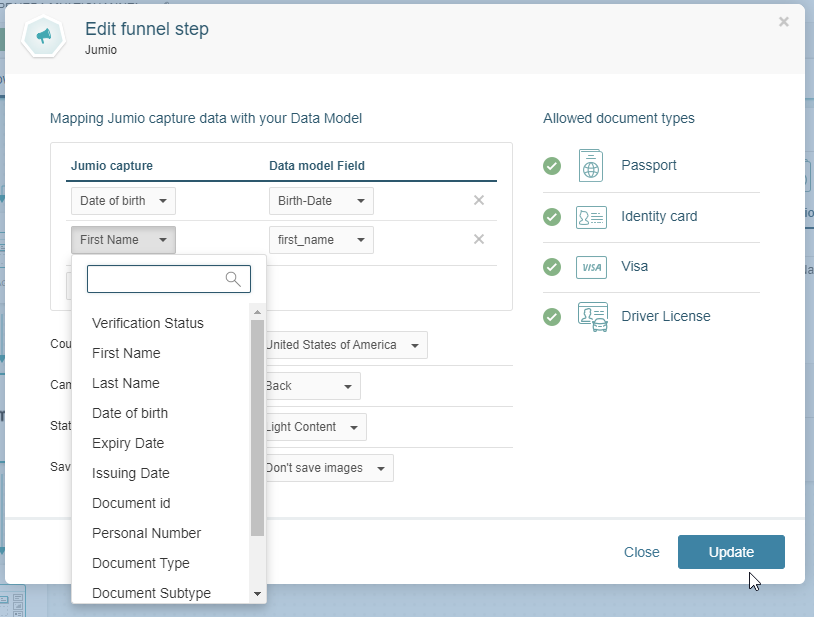
If the user chooses to map information captured in Jumio to fields in the data model, they will need to click on Add Mapping and then select the corresponding fields from Jumio and the data model, as follows:
After the funnel step is set up, the funnel will be ready to be saved with the Jumio integration working. Remember all changes made to a campaign need to be published after being saved in order to go live.