Distributing Large Campaign Sends Over Time
Split blasts are a powerful feature that allows to orchestrate a campaign with a large number of qualifying customers. It does so by breaking down the campaign into a sequence of smaller, distributed blasts sent sequentially over a specific period. This is particularly useful for preventing the overload of the call center or the financial institution and ensuring timely delivery of the communications so they are not flagged as spam.
Unlike the regular blast, where conditions are evaluated when sending, in the split blast this is done when scheduling. Even if changes are made to the segments between the time it is defined and when it is executed, the list of customers to whom the communication will be sent is not modified. For this reason, it is recommended to schedule the blast to start shortly after creating it to ensure the audience is current.
Configuring a Split Blast
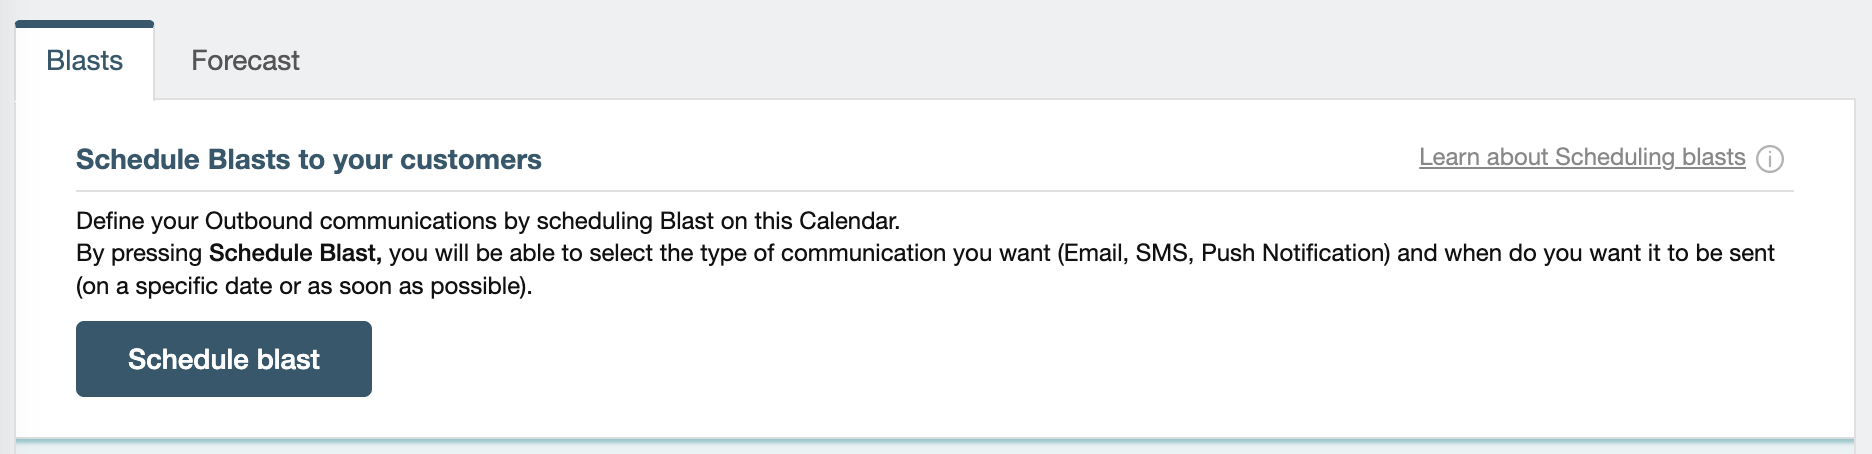
First, navigate to the Blasts tab in the Orchestration menu and click on Schedule blast:
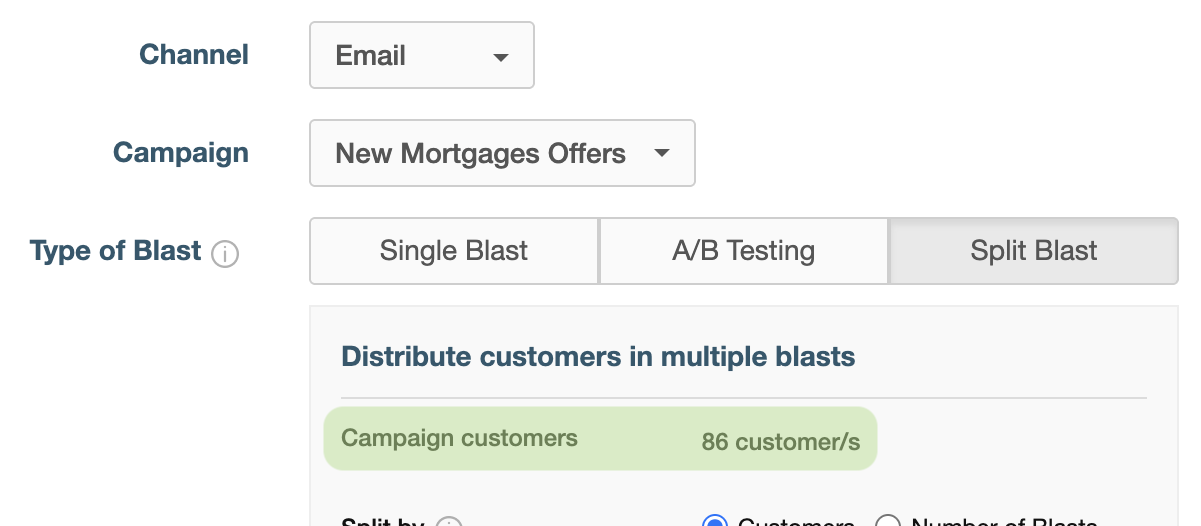
Then, choose the channel, the campaign, and the blast type (Split Blast). In the image below, you can see an example for the New Mortgages Offers campaign and the Email channel. It is important to note that the count of customers who qualify for the campaign appears next to Campaign customers.
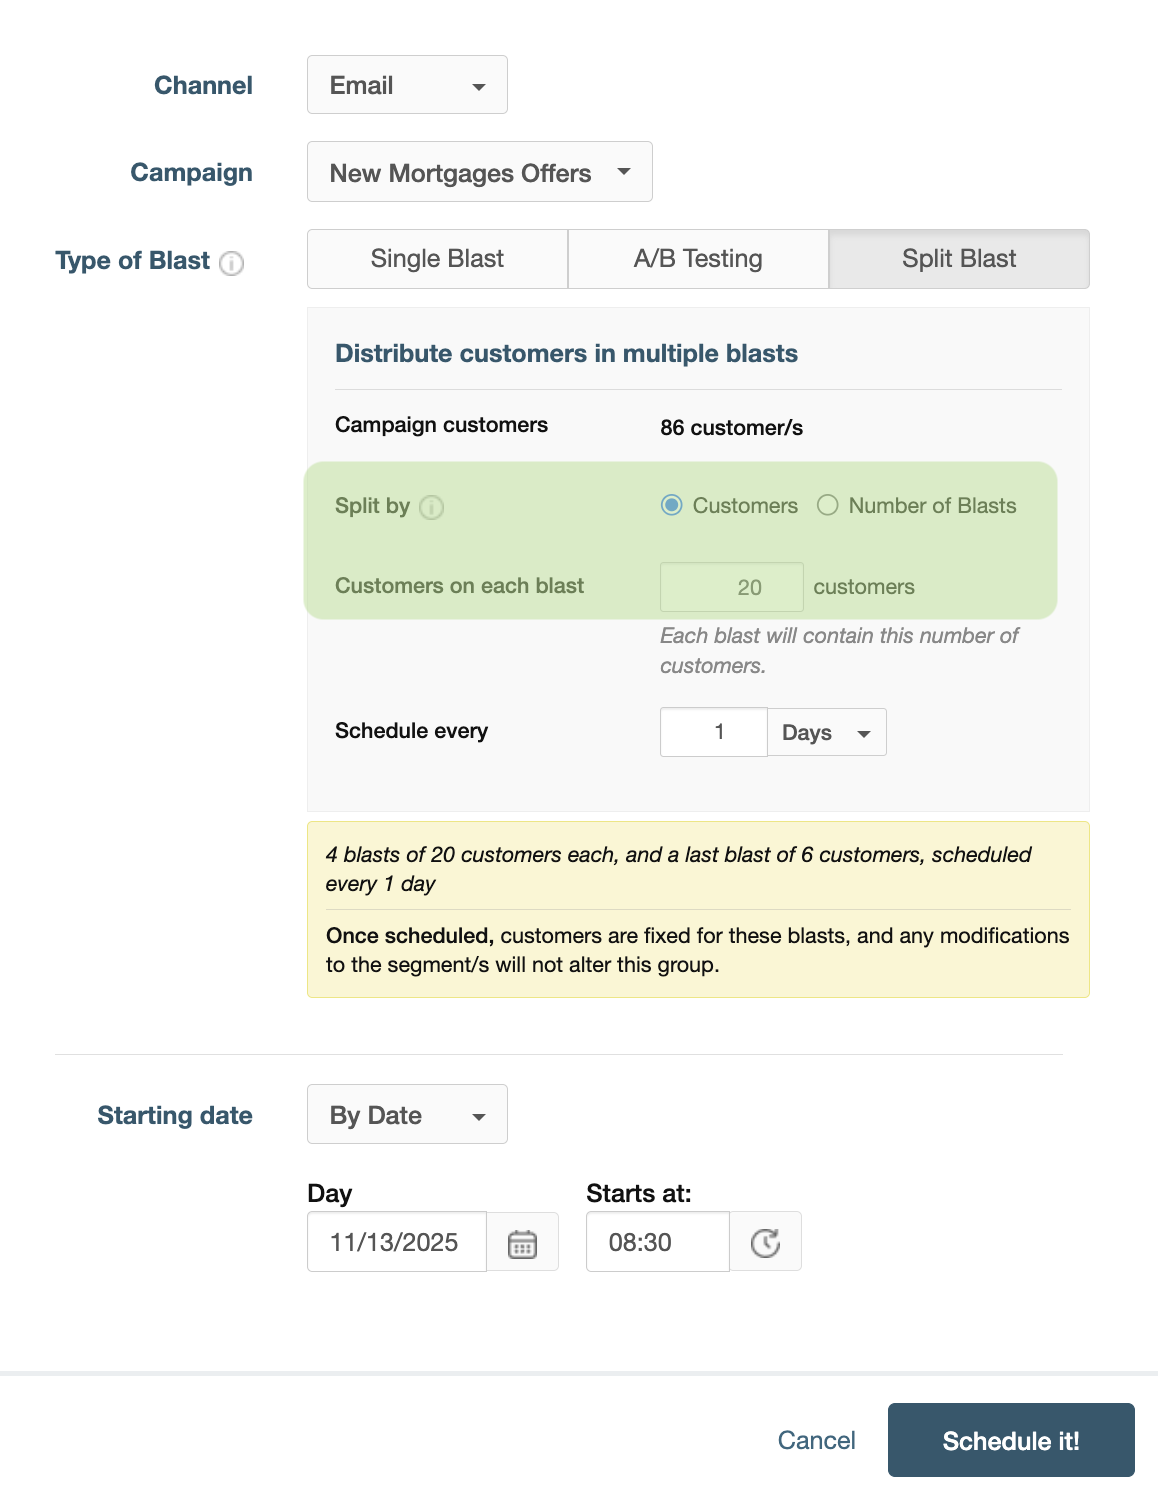
The split blast can be performed in two ways: by number of customers and by number of blasts. In both cases, you can choose a specific frequency through the options available in Schedule by (days, hours, or minutes) and Starting date (specific start date or as soon as possible). In the following examples, November 13, 2025 at 8:30 am will be used as the start date.
- Split by customers allows you to specify the maximum number of customers to include in each individual blast. In the following example, the campaign will be sent to a maximum of 20 customers per blast, which means that 4 individual blasts will be sent to that number of customers and a final one with 6. Each blast will be sent one day after the previous one.
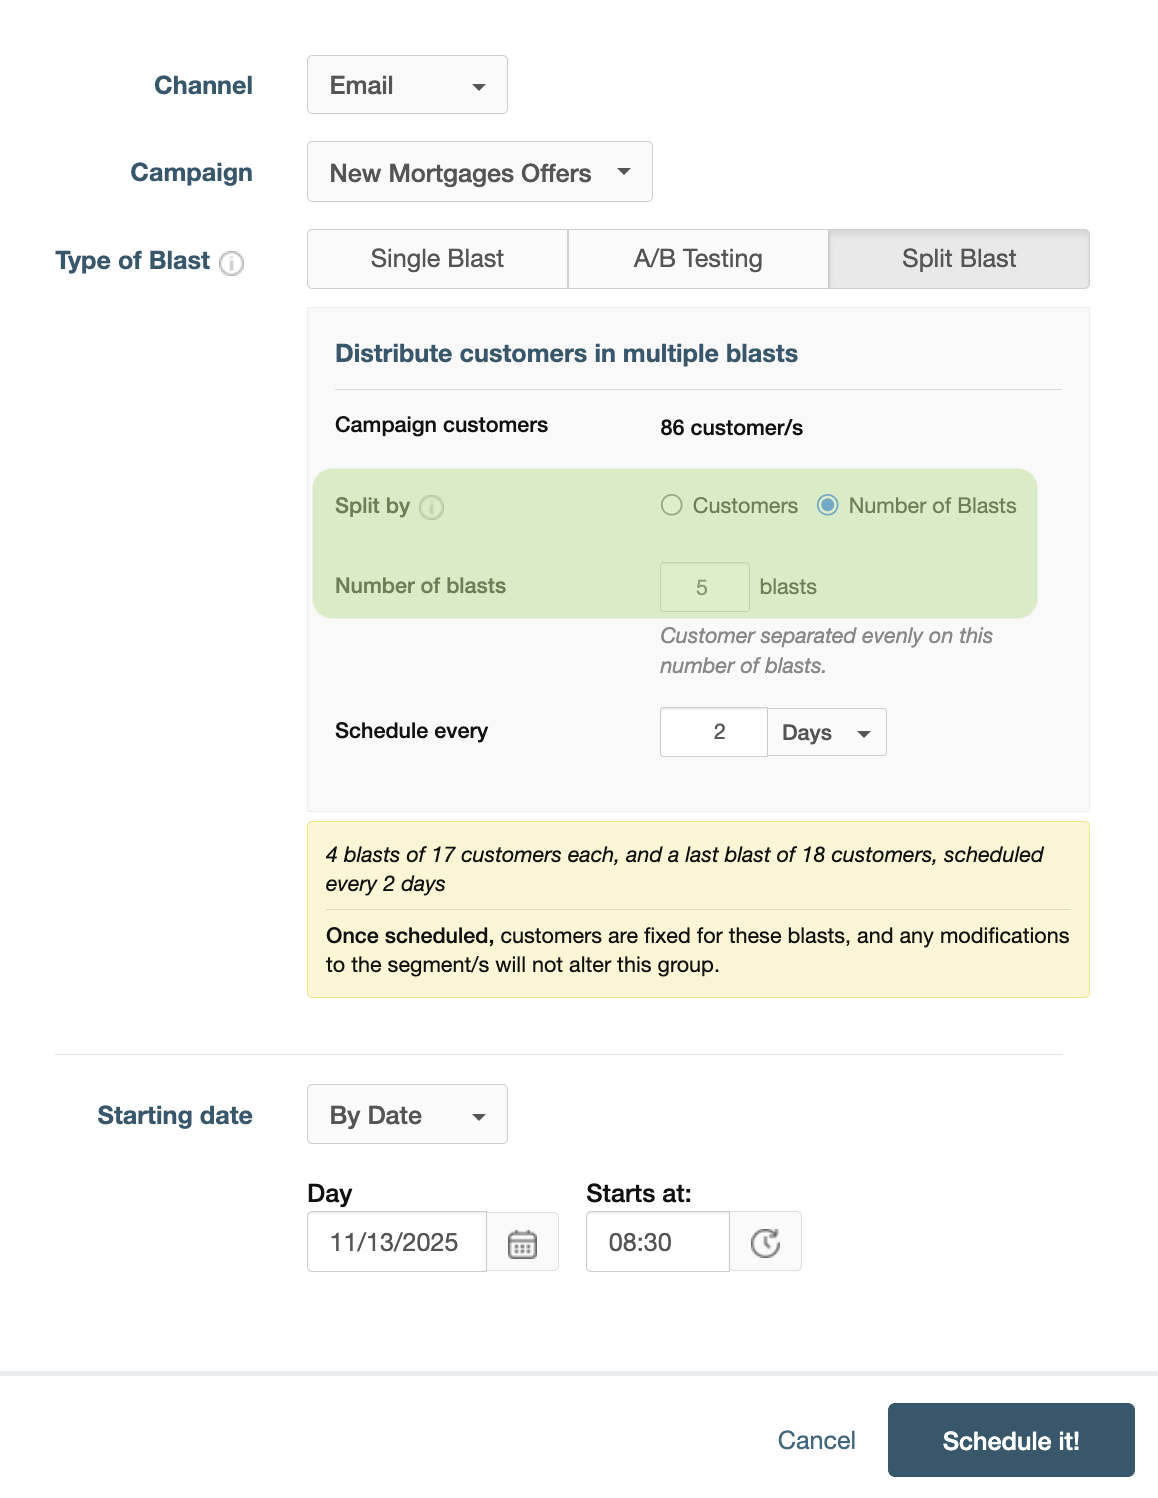
- Split by number of blasts defines the total number of smaller blasts you want to create. The system will automatically divide the total audience evenly among them. In the image below, the configuration indicates that five blasts will be sent. The first four will include 17 customers and the last one 18, this time spaced two days apart from each other.
Monitoring and Cancellation
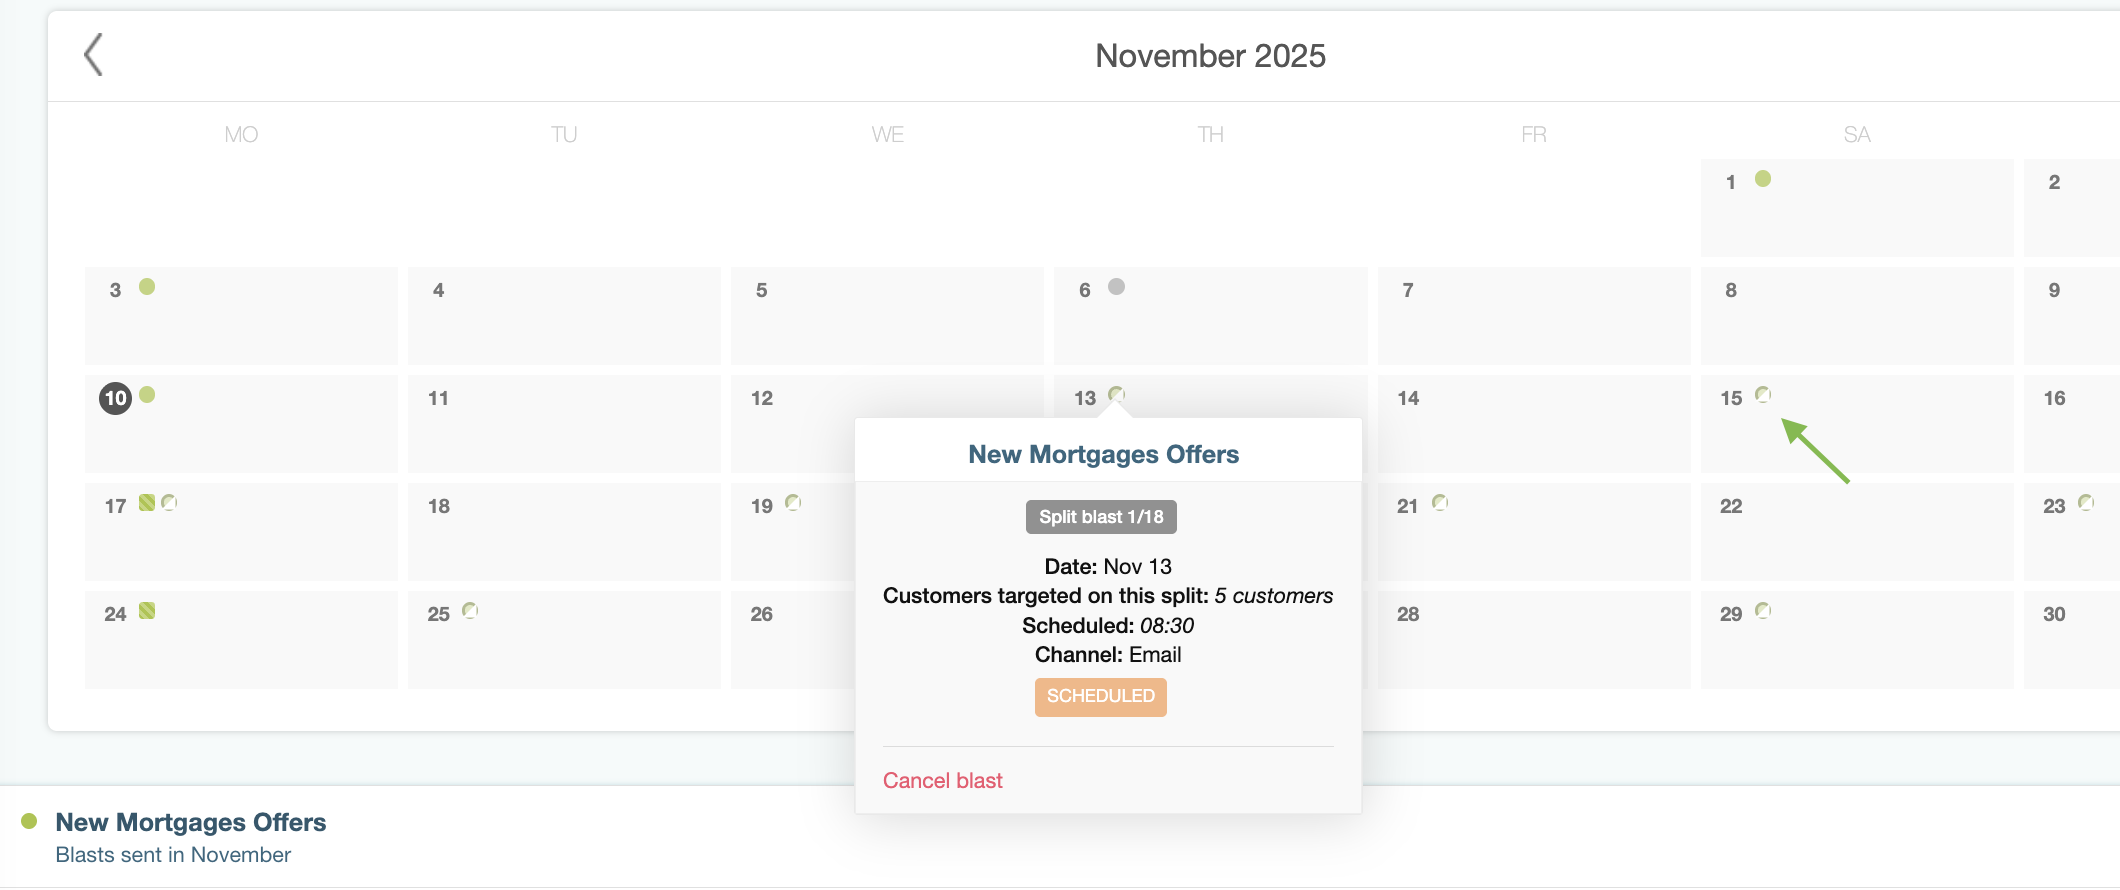
Once scheduled, you can view all individual blasts (both regular and the split ones) in the Calendar tab in Orchestration. There you can monitor the sends and cancel those that are still pending if necessary.
Important: If you cancel a split blast from this view, all subsequent ones in the sequence will also be canceled.
In the image below, you can see regular blasts with a full circle and split ones with a semicircle (one of them indicated with an arrow). By positioning the cursor over each one, you can see the relevant information for the event in question:
Analysis
The results of individual blasts will start showing up in the campaign analysis as soon as the first one is sent:
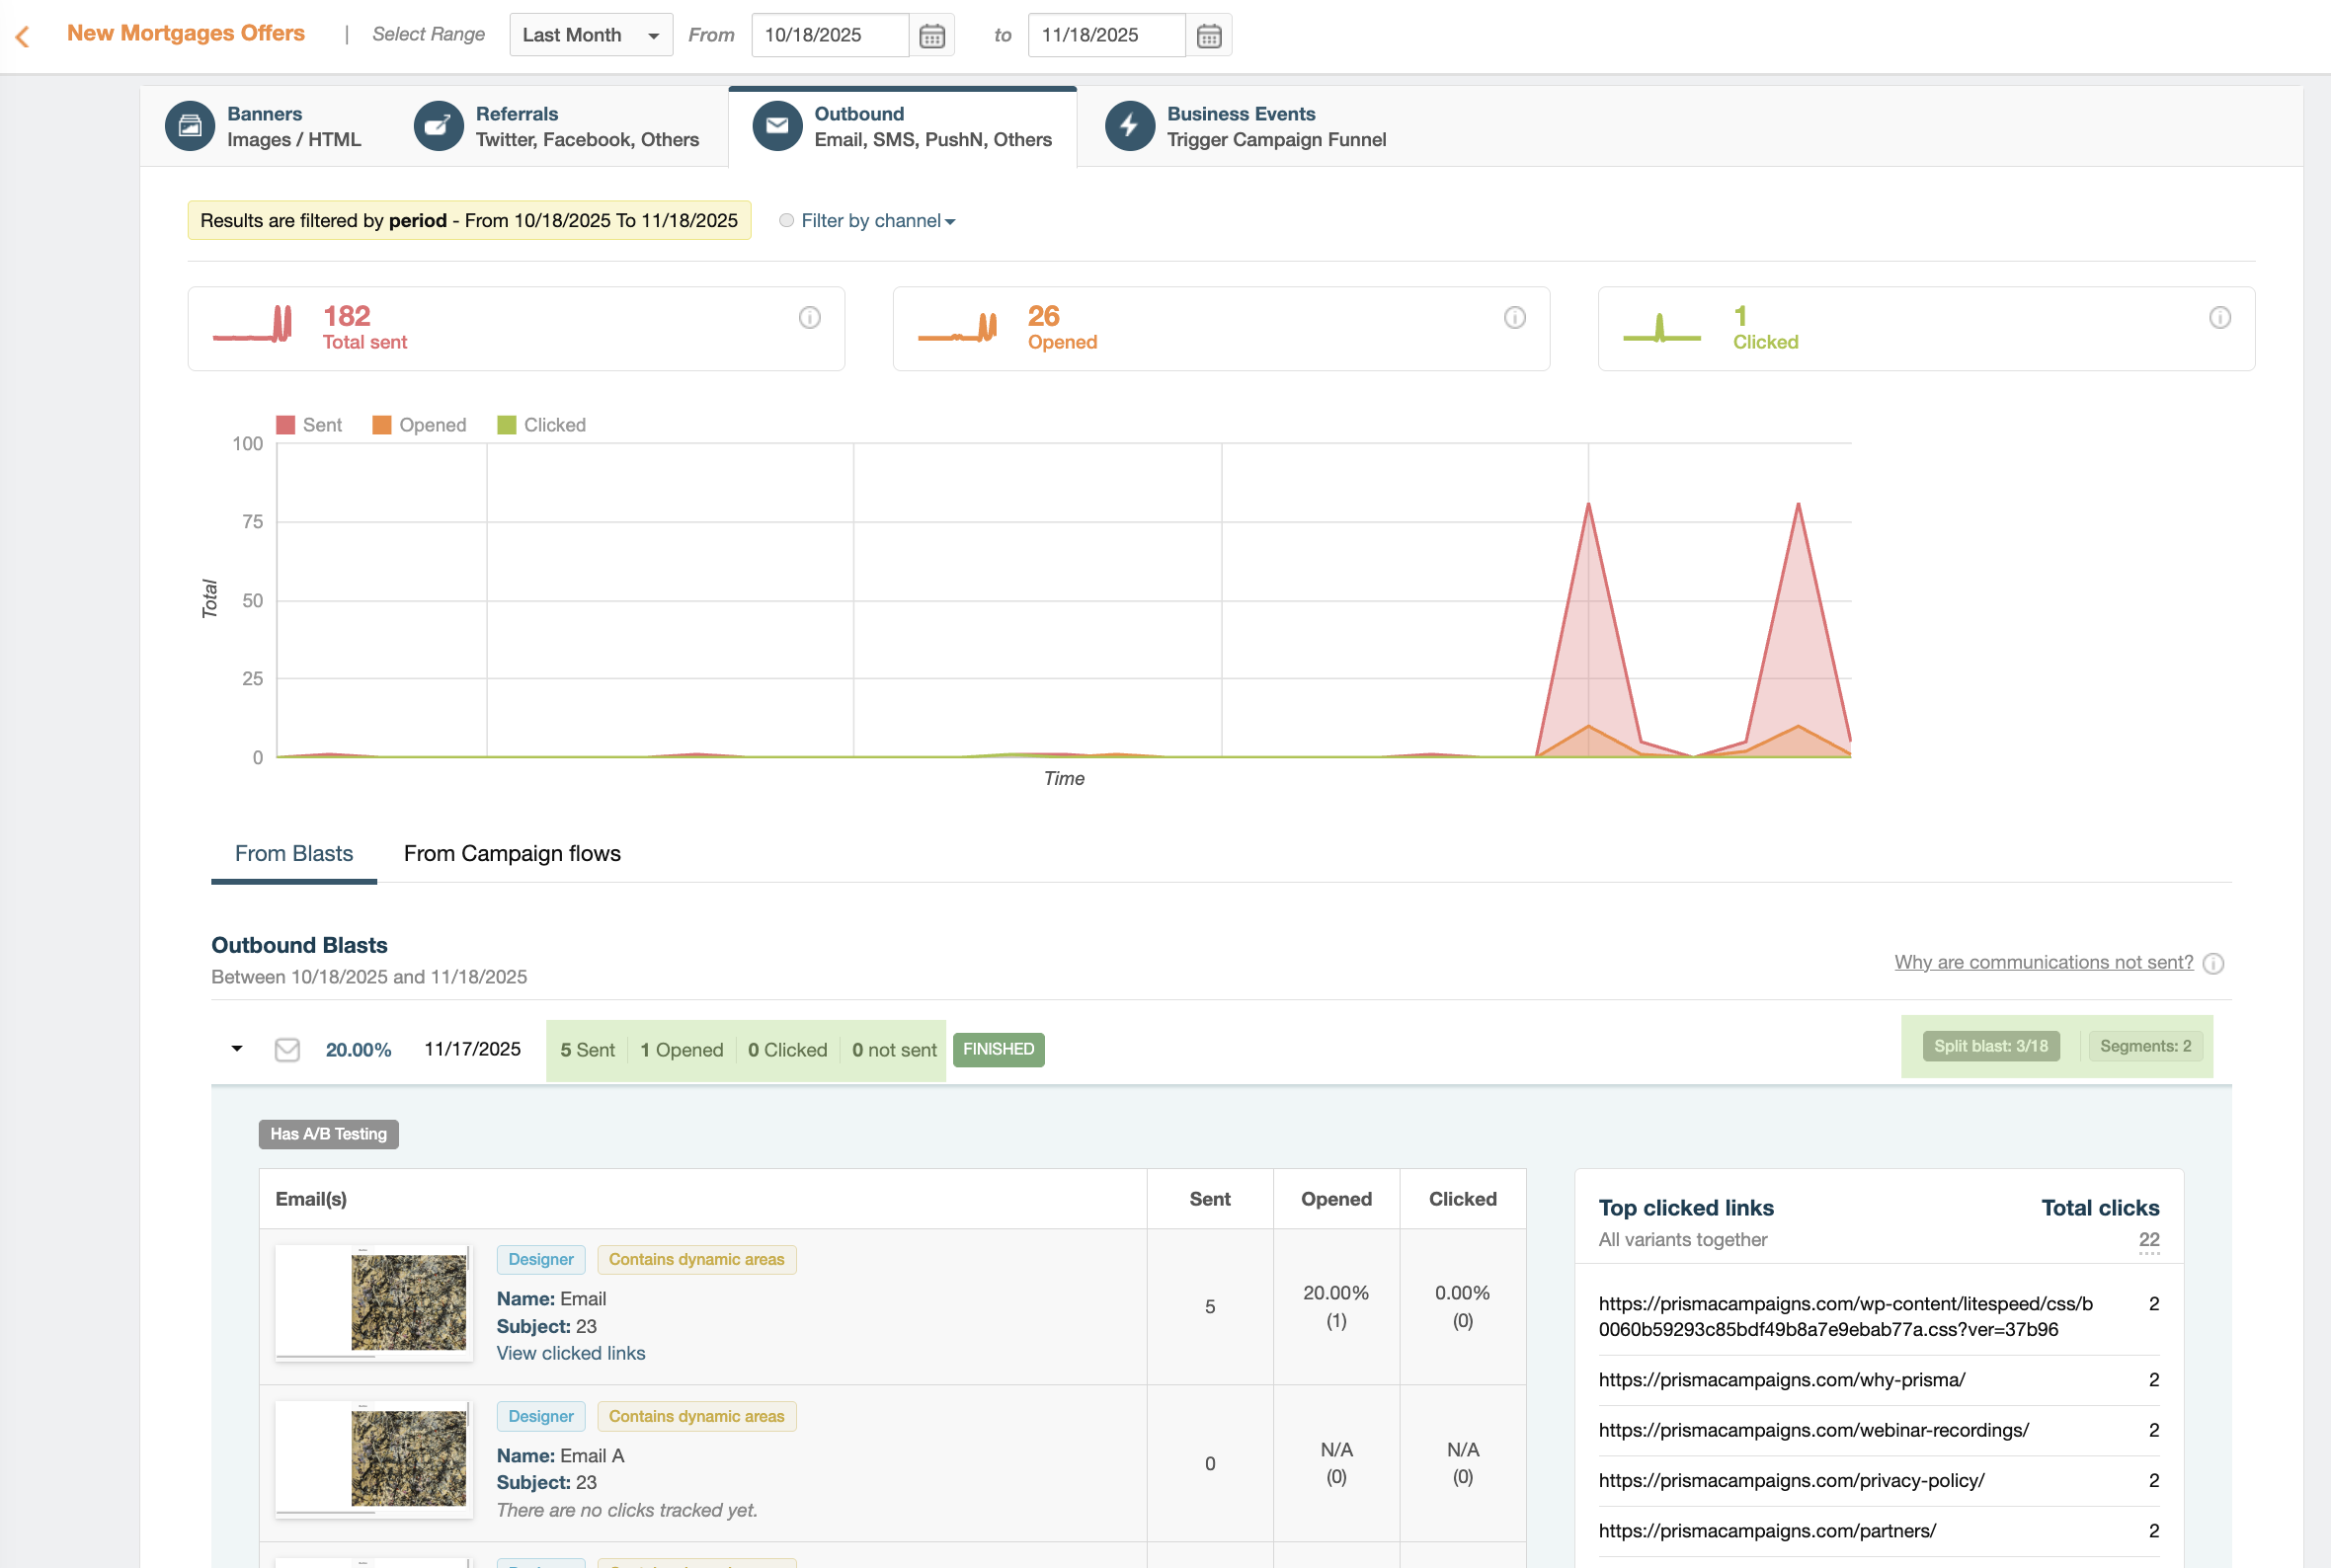
In the above image, you can see detailed information about each individual blast, including the number of emails sent, opened, and clicked. It also indicates which blast in the sequence is currently being shown (for example, Split blast: 1/18) and how many segments are included. If A/B testing is enabled, you will also see all variants and their performance metrics side by side.
Related Articles
On this page