Create an Onboarding Process
In this tutorial, we will explain how to create an onboarding process for all new members of the financial institution. To do so, we will focus on accounts that have been created during the last 24 hours.
A new onboarding process will be available after completing the below steps:
- Set up a segment to target the new members
- Create a campaign flow for that segment
- Decide which campaign sequence you want to expose to those customers
- Build the campaign flow
- Publish campaign flow and test
Creating a Segment
We will use the following data to create the segment:
customer_id,email,account_number,account_open_date
11111-GW,gwinkler@prismacampaigns.com,1818181,2021-10-25
22222-JD,john_doe@prismacampaigns.com,17171717,2021-10-25
33333-JM,juana_molina@prismacampaigns.com,19191919,2021-10-25
When you follow along with this tutorial, remember to change the
account_open_dateshould include the current date for testing purposes. In this example, we are assuming that today is October 25, 2021.
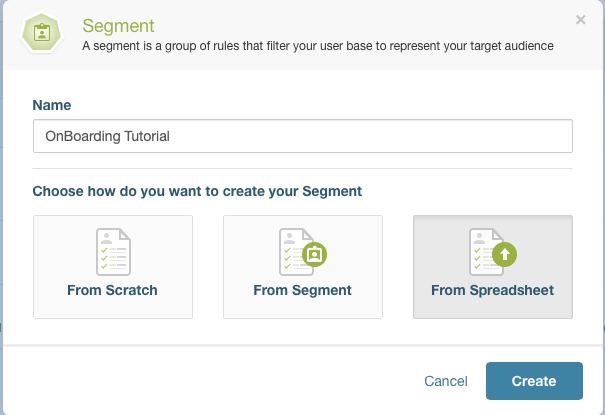
To proceed, let us copy and paste that information into a text file and save it with the name onboarding.csv. Next, we will create a new segment from spreadsheet named OnBoarding Tutorial by selecting the CSV file:
Next, map the column fields per the following strategy:
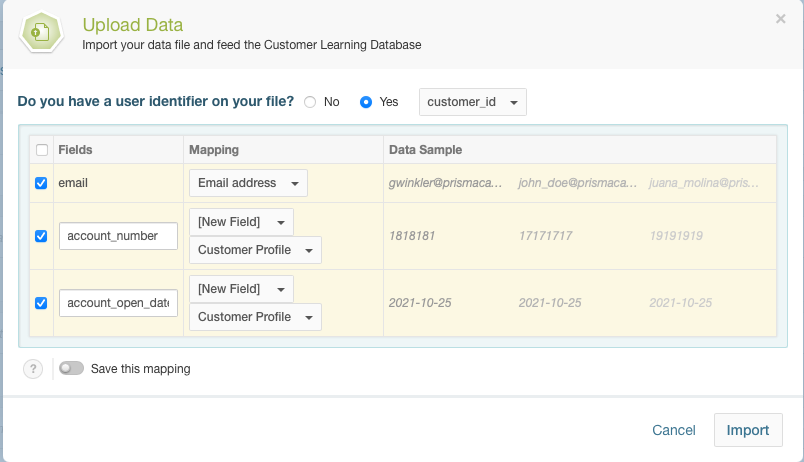
| Field in file | Maps to |
|---|---|
| customer_id | Customer identifier |
| Email address | |
| account_number | New field |
| account_open_date | New field |
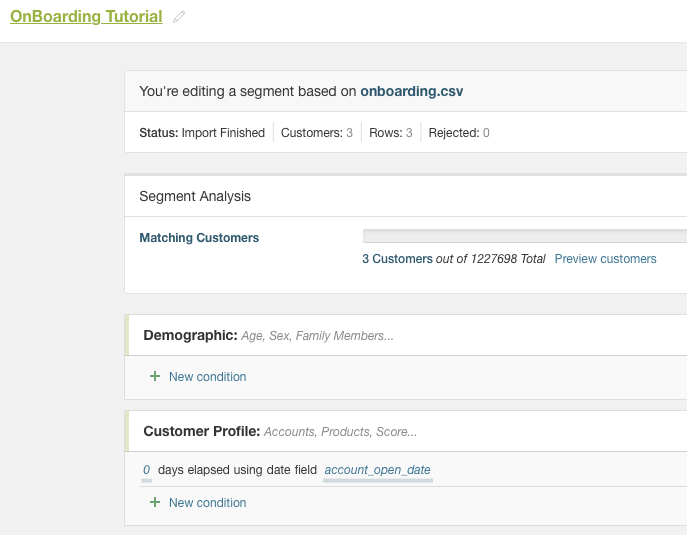
At this point, we have a segment with 3 customers out of the total from our database. Now, using the Customer Profile predefined conditions, select Days elapsed since date, and then set the condition as 0 days since account_open_date. You should still have the three matching customers who opened the account today:
Create a Campaign Flow for the Segment
In Campaigns, we will set up a new campaign and choose Campaign Flows as follows:
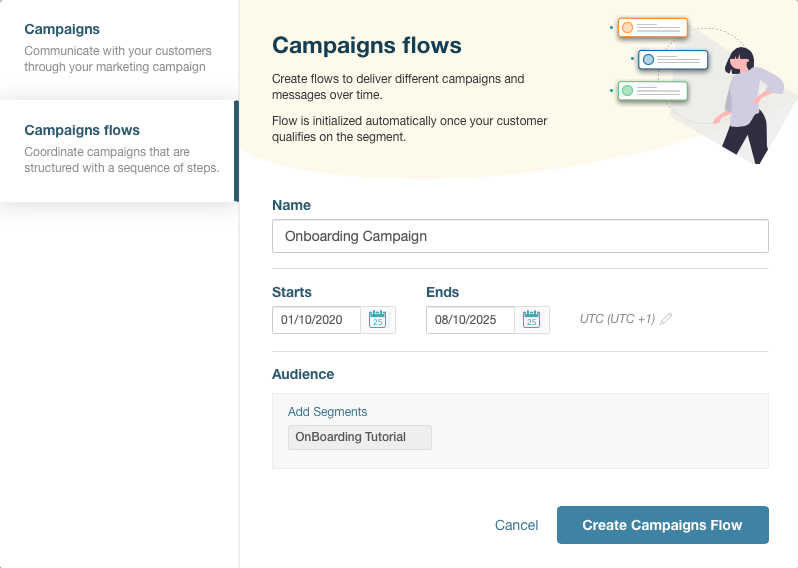
As a result, you should have a campaign with an empty flow.
Decide Which Campaigns Will Be Part of the Flow
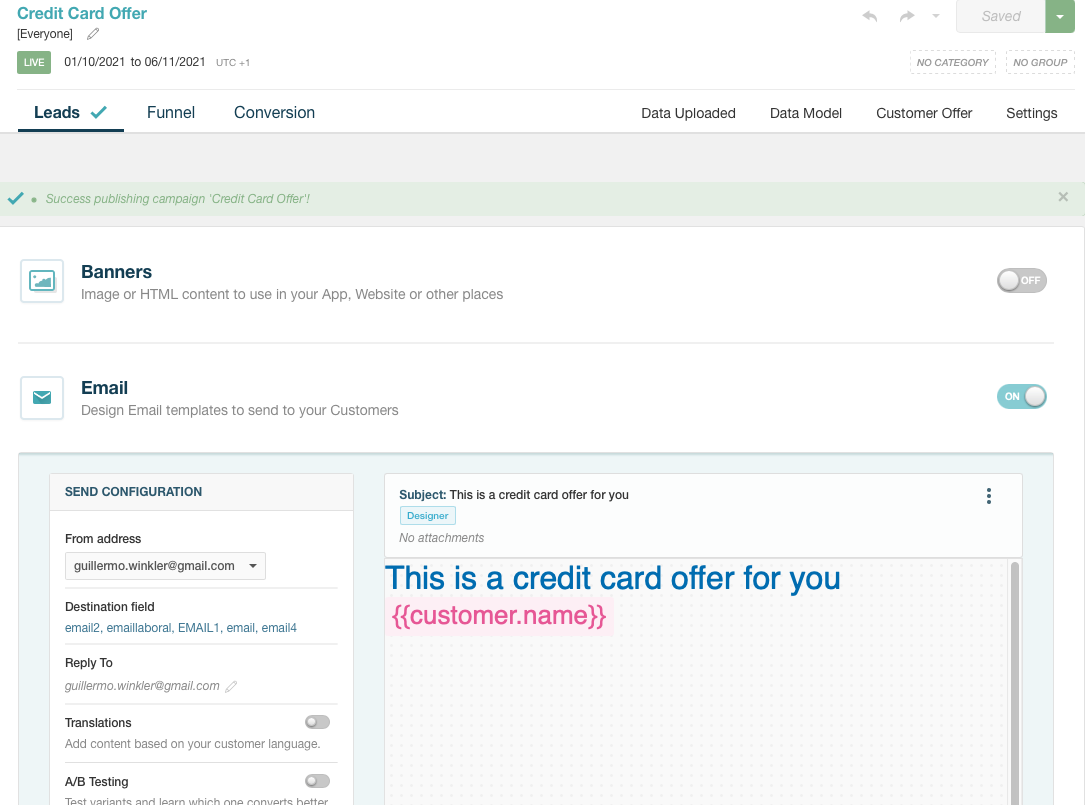
For this tutorial, we will offer the new member a credit card and a loan 3 and 5 days after opening the account, respectively. To accomplish that goal, we need two new campaigns that use the Everyone segment. After adding a valid date range and creating a simple email design, we will publish the campaign:
Setting up the Campaign Flow
In the campaign flow you defined previously, use the right-hand panel Delay and Cross Campaign Email actions to create a flow:
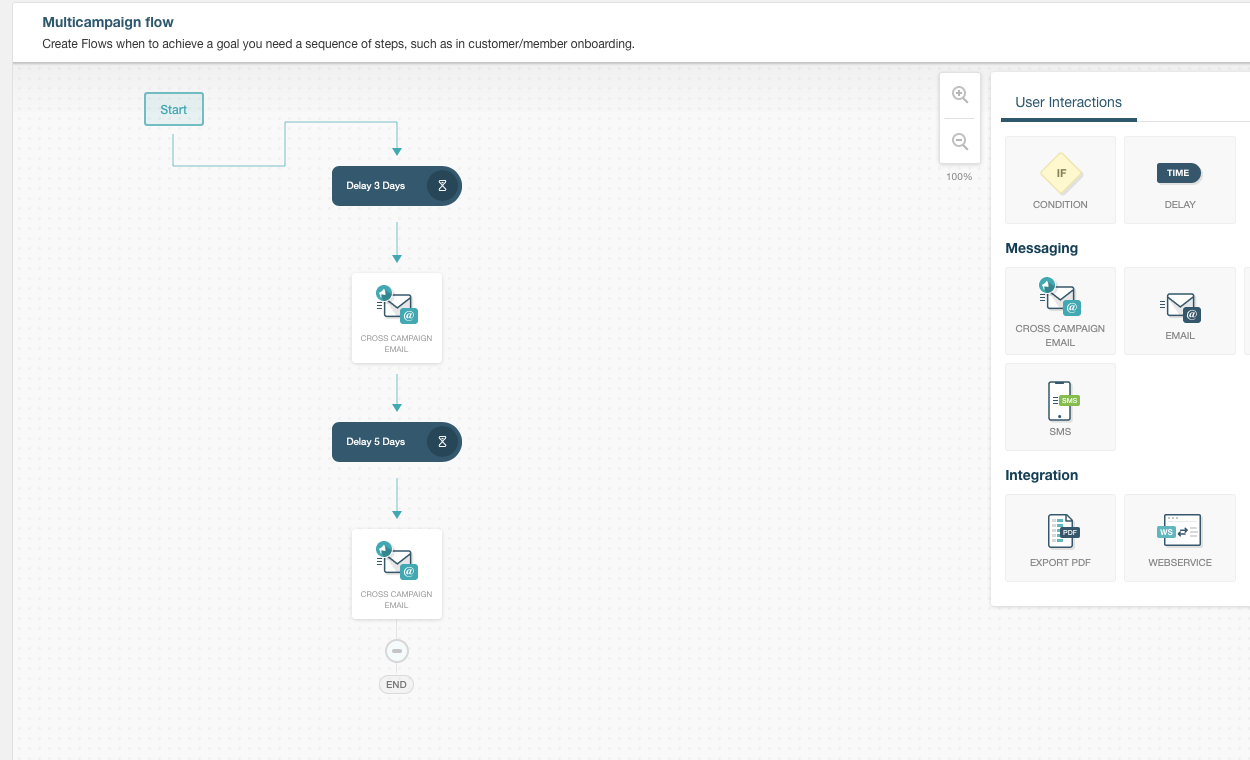
As you see, the following applies:
- The first action after the process starts is a 3-day delay.
- The next action is a cross-campaign email, which means we will be sending an email from another campaign (the credit card offer).
- After that, we wait again (now 5 days)
- Finally, we send another cross-campaign email (the loan offer).
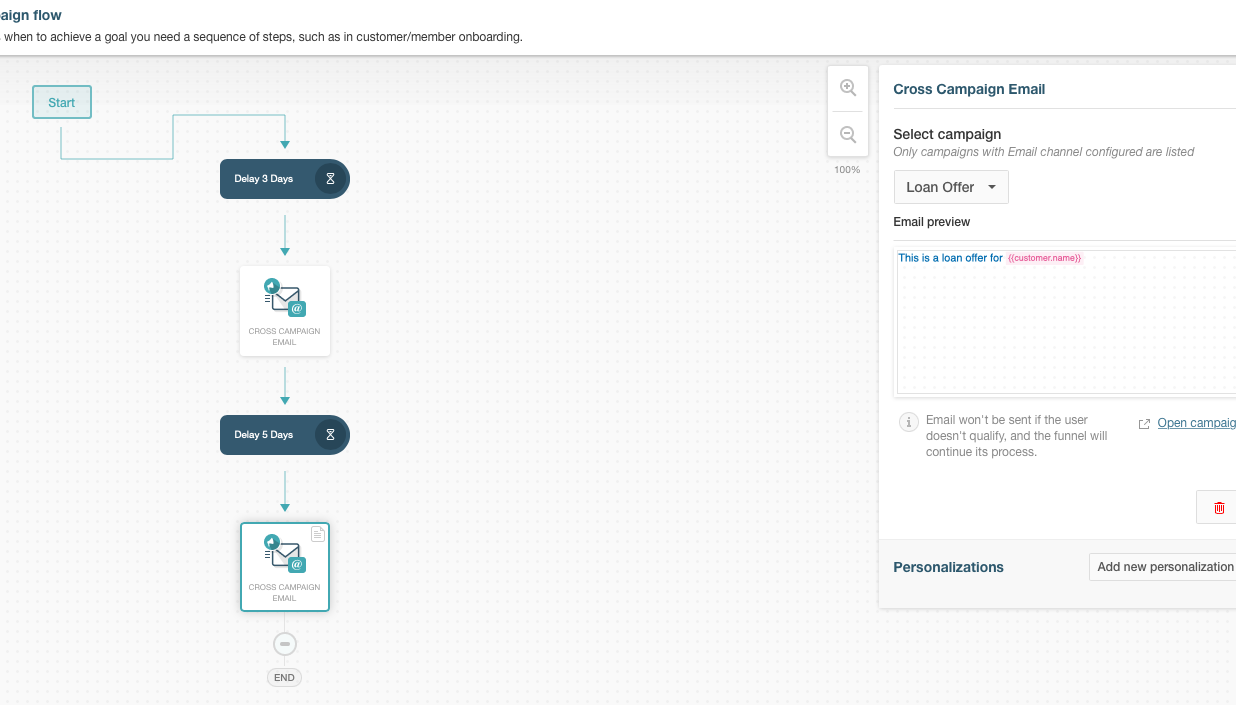
For each cross-campaign action, we see the proper campaign in place:
Publishing and Testing
After completing the above steps, it is time to save the flow, publish the campaign, and wait for the emails. If you want to improve the testing speed, you can remove the delays or change them to shorter time frames.
Related Articles
On this page