Integrating Prisma Campaigns and Atomic Financial
Primary financial relationships are usually defined by where customers receive their direct deposit, pay most of their recurring bills, and withdraw cash. Direct deposit switching is vital in this process, fostering customer loyalty to the chosen institution. This is particularly important for smaller credit unions, as establishing these primary relationships often depends on direct deposit enrollment. Prisma Campaigns’ integration with Atomic Financial provides a seamless Direct Deposit Switch (DDS) solution that simplifies the process by eliminating paper forms and directly connecting to payroll.
Preparing Your Atomic Financial Account
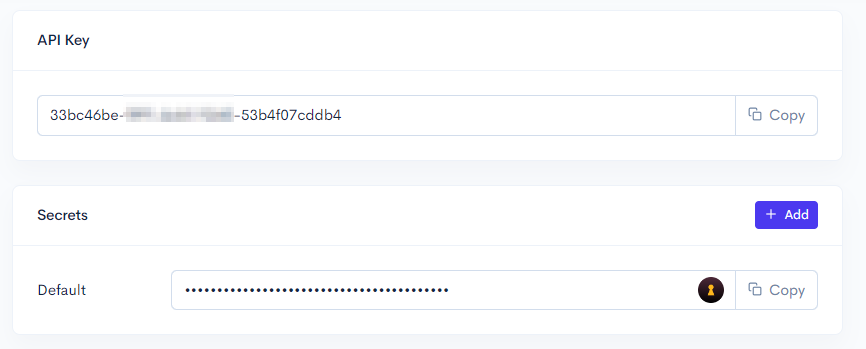
If you haven’t already, sign up for an account at Atomic Financial and log in. Once you are logged in, you will need to generate an API key and secret to connect your Atomic Financial account to Prisma Campaigns. To do this, navigate to the Settings/Credentials in the Atomic Financial console to generate both credentials. Copy and keep them handy for the next steps.
Configuring the Integration in Prisma Campaigns
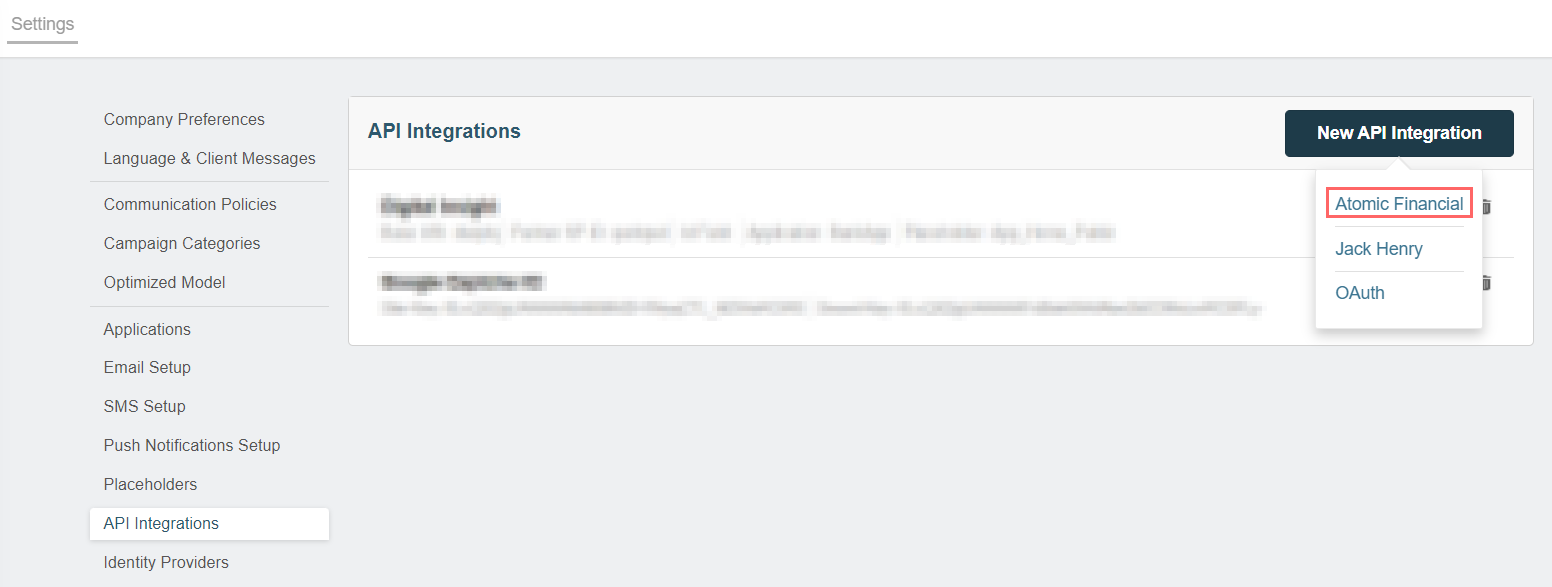
In Prisma Campaigns, go to Settings/API Integrations. Click on New API Integration in the top right corner and select Atomic Financial:
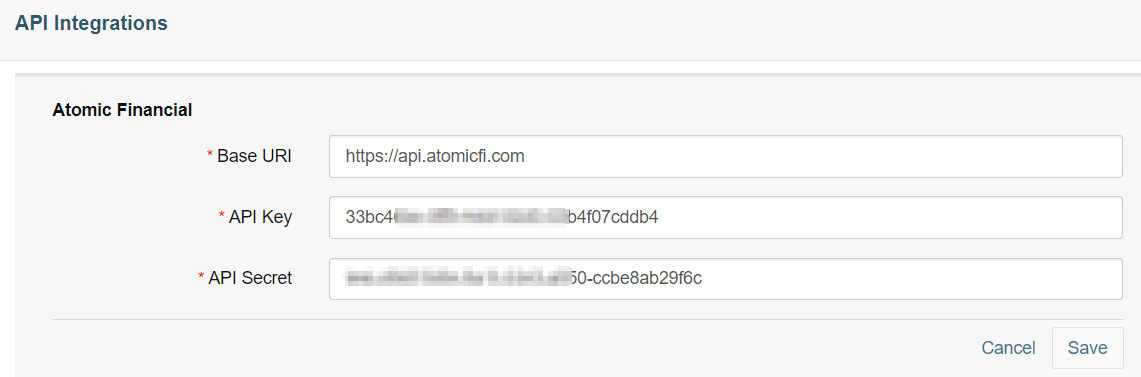
Enter https://api.atomicfi.com as the base URI, paste the API key and secret you generated in the previous step, and hit the Save button:
Next, verify that Atomic Financial appears in the list of API integrations:

Using the Atomic Financial Integration in a Campaign
Create a new campaign or open an existing one in Prisma Campaigns. The images below show an existing campaign that we will use to illustrate how to integrate Atomic Financial.
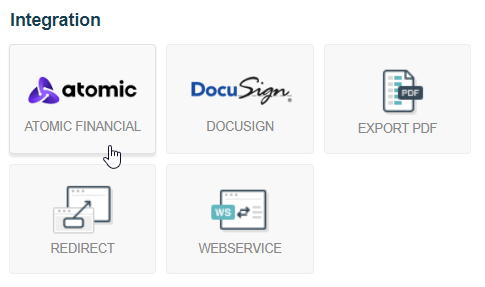
In the campaign funnel, drag and drop the Atomic Financial action:
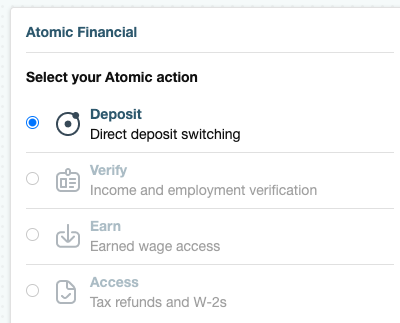
After adding the action, you will see its configuration section on the right. Here you can choose the action you want to perform. In this case, we will select Deposit for direct deposit switching:
While setting up the funnel action, associate it with user or campaign model fields (preferably the latter to avoid cluttering the user model with unnecessary data). The required fields are the account number, type, and ABA routing number. These values represent the account to which the direct deposit will be switched.
Configuring a Single Account per Customer
If a given customer has only one account at their credit union or bank, you can use text fields with cardinality one to store the account number, type, and ABA routing number separately. The allowed values for the account type are savings, checking, or paycard.

Addressing Multiple Accounts for Deposit Redirection
When an individual has multiple accounts at their credit union or bank, Prisma Campaigns offers two approaches to handle direct deposit switching:
-
Form selection in Prisma. Create a form in Prisma where the individual selects their preferred account, and the selected field is configured in Atomic Financial.
-
Upload all accounts to a multi-valued field. If you choose this route, the user will select their account directly in Atomic’s UI, eliminating the need for a form in Prisma.
When you opt for the second option, you will need to mark the field’s cardinality as many and format the data as account|type|description, such as 137-W|checking|Business. In this case, the type is sent as a fixed value and not as a reference to another field. You can use this sample file or the records below to test the integration:
user_id,account-data
137-W,12345678|savings|Shared
137-W,87654321|checking|Business
137-W,01010101|savings|Personal
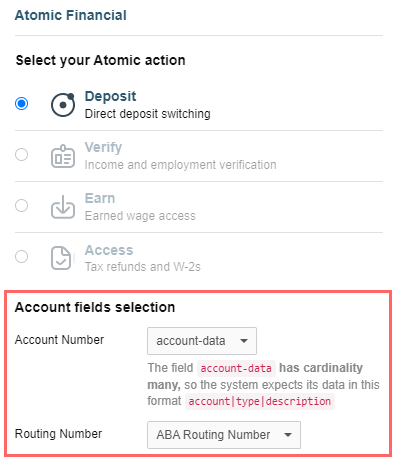
As shown above, the account number selection provides a reminder about the proper format for the account data.
Testing and Launching Your Campaign
To test the campaign, you can use the Funnel Preview button in the top right corner of the funnel creator. This will allow you to simulate the campaign flow and verify that the Atomic Financial action is working as expected.
To begin, choose a sample customer and hit the Run Preview button:

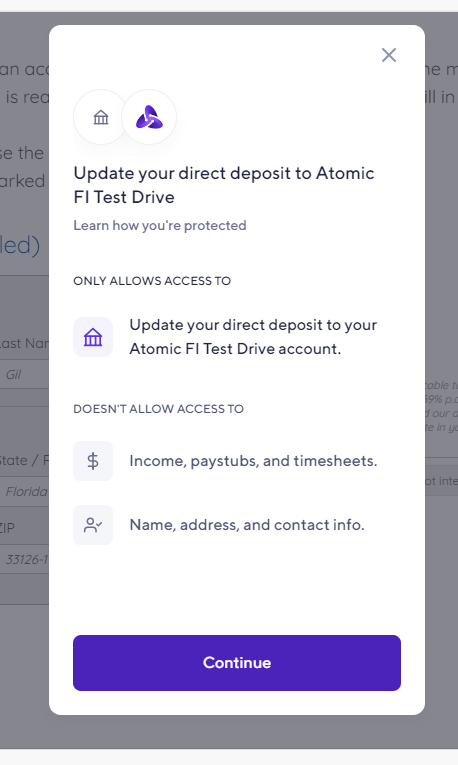
After the funnel starts, you will see the Atomic Financial action being executed using the integration you configured earlier. As you can see, the only access consists of updating the customer’s direct deposit information. Hit the Continue button to proceed with the funnel:
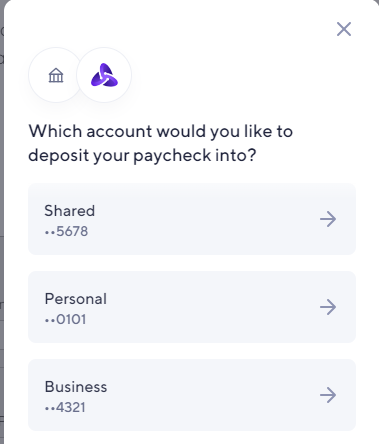
If the customer has multiple accounts, the first screen will prompt them to select the account they want to switch the direct deposit to:
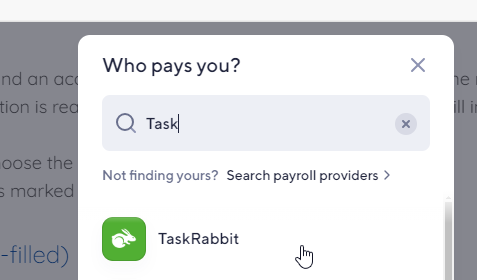
Otherwise, you can skip that step and select or search for an employer or payroll provider from the list (TaskRabbit in the example below) and click Continue:
During the testing stage, use the test credentials provided in the Atomic Financial official documentation. These are as follows:
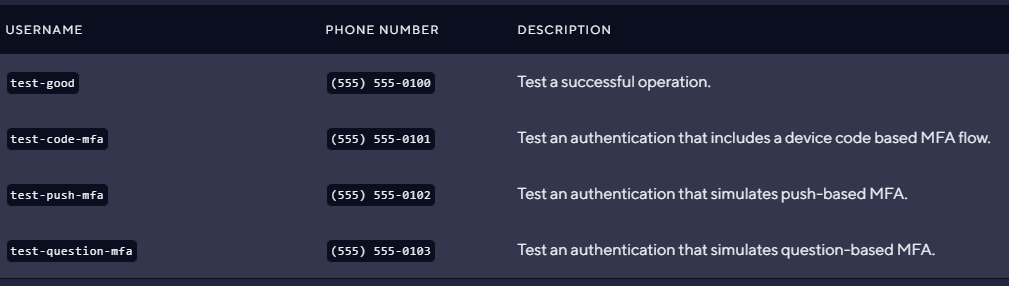
If the authentication requires an email, simply append @example.com to the end of the chosen username. It is important to note that any password will work for the test credentials. When the campaign is live, the customers will instead use their credentials for the provider in question.
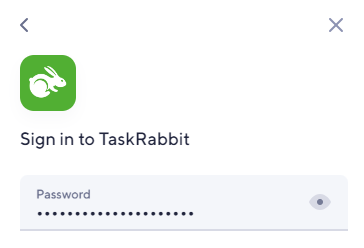
Enter the test username and click Continue:

Choose a random password and do the same:
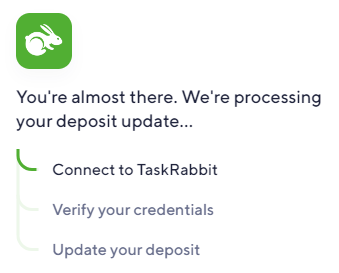
Wait until Atomic Financial connects to the payroll provider and retrieves the direct deposit information:
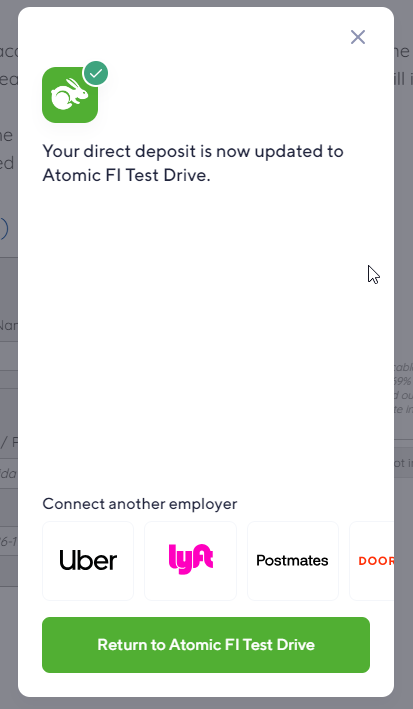
When the process is complete, you will see a confirmation message that the direct deposit information has been successfully updated to be handled by the Atomic Financial integration. Clicking the button at the bottom will take you back to the funnel preview.
Once you are ready to launch the campaign in production, do not forget to publish the changes.
On this page