Performing A/B Testing in a Campaign
A/B testing consists of comparing two versions (or more) of an element to empirically evaluate which one obtains better key indicators (more conversions, sales, visits, etc.) over time. To achieve this objective, a base design is defined along with one or more variants with which you aim to obtain better results.
Before You Start
It is important to keep in mind that when performing A/B testing, certain guidelines must be followed in order to obtain valid results. Otherwise, any conclusions drawn from the experiment may be incorrect.
Recommendations:
-
Small changes. For a measurement to be effective, it is necessary to make variants with controlled changes. In cases where the design changes completely, it is difficult to determine what is the final reason that influences the key performance indicator (it can be the text, the button, the color, or the image, to name a few examples).
-
Test by work areas. In order to make controlled and measurable changes, we recommend you to work by areas or themes as the following examples illustrate:
- Call to action: change button color, size, location, etc.
- Backgrounds, colors, and images: change the background image, colors, or background design.
- Texts: modify titles, text, long/brief, language, value proposition, etc.
- Layout/Style: update the organization of the information or aesthetic details of the design.
- Forms: form usability (long vs. short, type of fields, etc.).
-
Data volume. Engage as many people as possible over time to get more results to evaluate.
Some things you want to avoid:
-
Making multiple changes. If you want to evaluate improvements in the Call to Action, do not make changes in the image and design at the same time.
-
Comparing variants in different time periods. Because the audience may show different behavior in a two-week period, do not show one variant the first and the other the next. This can happen, for example, when it is the beginning of the month and customers usually do not buy on those days.
-
Hasty conclusions. It is important to have a significant volume of data to obtain a statistically valid result. Thus, if you repeat the test you will have a reasonable certainty that you will get the same result. To evaluate this point, we recommend that you perform an online calculation using a simulator.
Setting Up A/B Testing
Prisma Campaigns allows you to perform A/B testing and add multiple variants on several channels within the campaign. Below are instructions on how to set up each of them.
- Banners
- SMS
- Push
Banners
To begin, go to a campaign where you have previously configured the banner channel. Edit the banner and follow these steps to start A/B testing, using the image below as a reference.
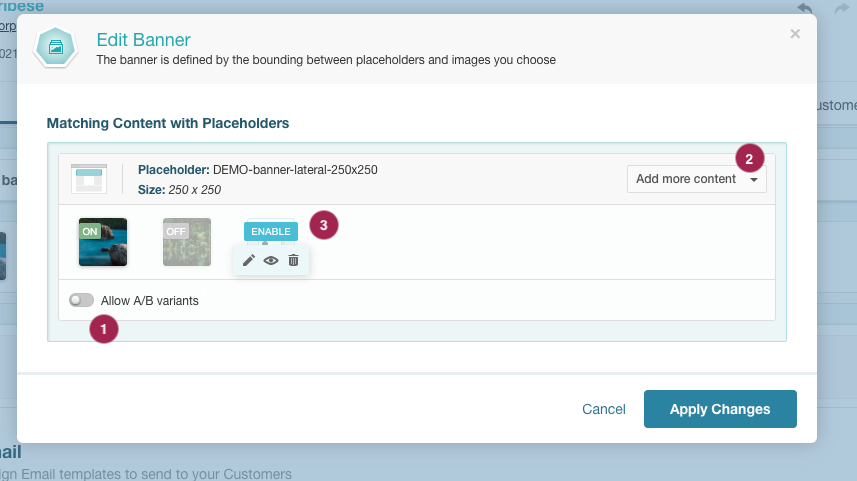
- Ensure that the switch that allows displaying more than one variant for the same placeholder is turned on.
- Expand the list and add more variants (image, HTML, Prisma-AI generated, or chosen from the media library) to the banner. They do not need to be of the same type, since A/B testing can be performed between an image banner and an HTML banner.
- Each of the versions can be activated or deactivated. Once uploaded, you should activate the ones you want to use for A/B testing. To do this, place the cursor over the desired image and click the button to activate it. The image will show the ON/OFF label according to its status.
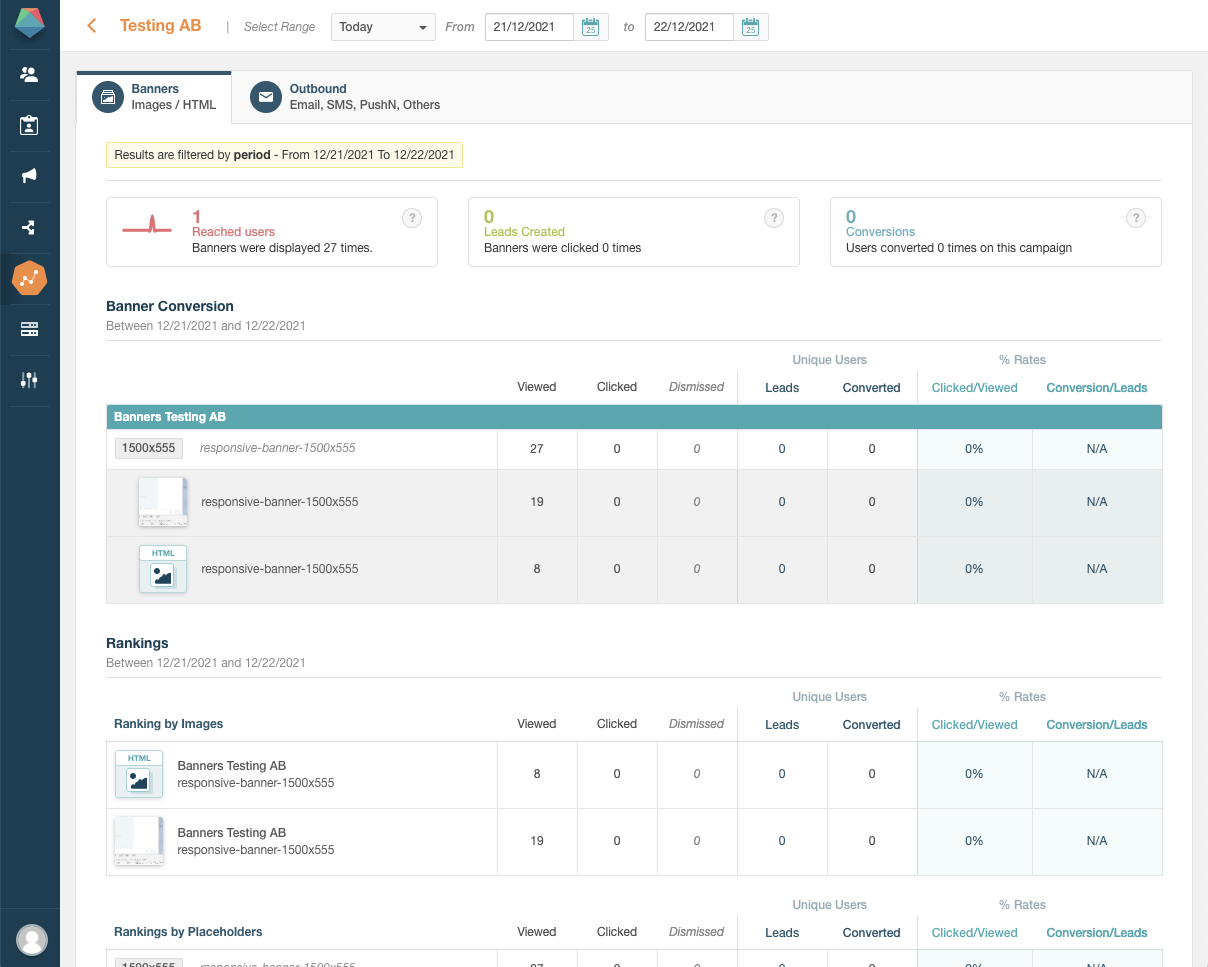
Once you have entered the variant to the banner and published the campaign, you can navigate to the Analysis menu of the campaign to see the variants that were viewed. You will also be able to see how each one has been interacted with, as shown in the image below.
If you do not have a campaign with banners, refer to Adding Banners in a Campaign.
If you want to perform A/B testing on the email channel, enter a campaign where it is active and use the image below as a reference to continue.
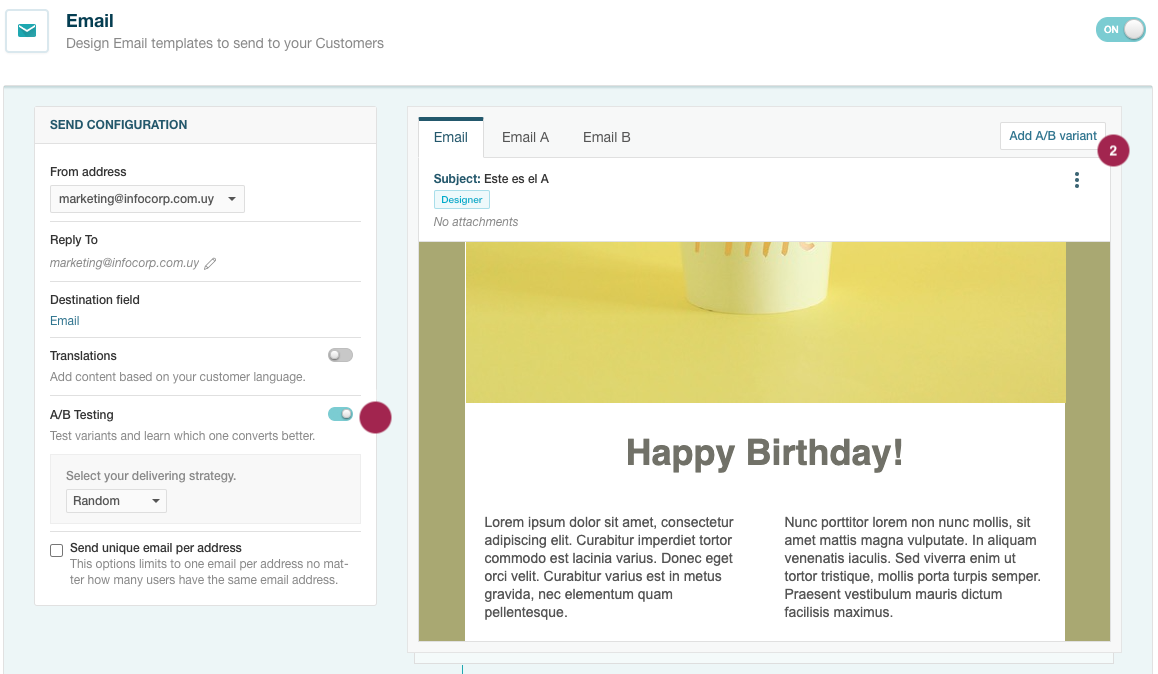
- Turn on the switch to enable A/B Testing.
- Once enabled, press the Add A/B variant button to add new variants.
- The new variants will appear in new tabs where you will be able to view and edit the content of each one.
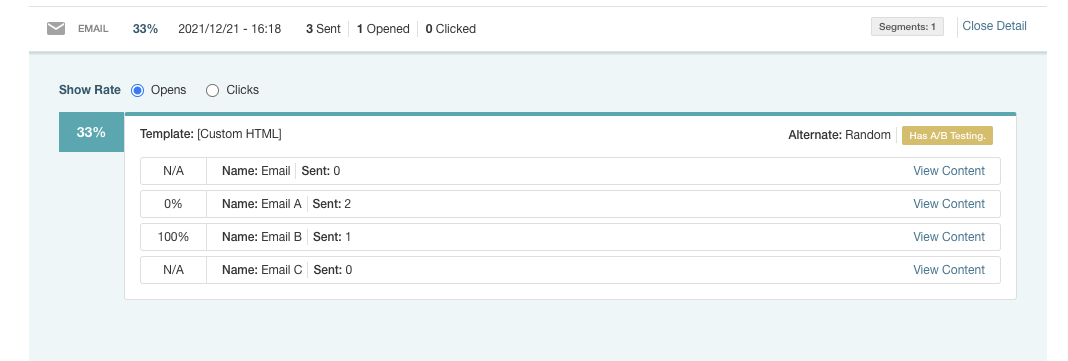
Once you have added the variant to the email channel and published the campaign, you will need to schedule a blast in the Orchestration menu. After the message has been viewed by your customers, you will be able to start viewing in the Outbound section of the Analysis menu the emails that were delivered and their results.
If you do not have a campaign with emails, please refer to Adding Email Content
SMS / Push Notifications
For the SMS and Push Notifications channels, the procedure to activate A/B testing and its variants is very similar to the previous ones. In this case, we will use SMS as a reference, following the steps outlined in the image.
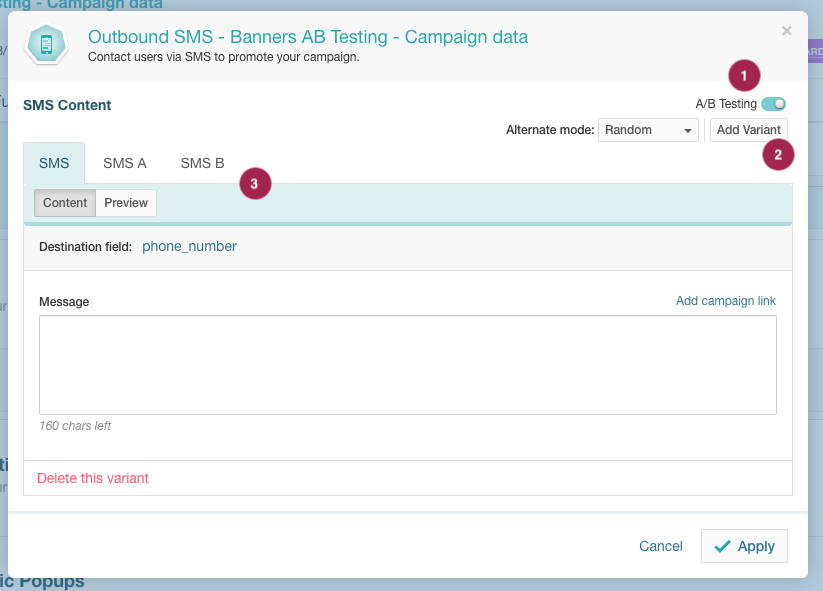
- Turn on the switch to enable A/B Testing.
- Once enabled, press the Add A/B variant button to add new variants.
- The new variants will appear in new tabs where you will be able to view and edit the content of each one.
If you do not have a campaign with SMS or push notifications, please refer to Adding SMS Content or Adding Push Notifications based on the case.
Using Key Metrics to Determine A/B Testing Winners
For outbound channels (Email, SMS and Push Notifications), Prisma Campaigns allows you to automatically measure the winning variant based on different metrics. Once the variant with the best performance is determined, the system will automatically send the rest using that winning version.
To perform A/B testing, select the A/B Testing button when scheduling a blast. In the image below, you can see an example for the New Mortgages Offers campaign and the Email channel.
The system will send the communication to the percentage of customers specified in Sample size and compare the performance of each variant based on the metric selected through Winning measure (click rate, conversion, or open rate). Then, it will send the one that performs better to the remaining customers as mentioned above.

Through Test duration you can set how long the test will run before the winning version is automatically sent to the remaining customers. In the example, the test duration is set to 3 days, meaning the winning version will be sent automatically after this period.
You can also configure the Starting date to specify when the test should begin, either by selecting a specific date and time or scheduling it to start as soon as possible.
Related Articles
On this page